
By Julie McGuffee
There’s excitement in the air and it’s coming from the other side of the “pond” where a Royal Wedding is top of everyone’s mind. Gossip shows and tabloids are buzzing with news about who’s on the guest list and, what is most important, who will wear what. Watch parties are planned all over the world to celebrate the royal couple and DVR’s and alarm clocks are set – everybody loves a wedding, especially when royalty is involved and it’s time to plan on what to wear to this most auspicious occasion (even if we only get to visit via the telly).
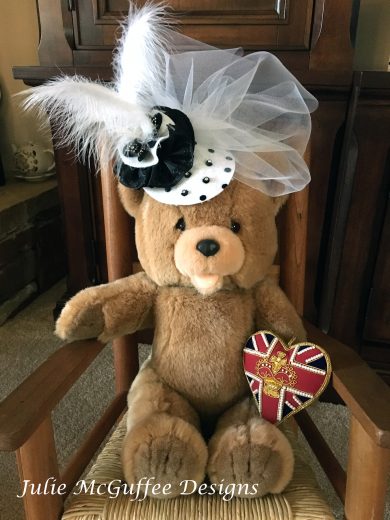
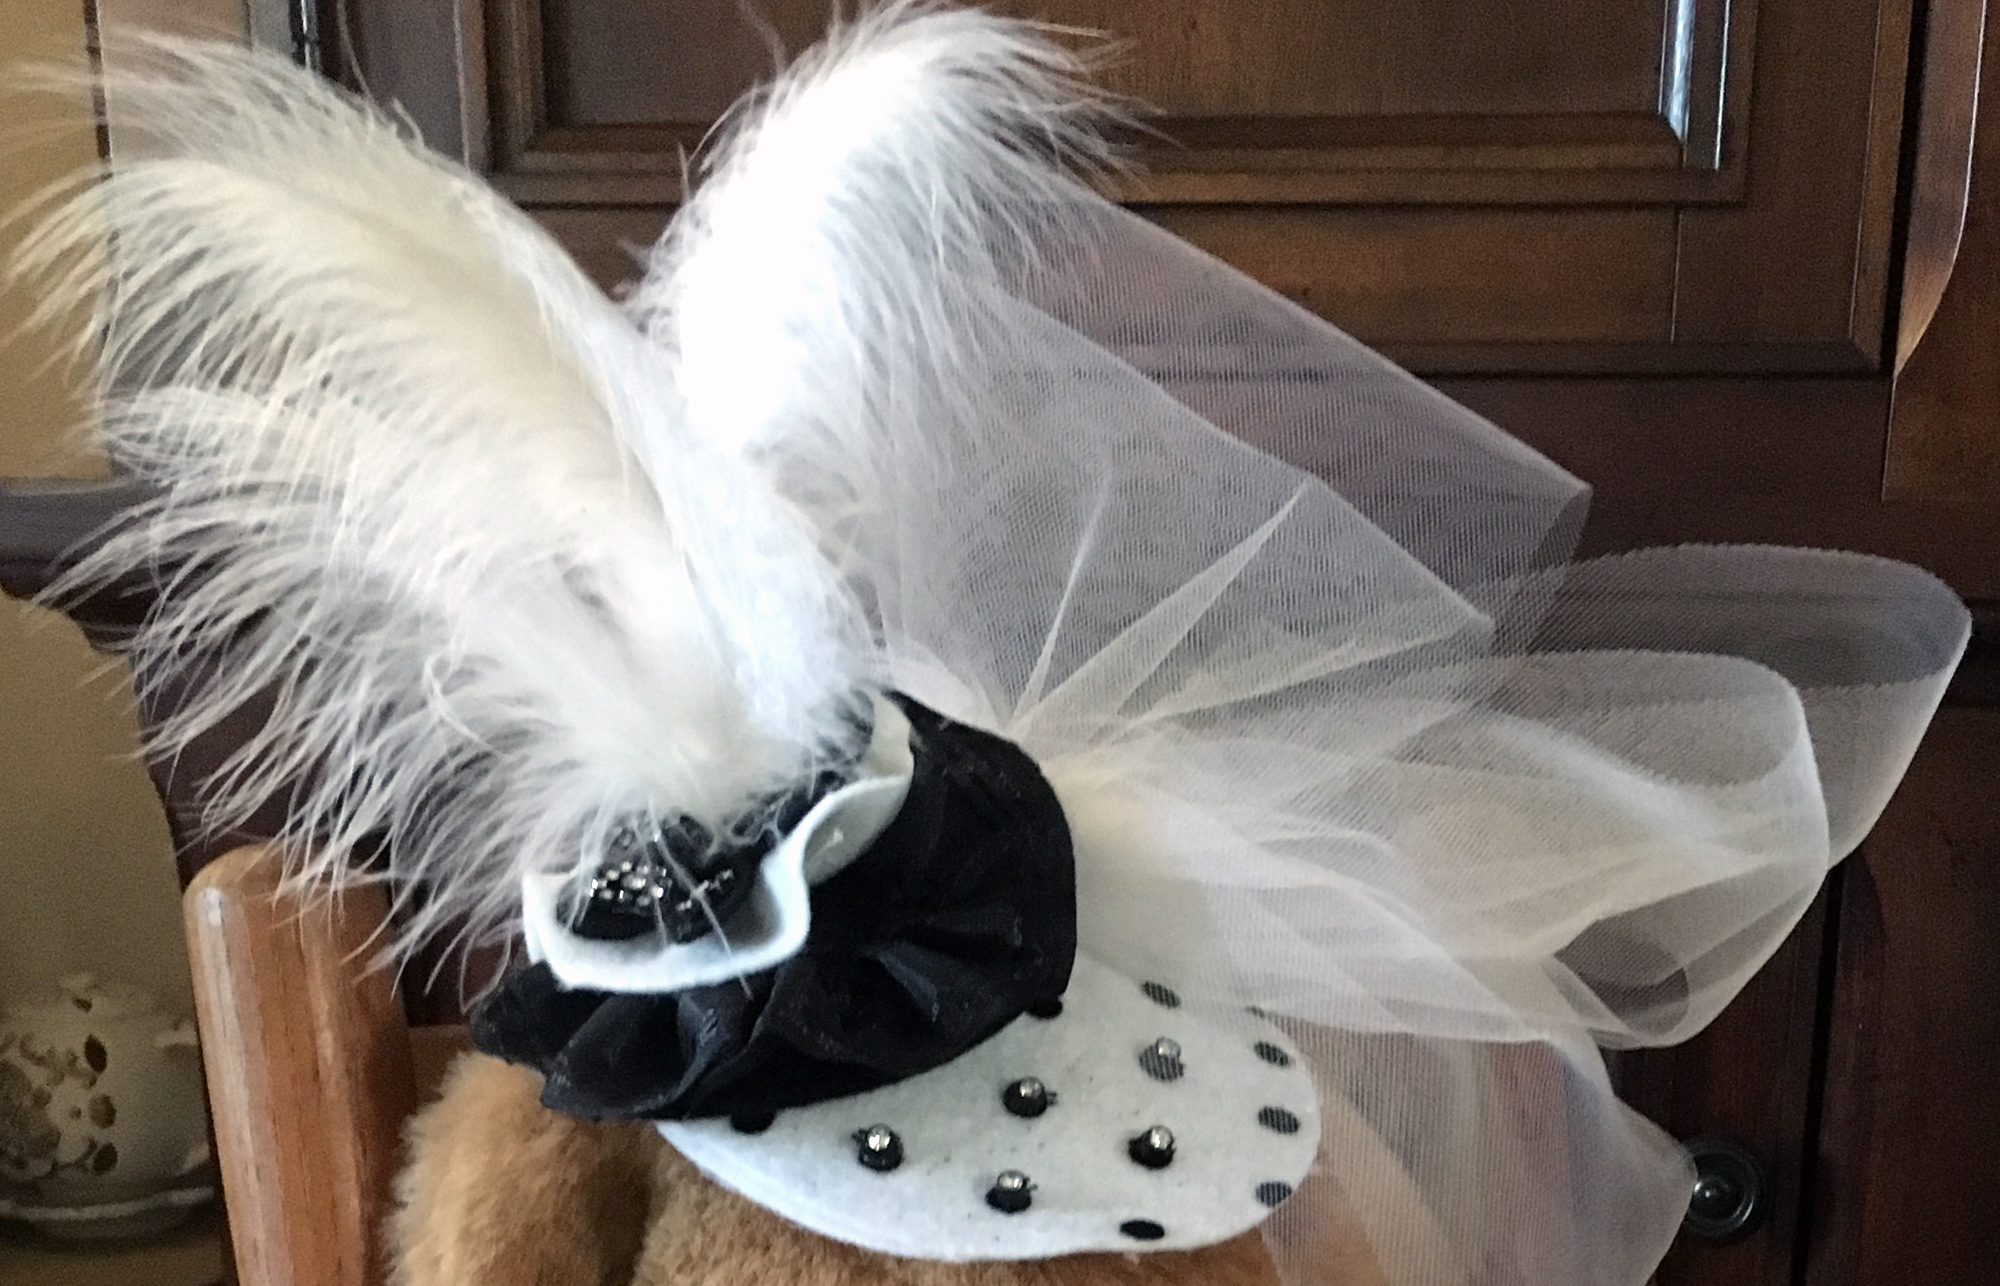
Everyone has a favorite dress, of course, but the most important part of an outfit is the hat. Her Royal Highness, Queen Elizabeth would never be seen outside her castle walls without a hat perched upon the top of her royal, perfectly coiffed head, and no self respecting lady, or gentleman would dream of entering the church without a hat. Enter the “Fascinator”. An odd name to be sure, but one that conjures up images of grandeur, frivolity and all round creative fun. It is definitely one of the “bear” necessities for this and all other special occasions and great fun to make! Teddy is ready!

Skill Level for this project: Beginner
Time to complete: 2 hours
You will need:
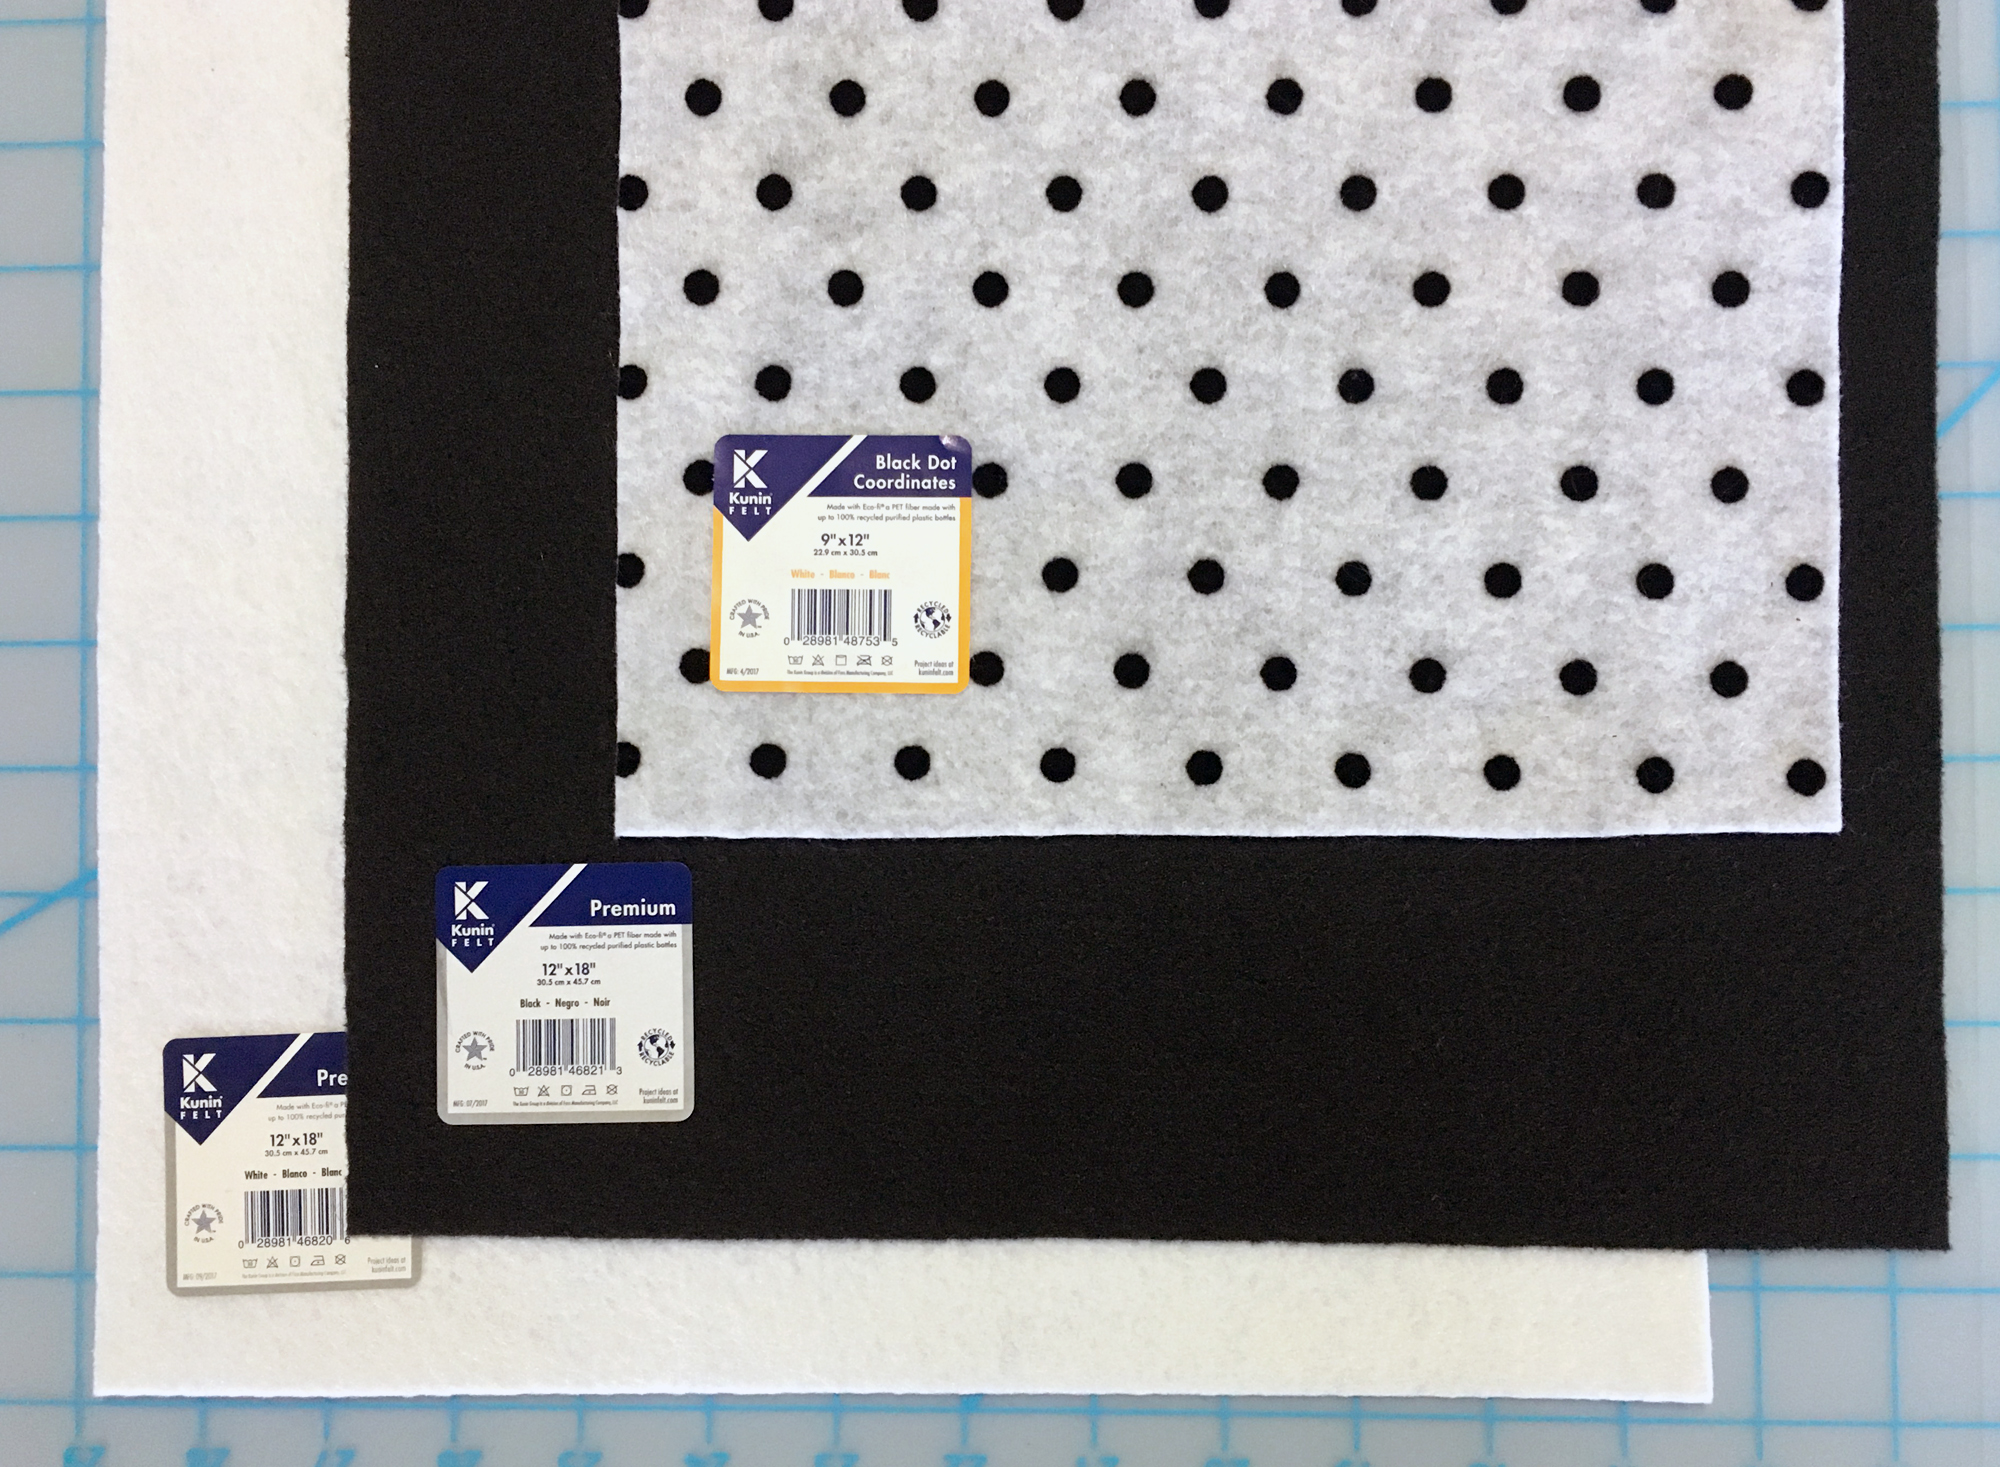
- Kunin® Premium Felt* 12” x 18” – White
- Kunin® Premium Felt 12” x 18” – Black
- Kunin® Black Dot on White Coordinates Felt 9″ x 12”
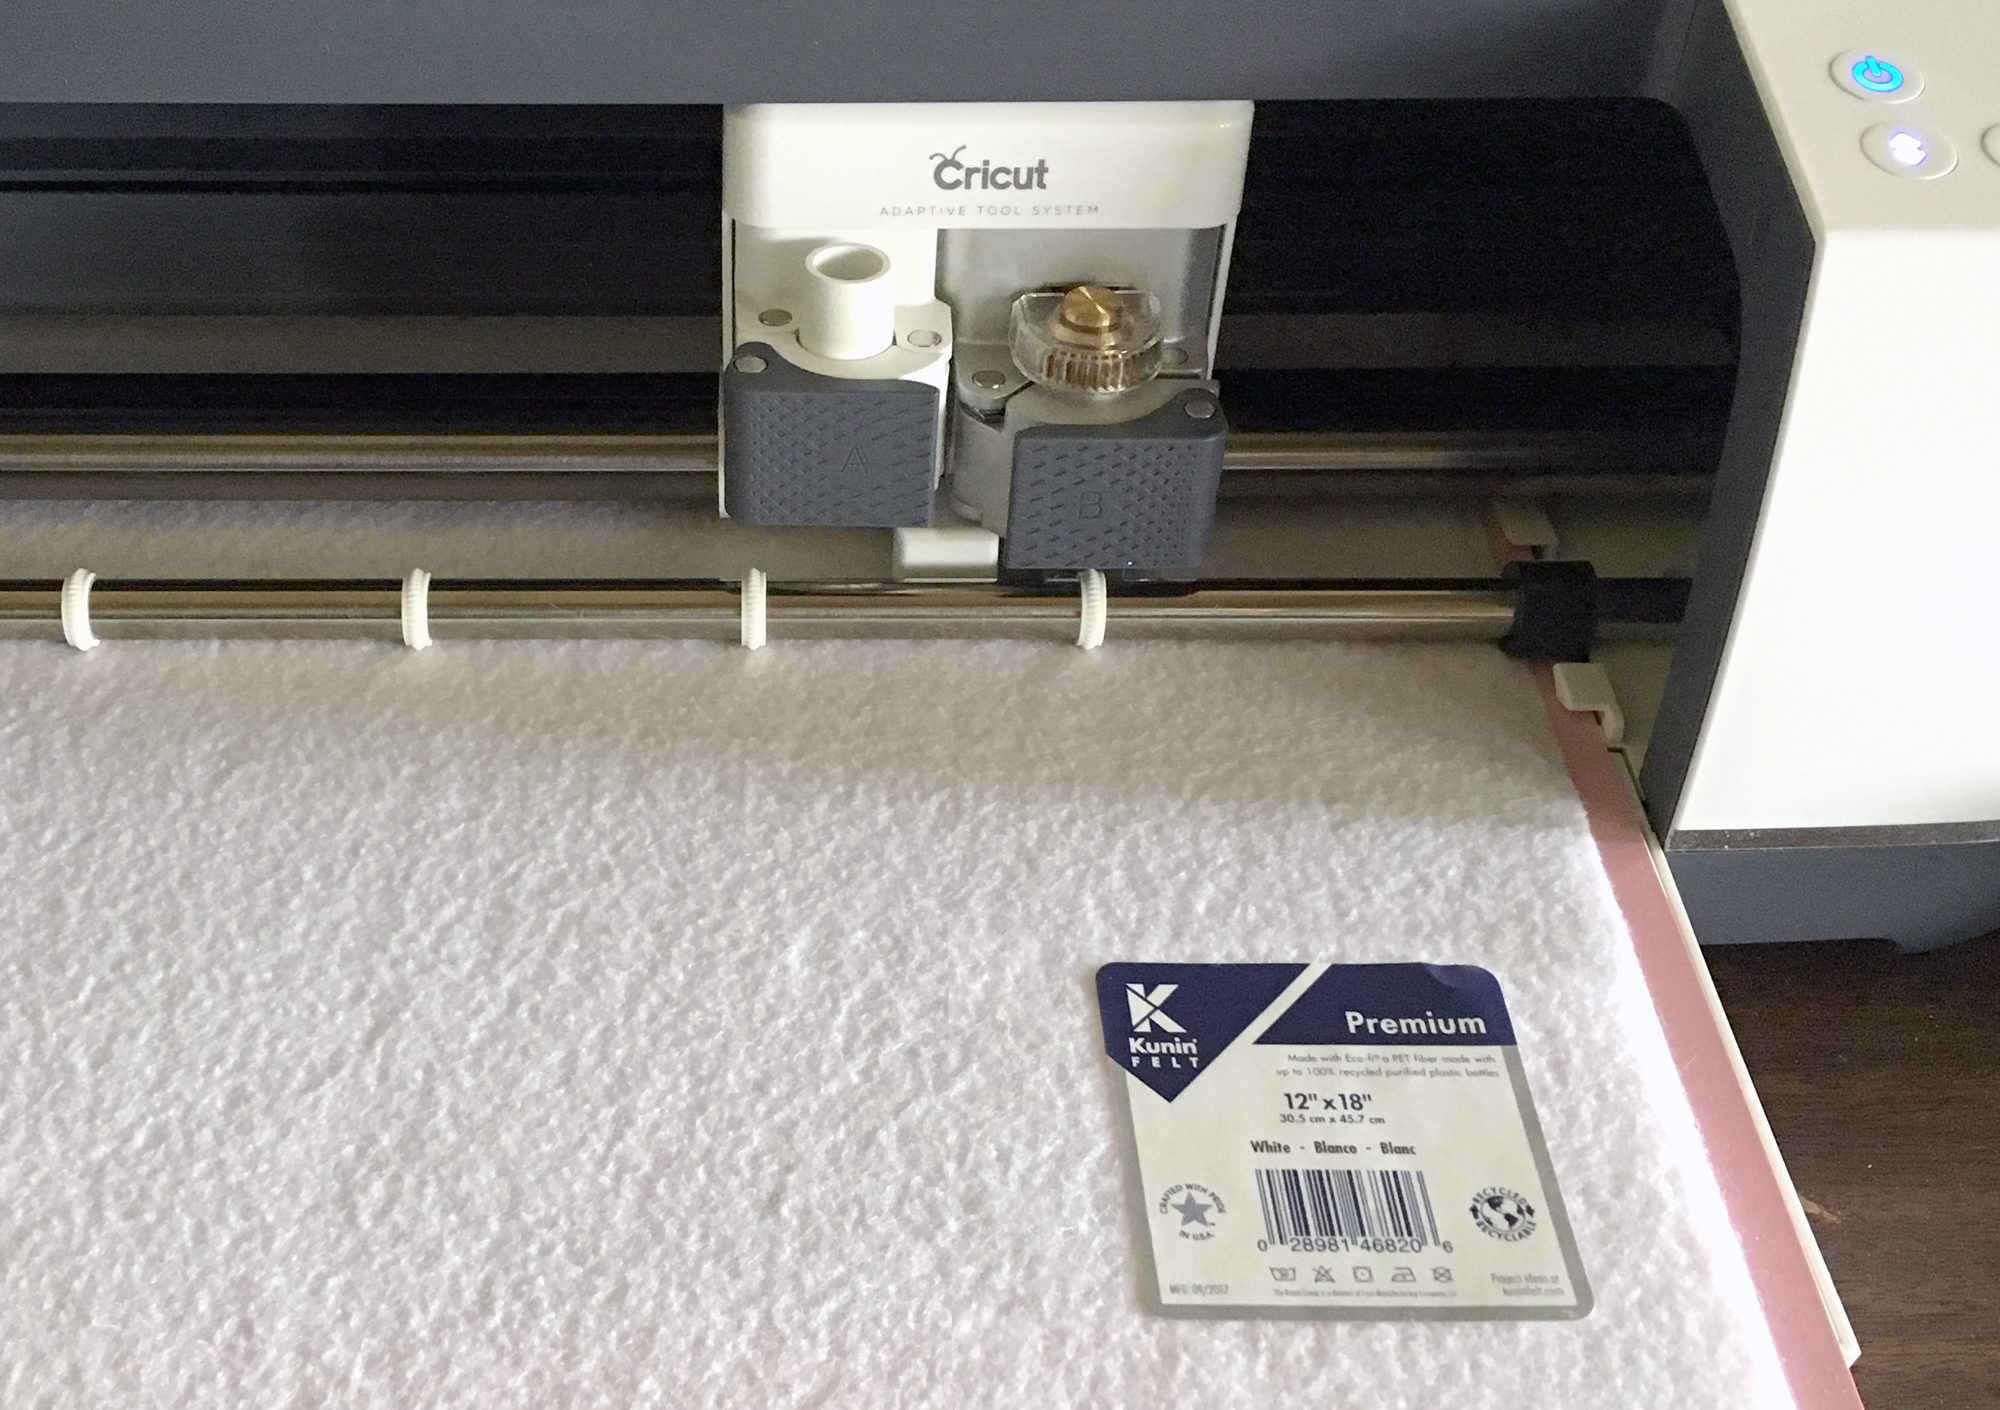
- Cricut® Maker™ with Rotary blade
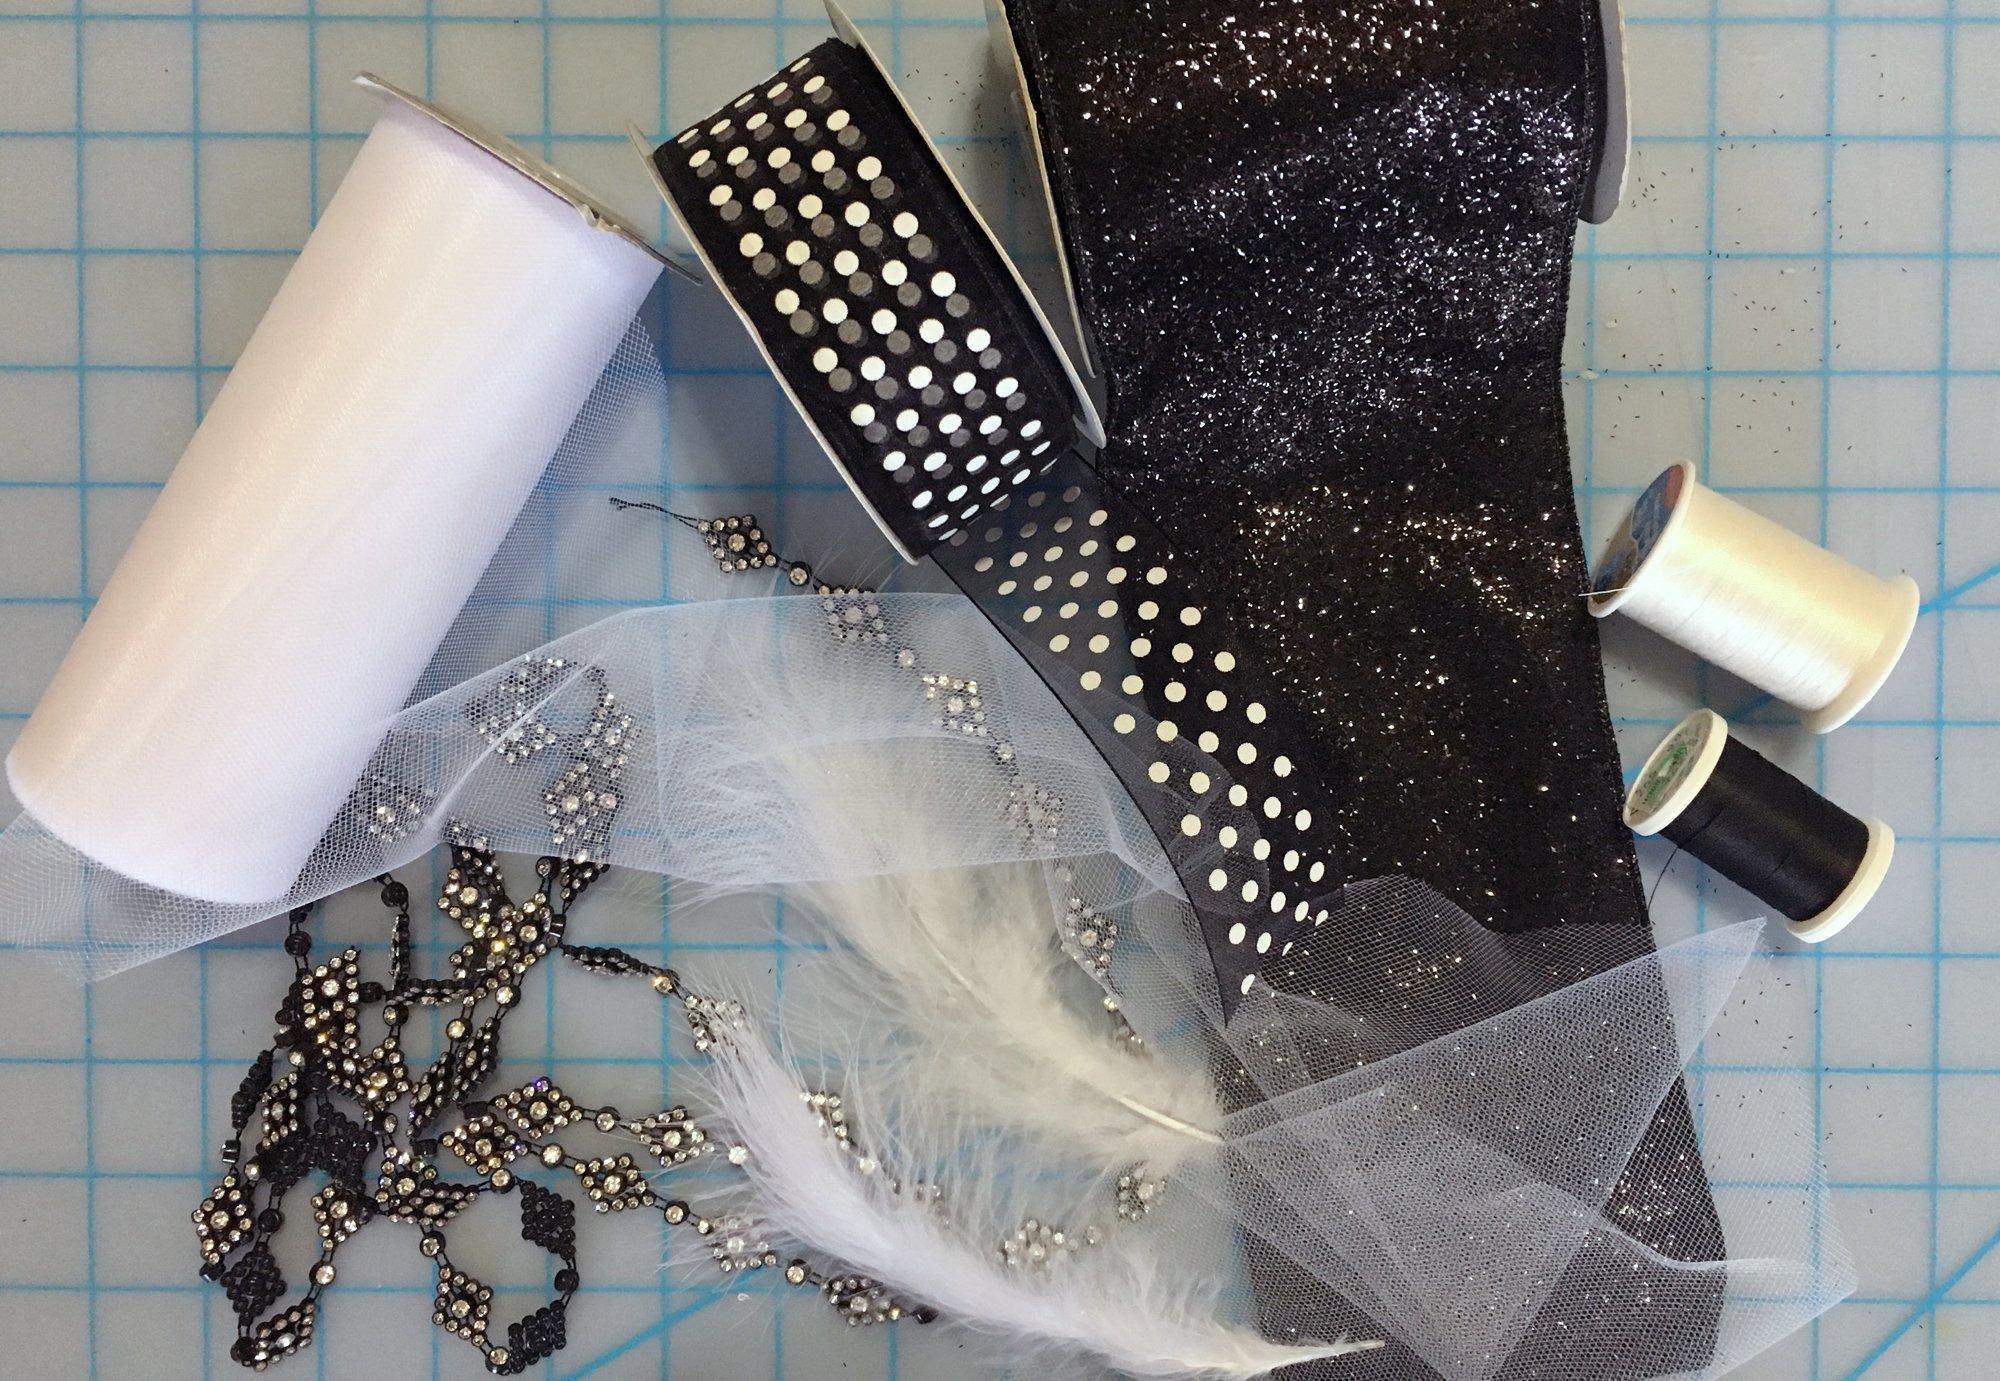
- Wired Ribbon – Black
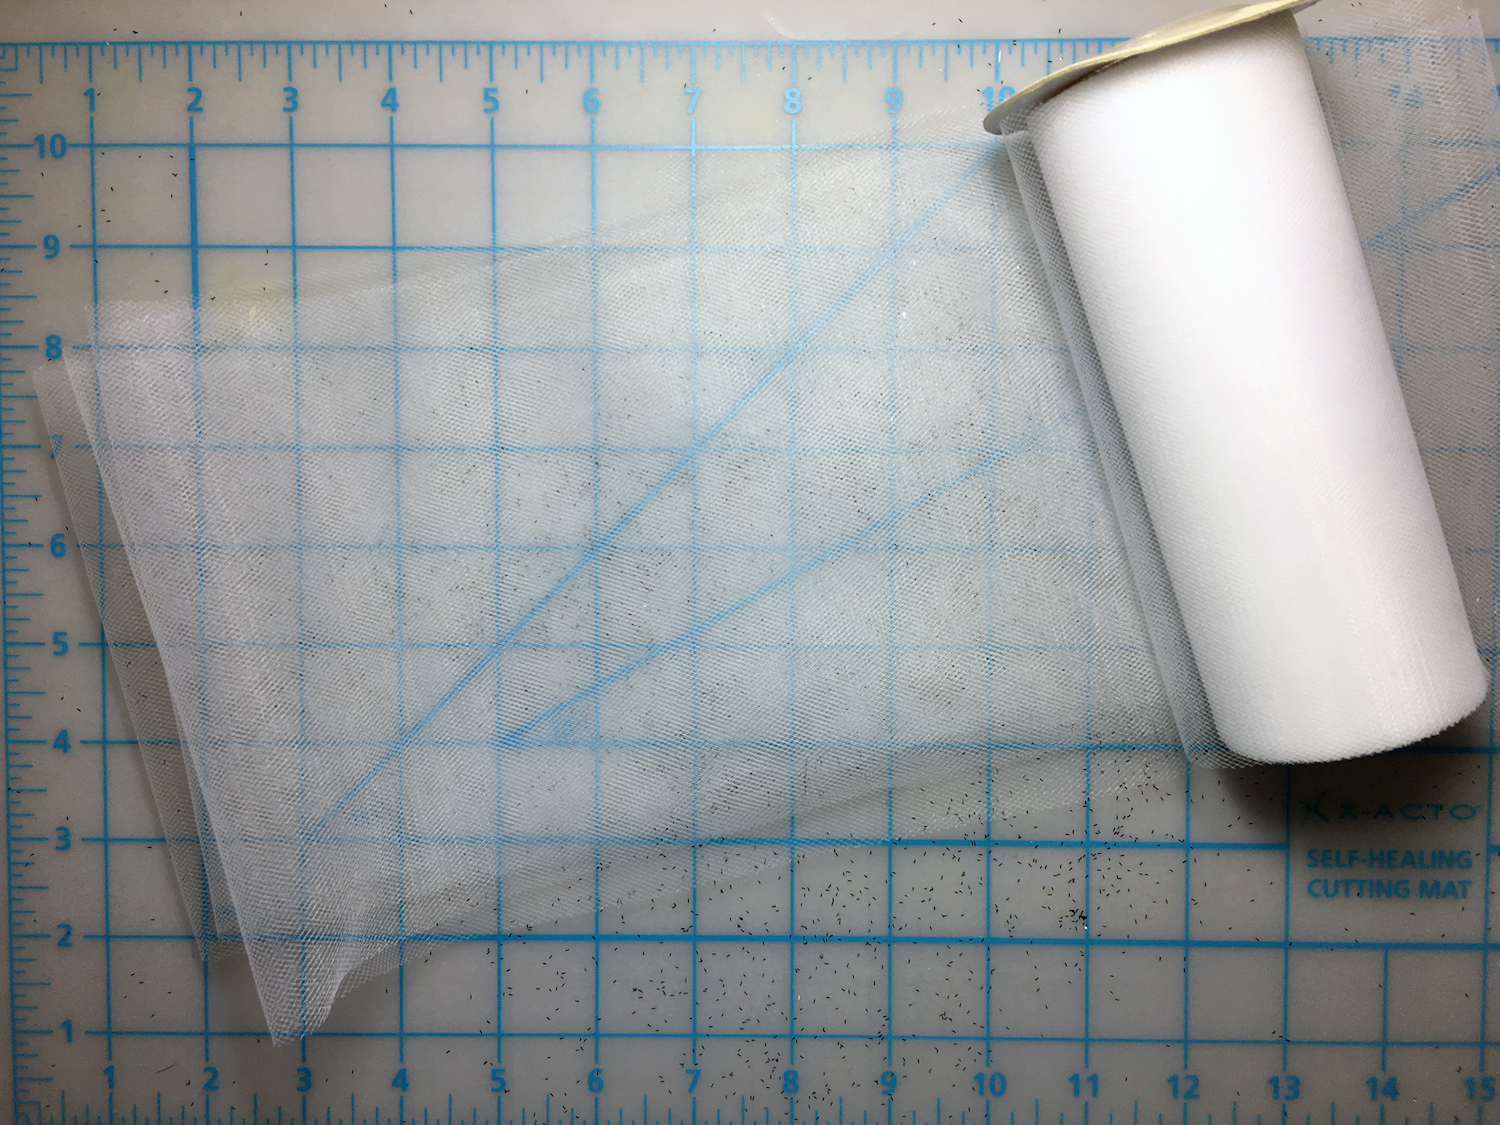
- Variety of Black and White trims and Tulle (Expo International)
- Craft Feathers – White
- 3” Barrette
- Needle and thread
- Glue Gun and lo-temp glue
- Scissors
*Premium felt is also available 9” x 12”
Instructions:
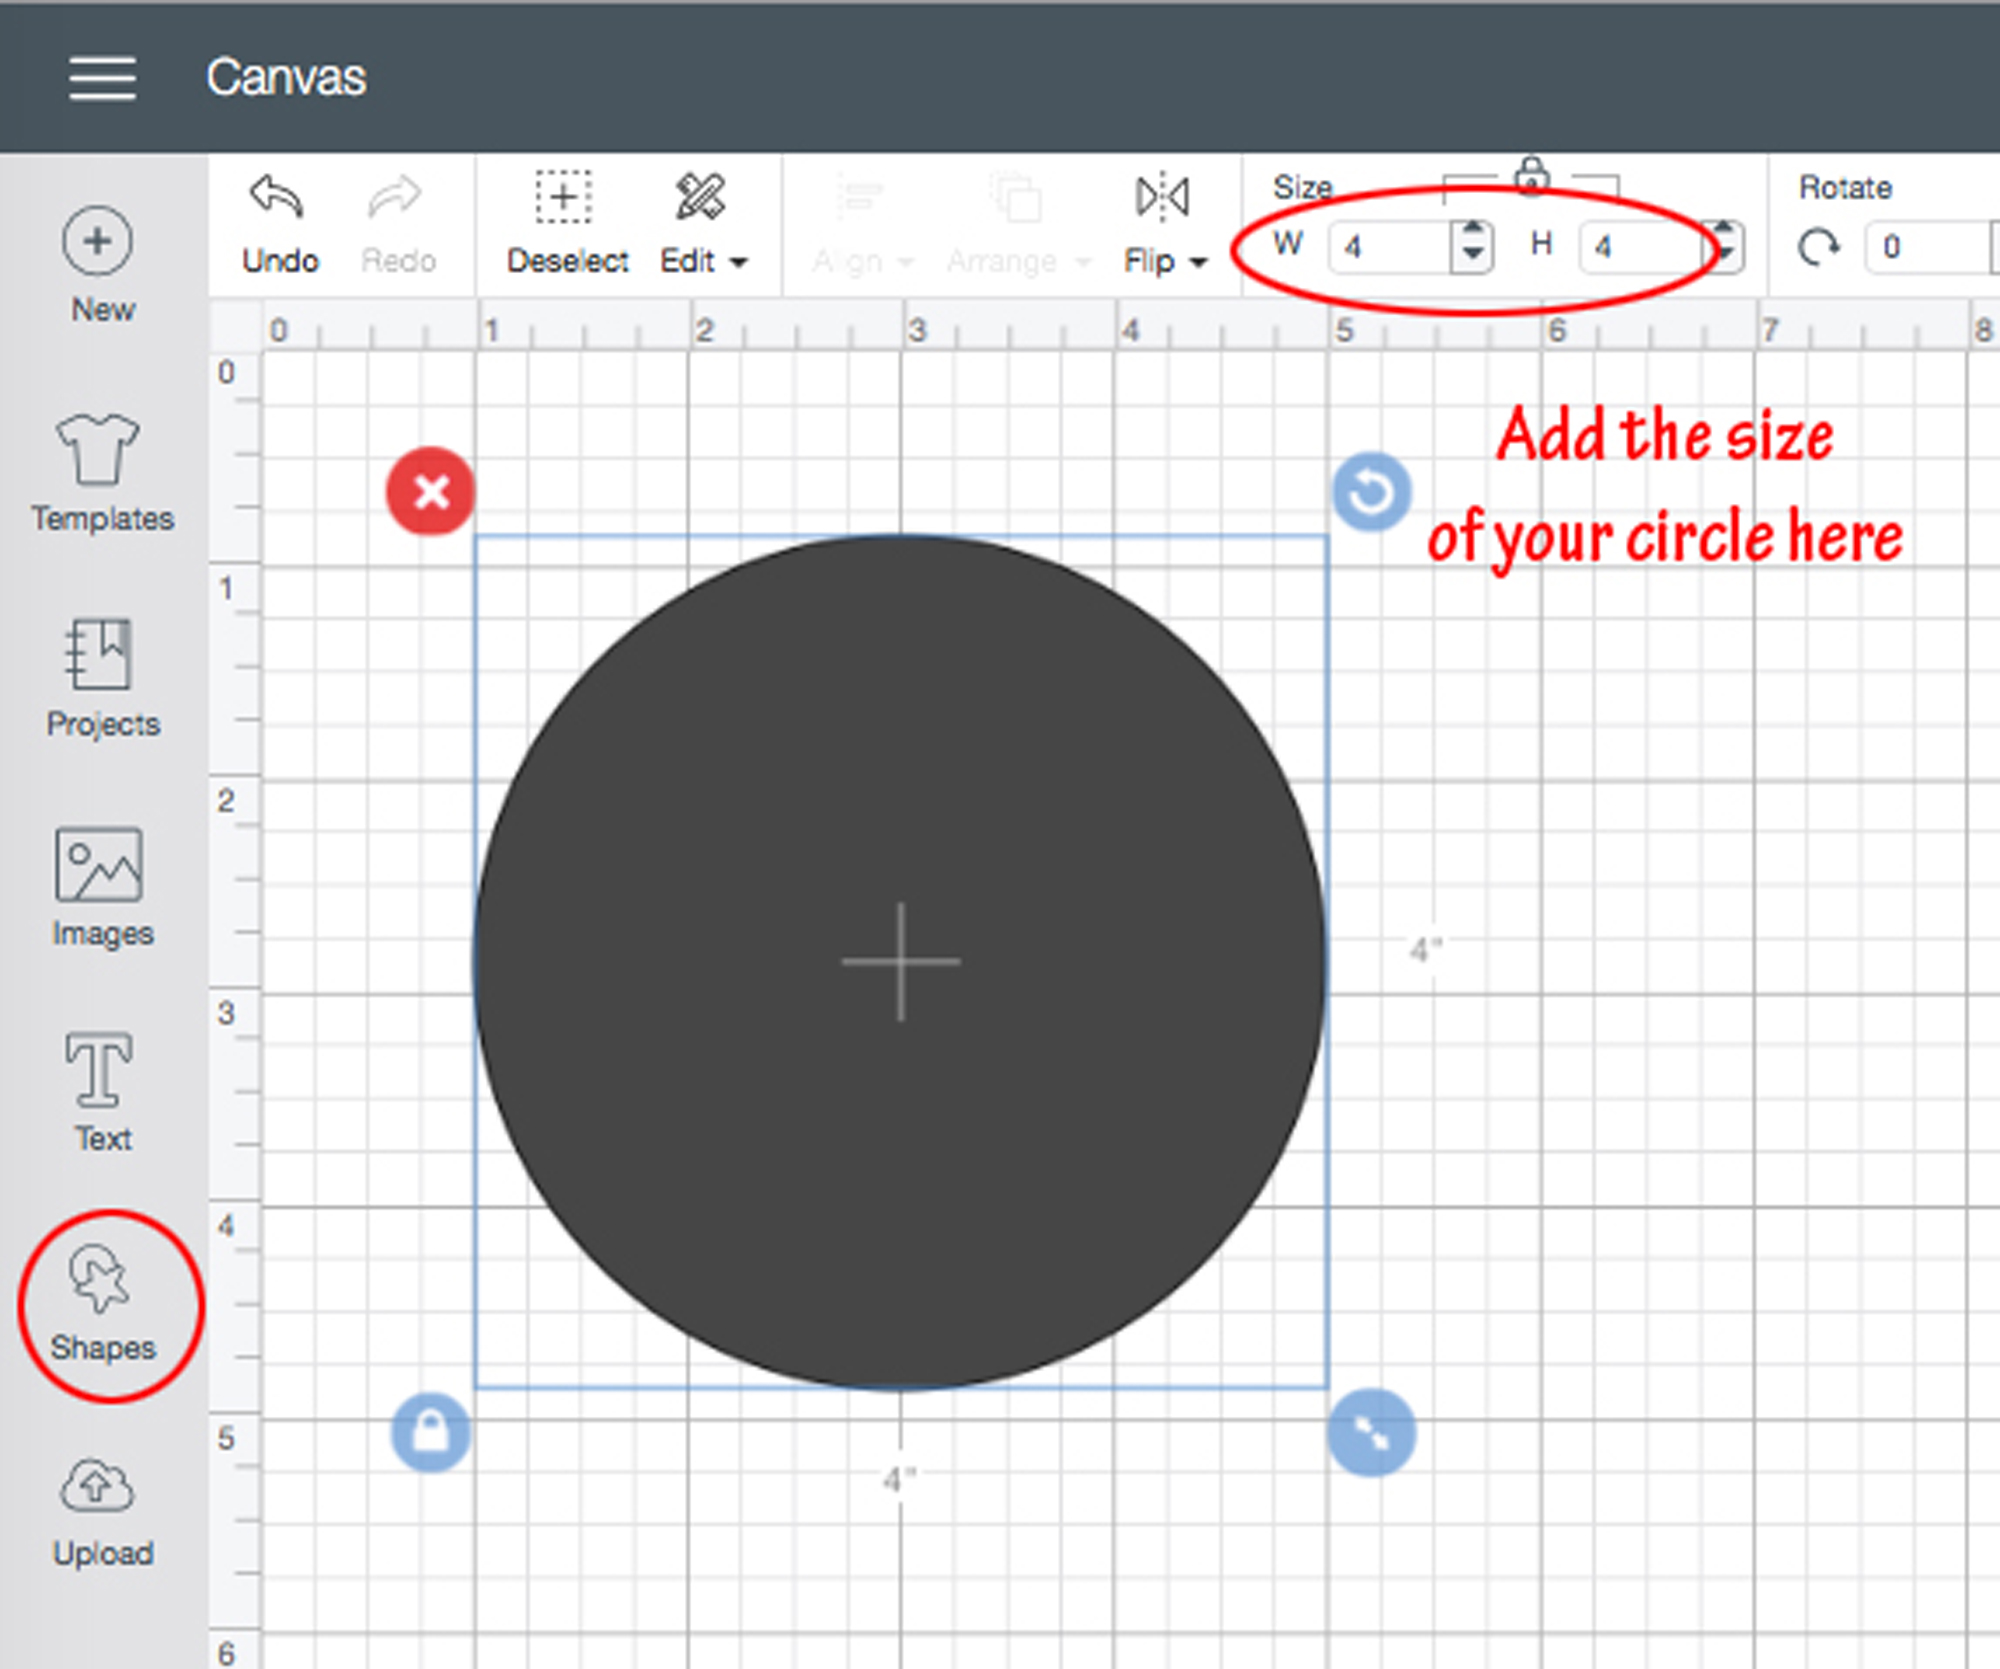
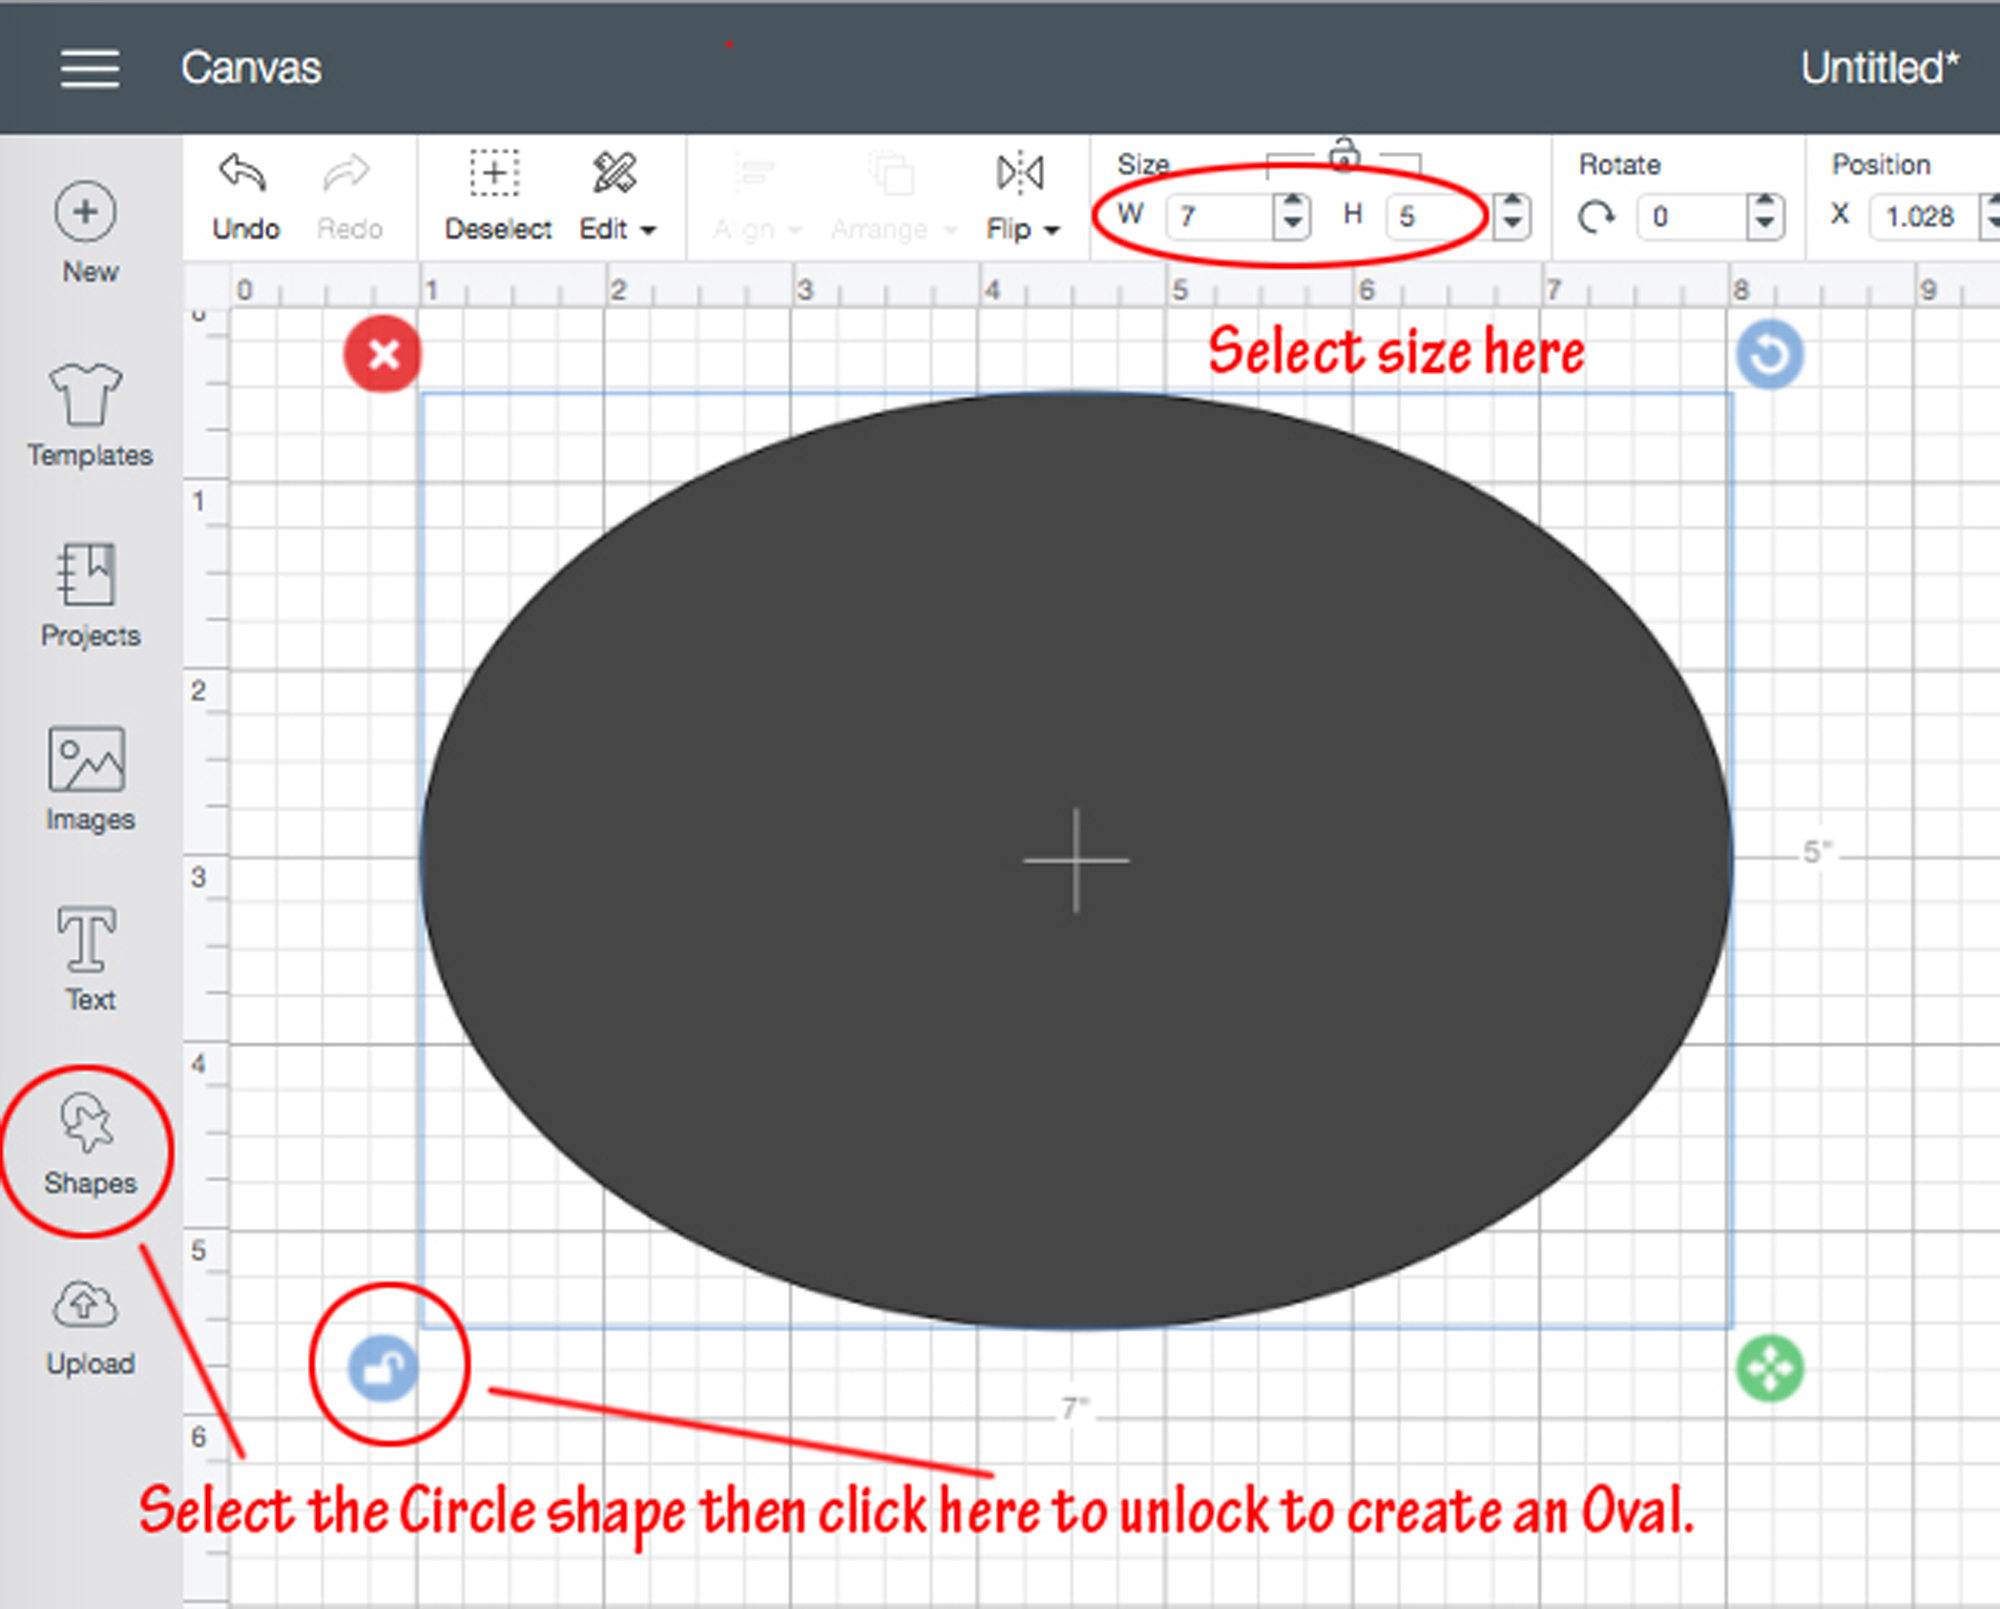
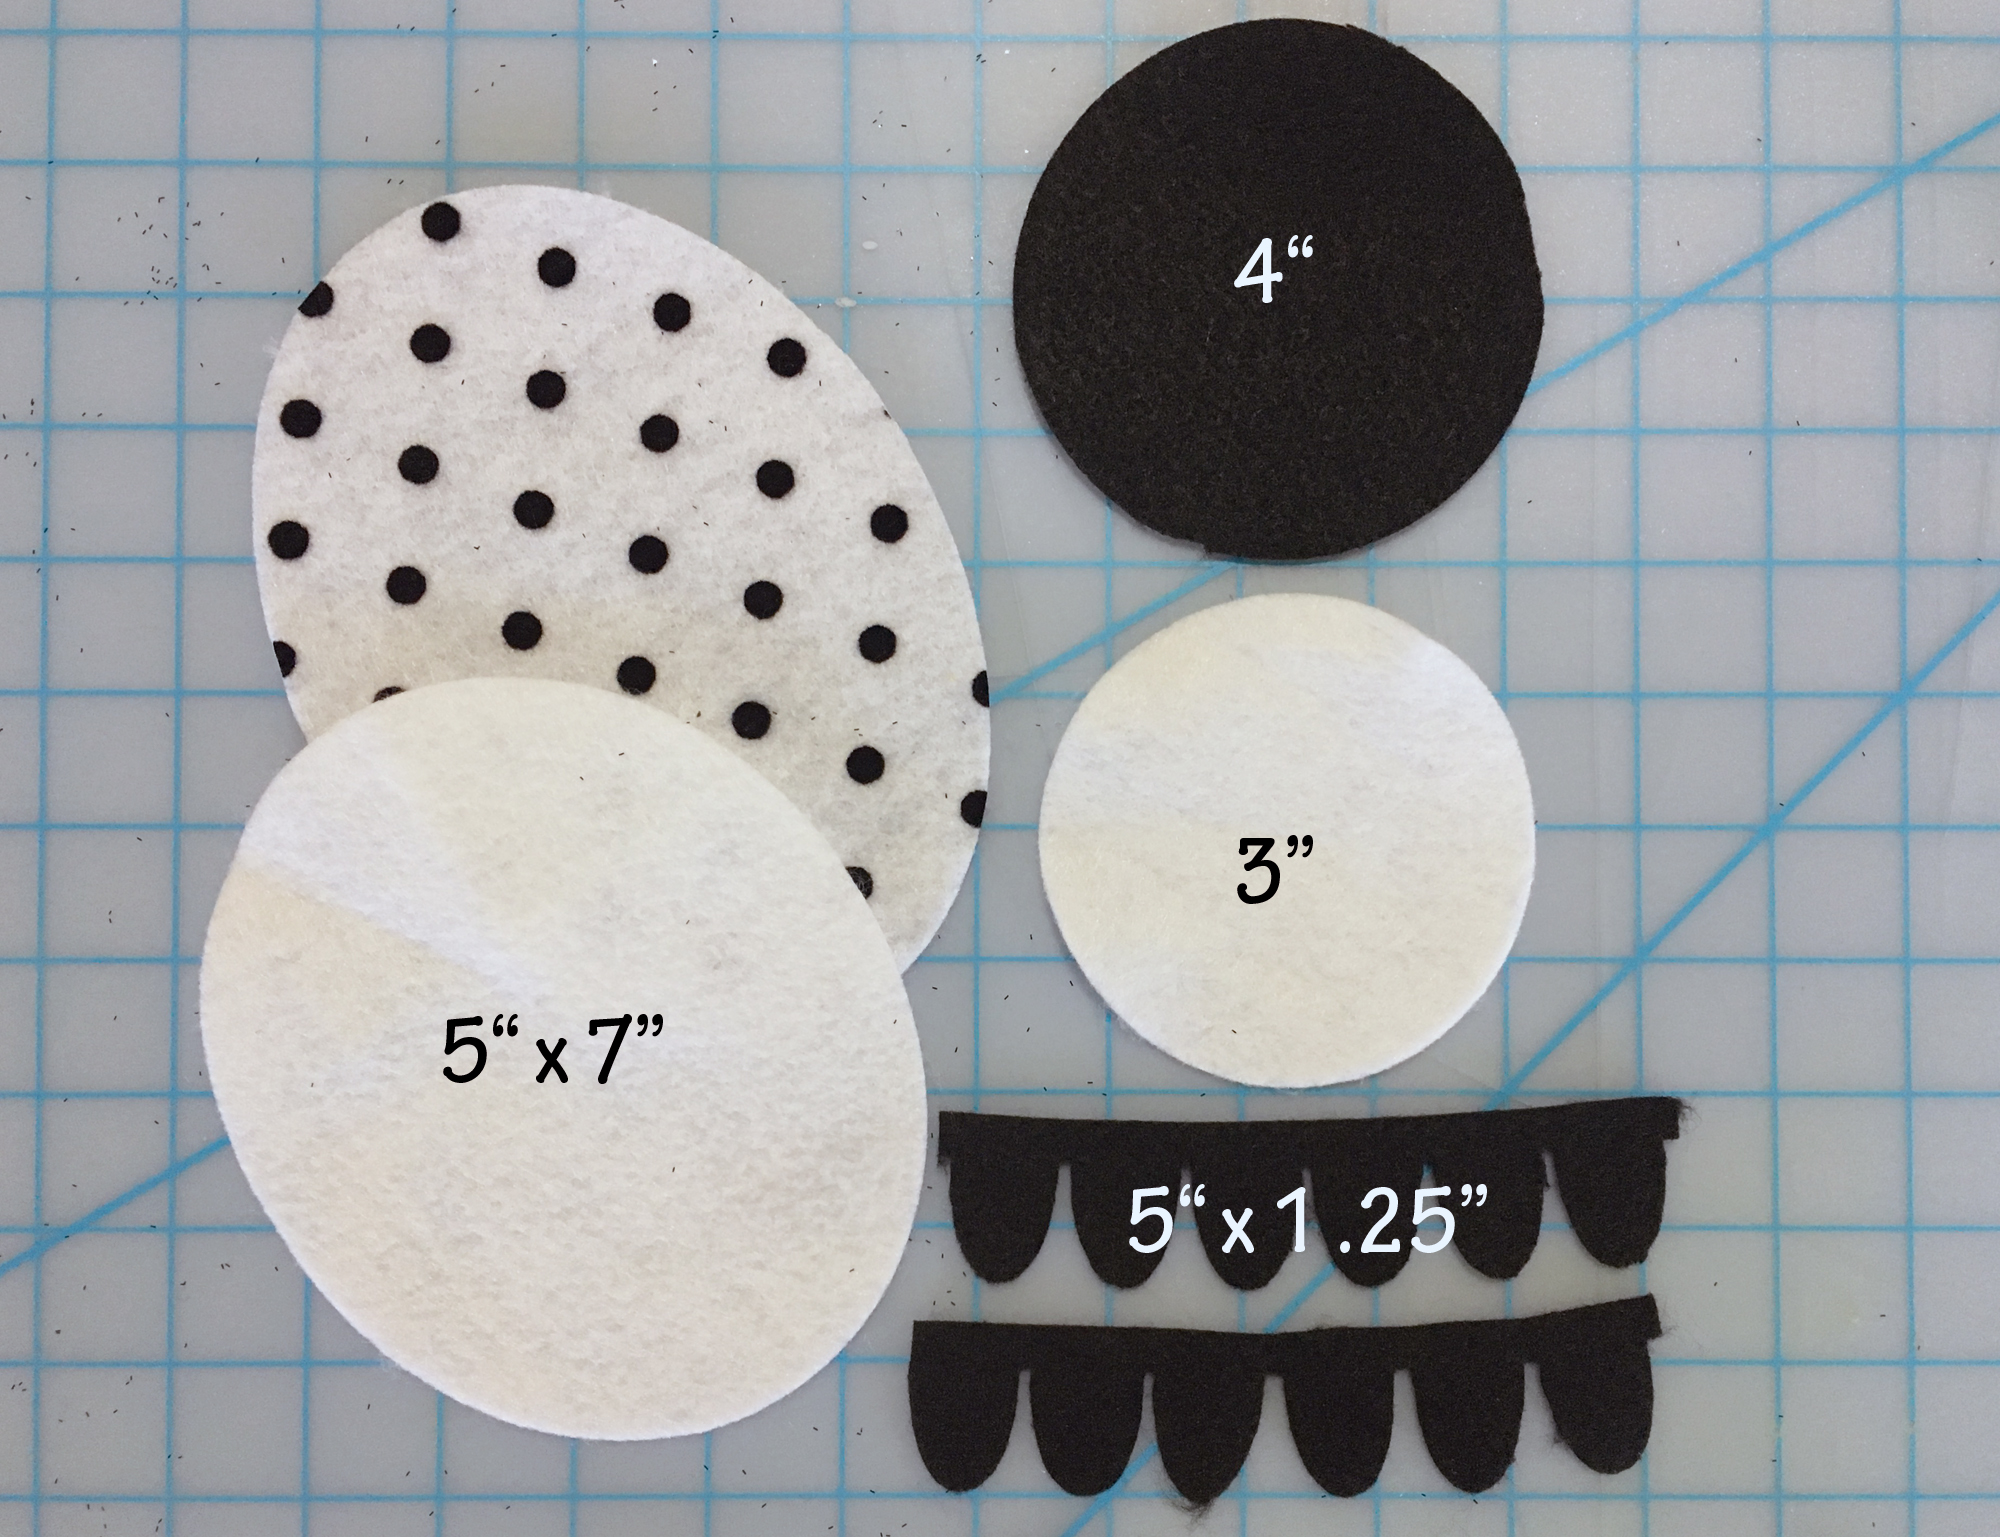
1. Cut the following shapes:
- One 3” circle and one 5” x 7 oval – white;
- One 4” circle and one 5” x 1.25” strip of petals – black
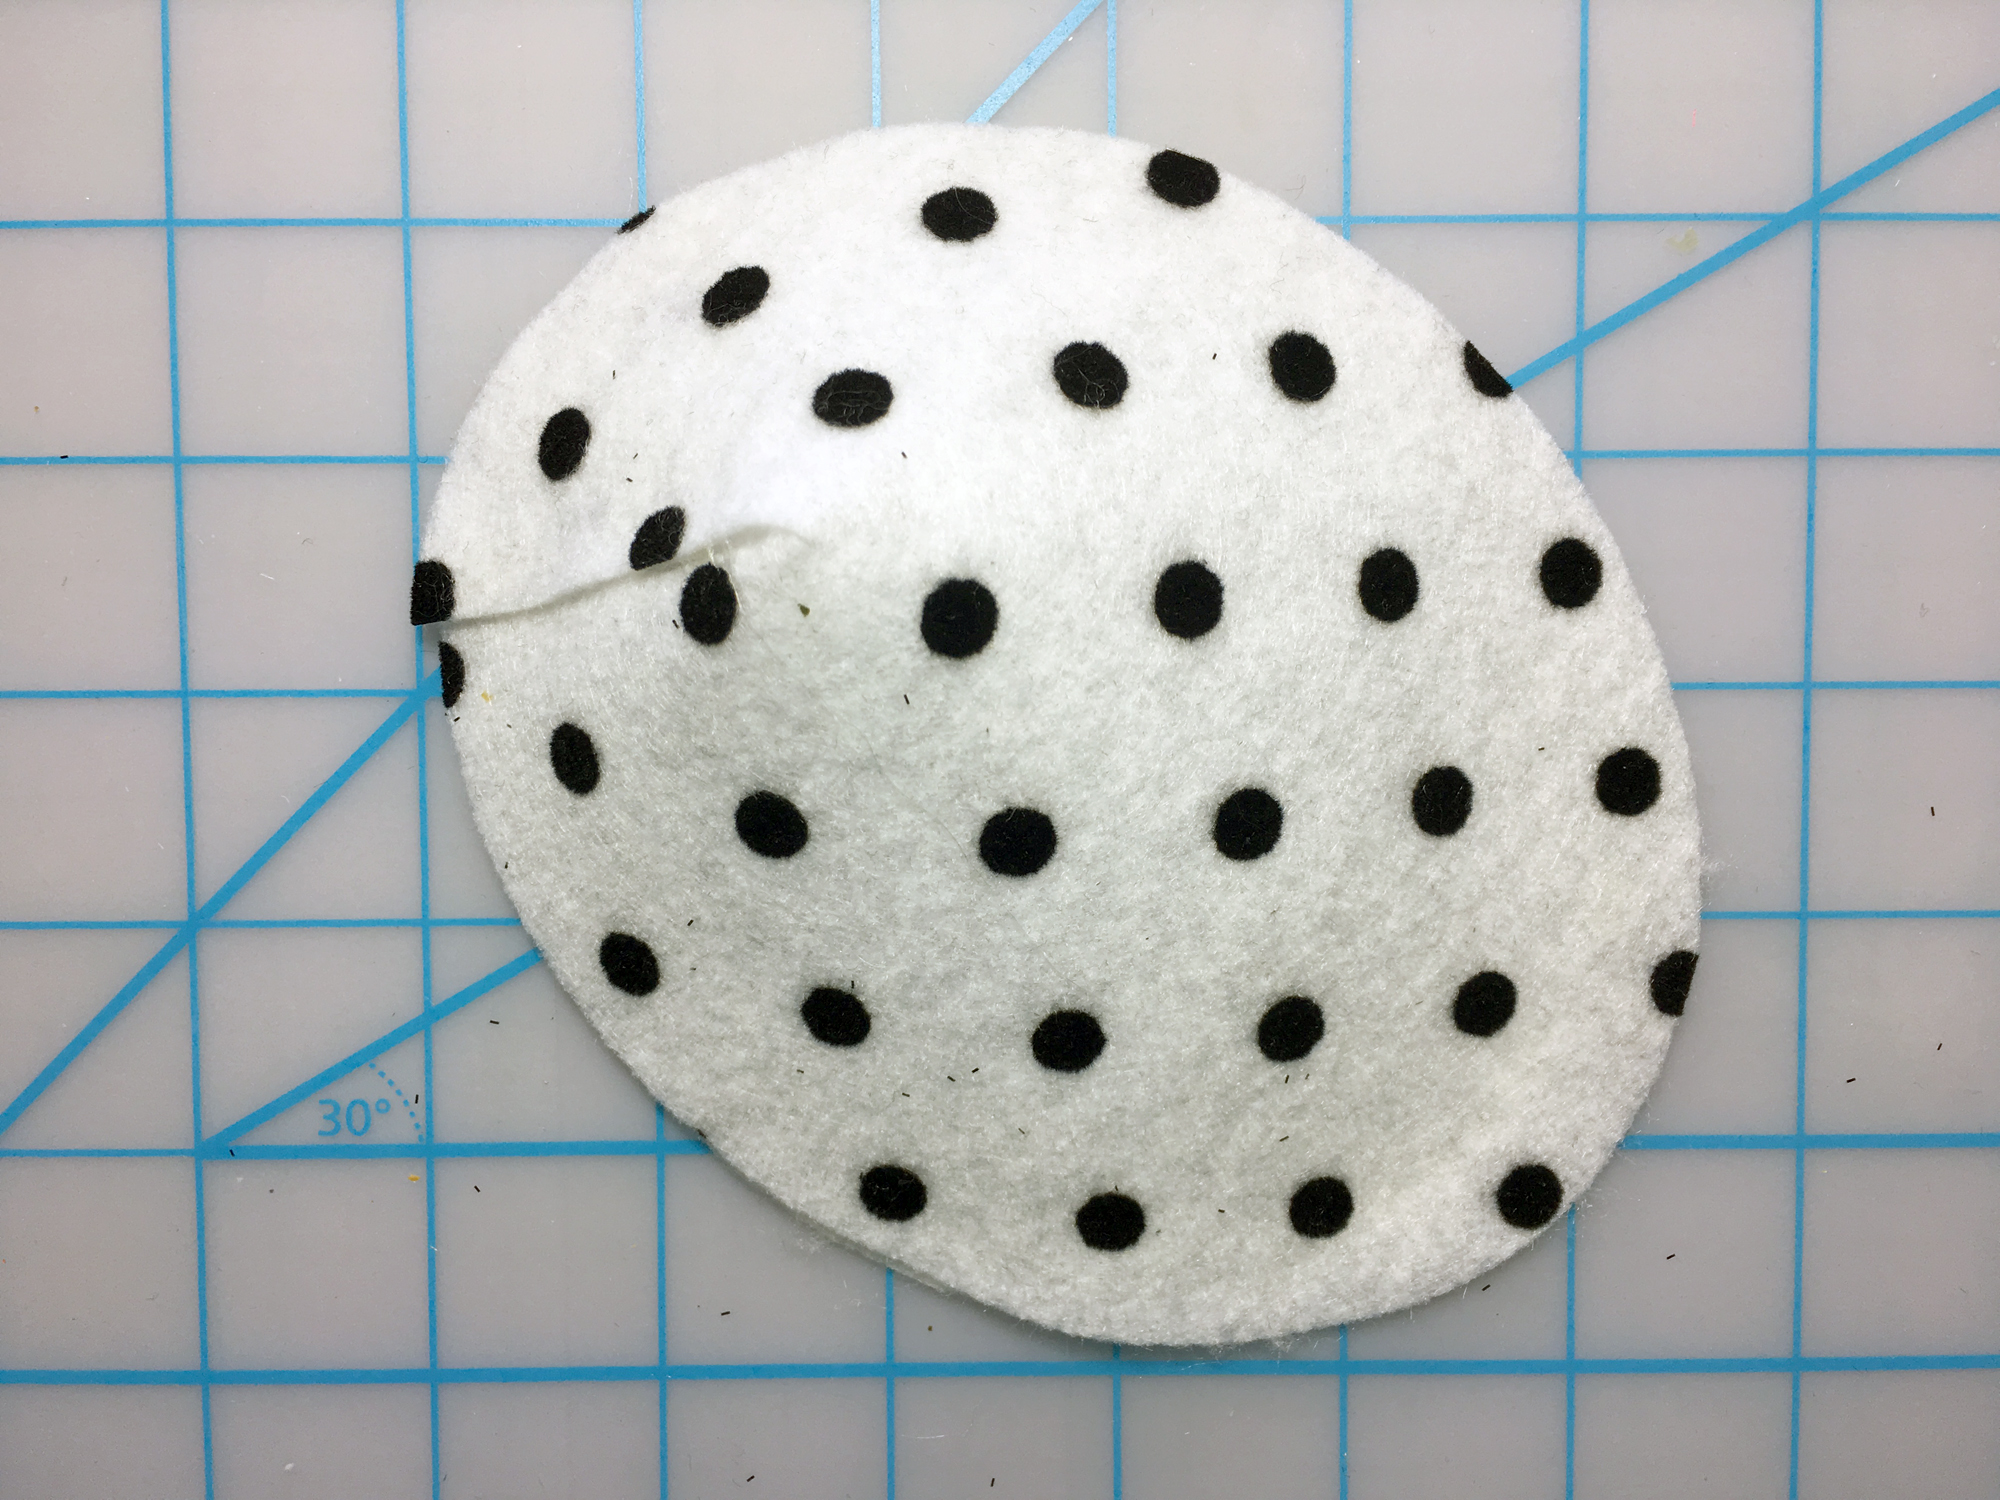
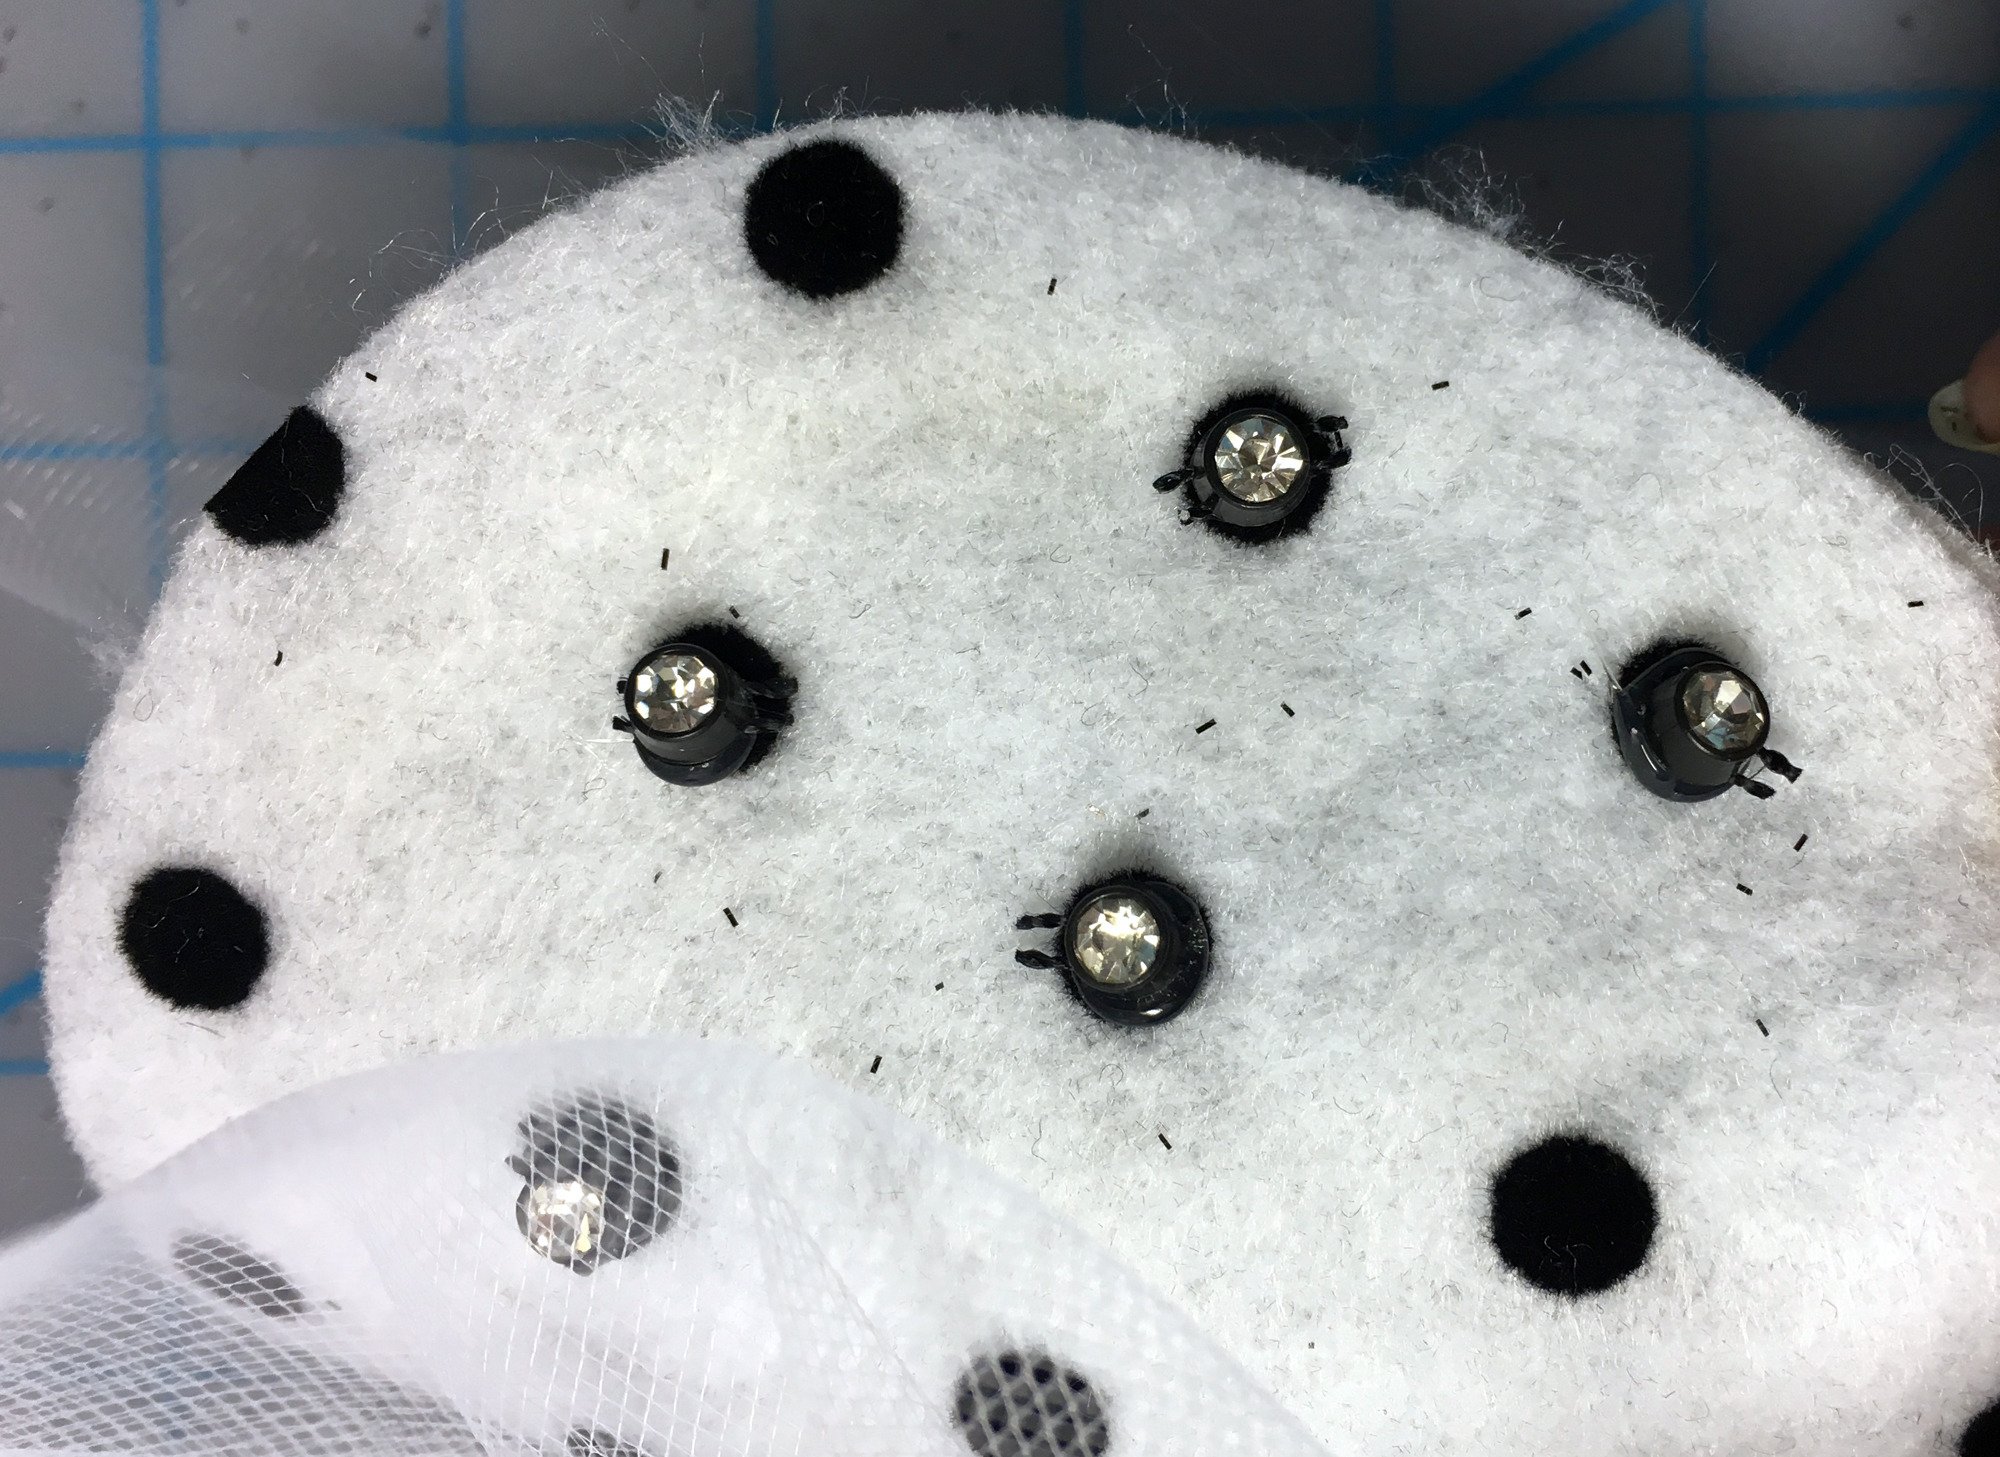
- One 5 ½” – 7 ½” oval – black dot on white
You can cut these with the Maker in Cricut Design Space using the “shapes” feature and size option, or create your own paper templates. These shapes don’t have to be perfect for this project.

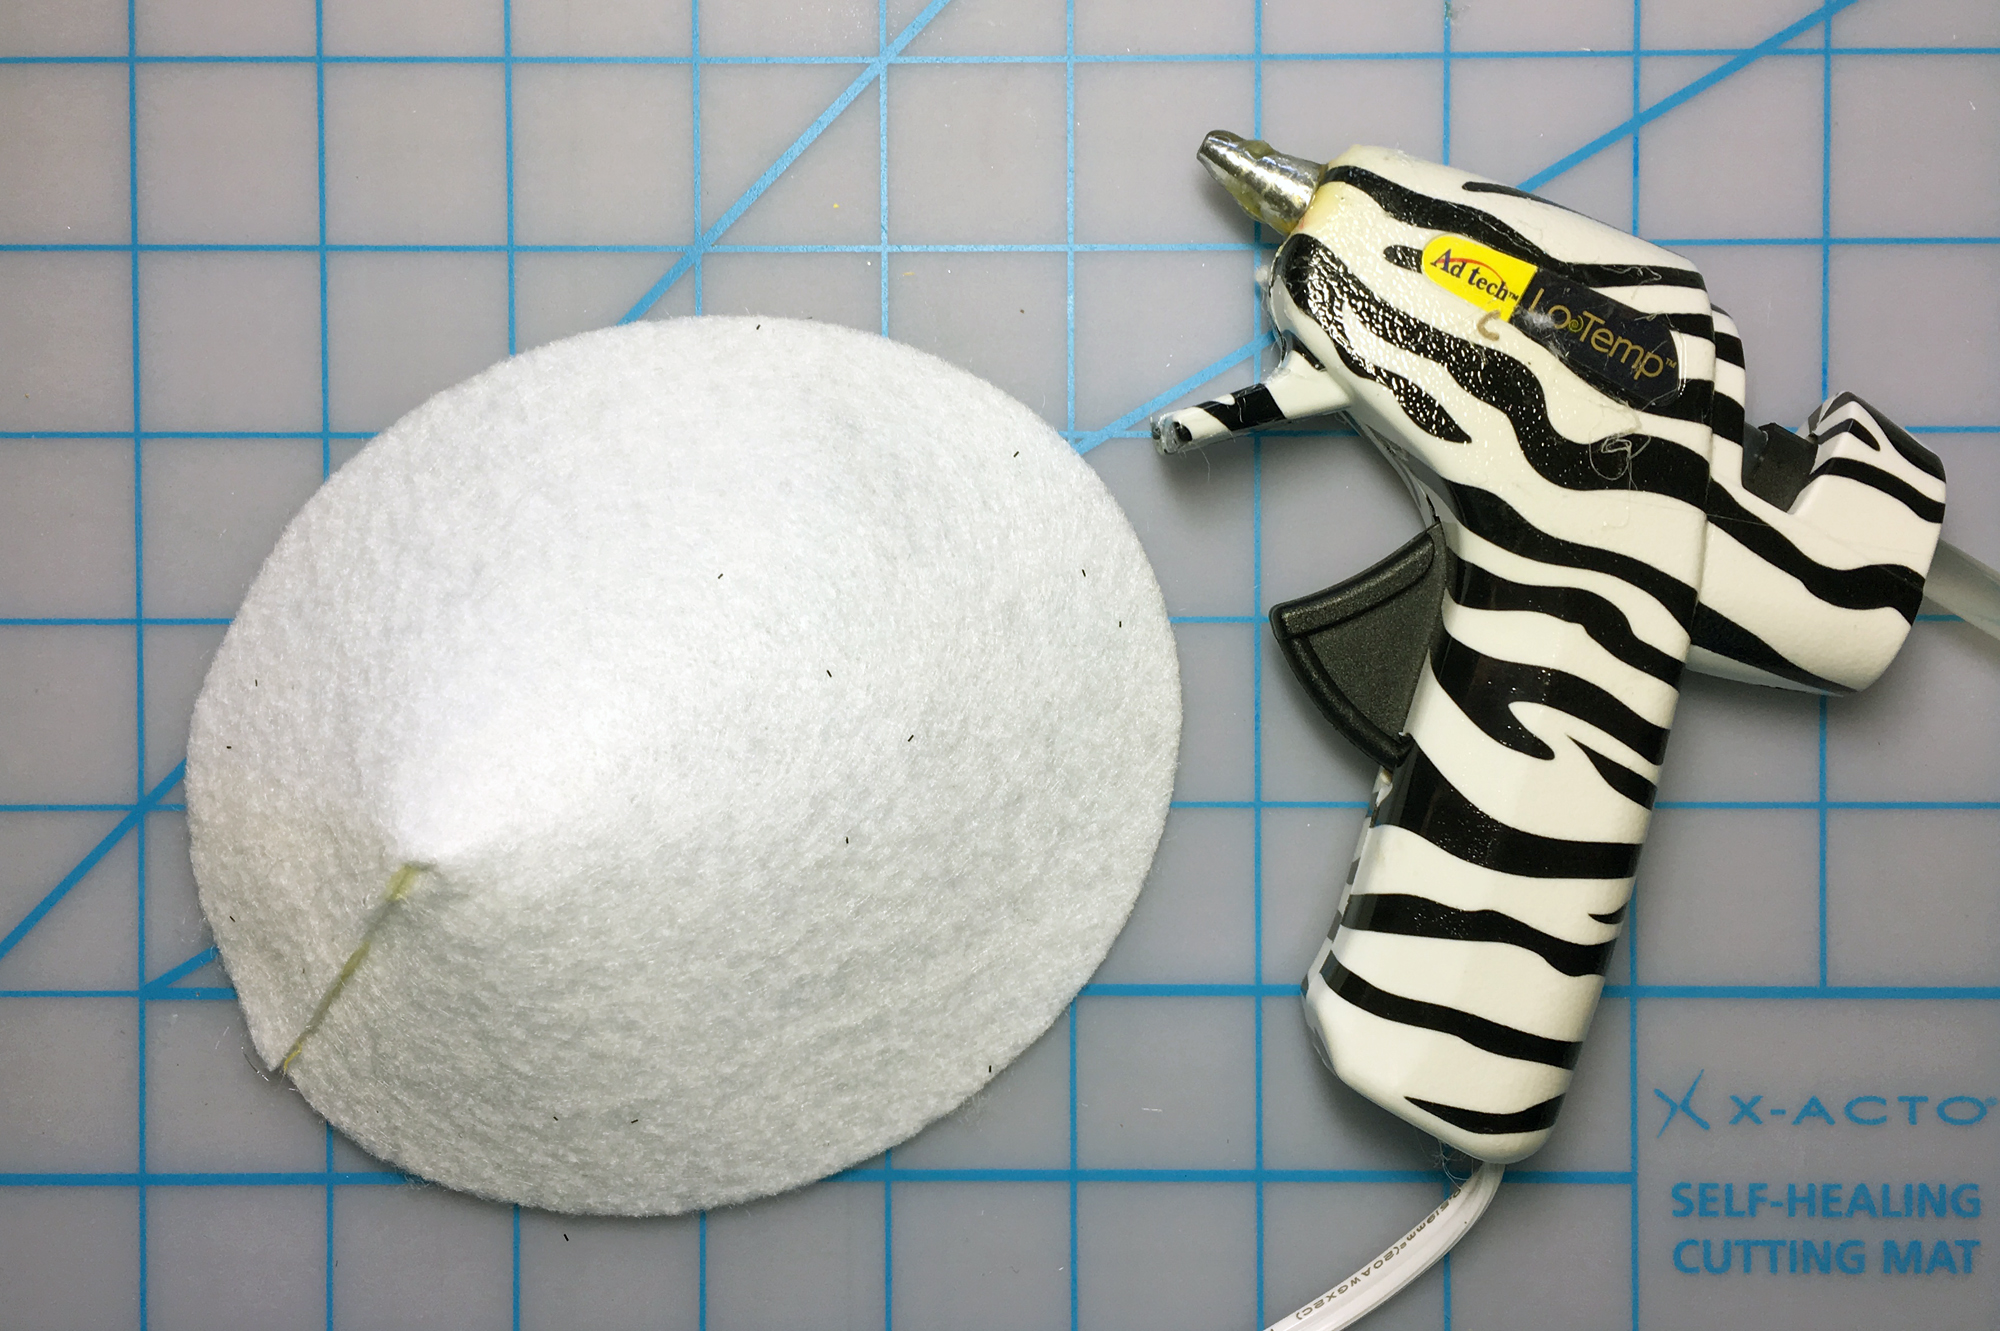
2. To create the shape for the base, fold the white oval in half lengthways then cut a 2 ½” slit along the fold from the edge. Overlap each side then glue in place. Repeat with the dot oval then glue this oval on top of the white. The white, premium felt oval is slightly smaller and gives the base of the fascinator more stability.
3. Create the flower as follows:
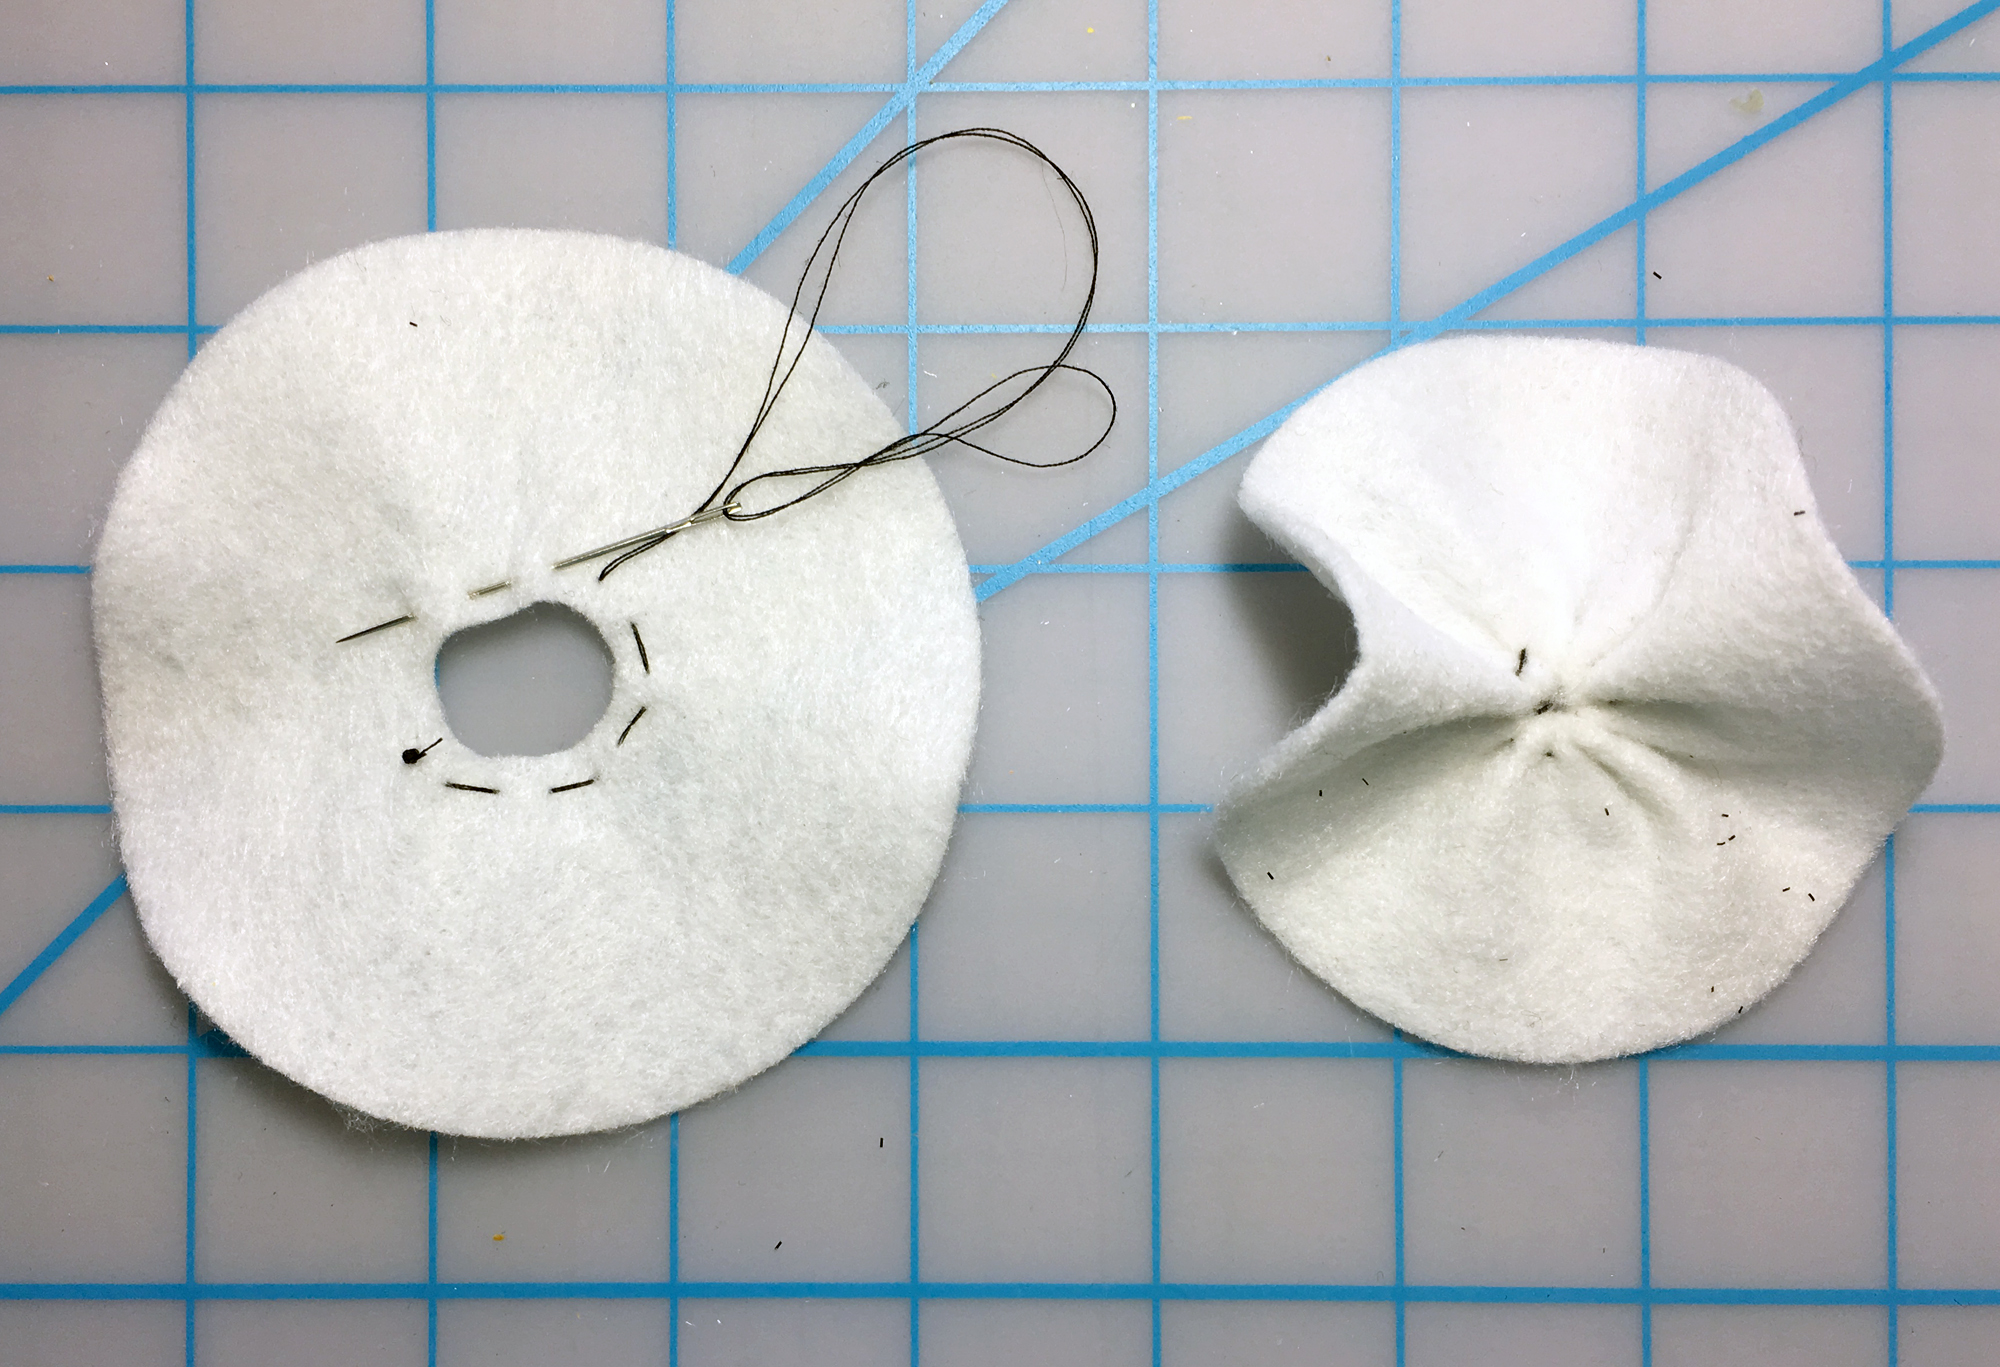
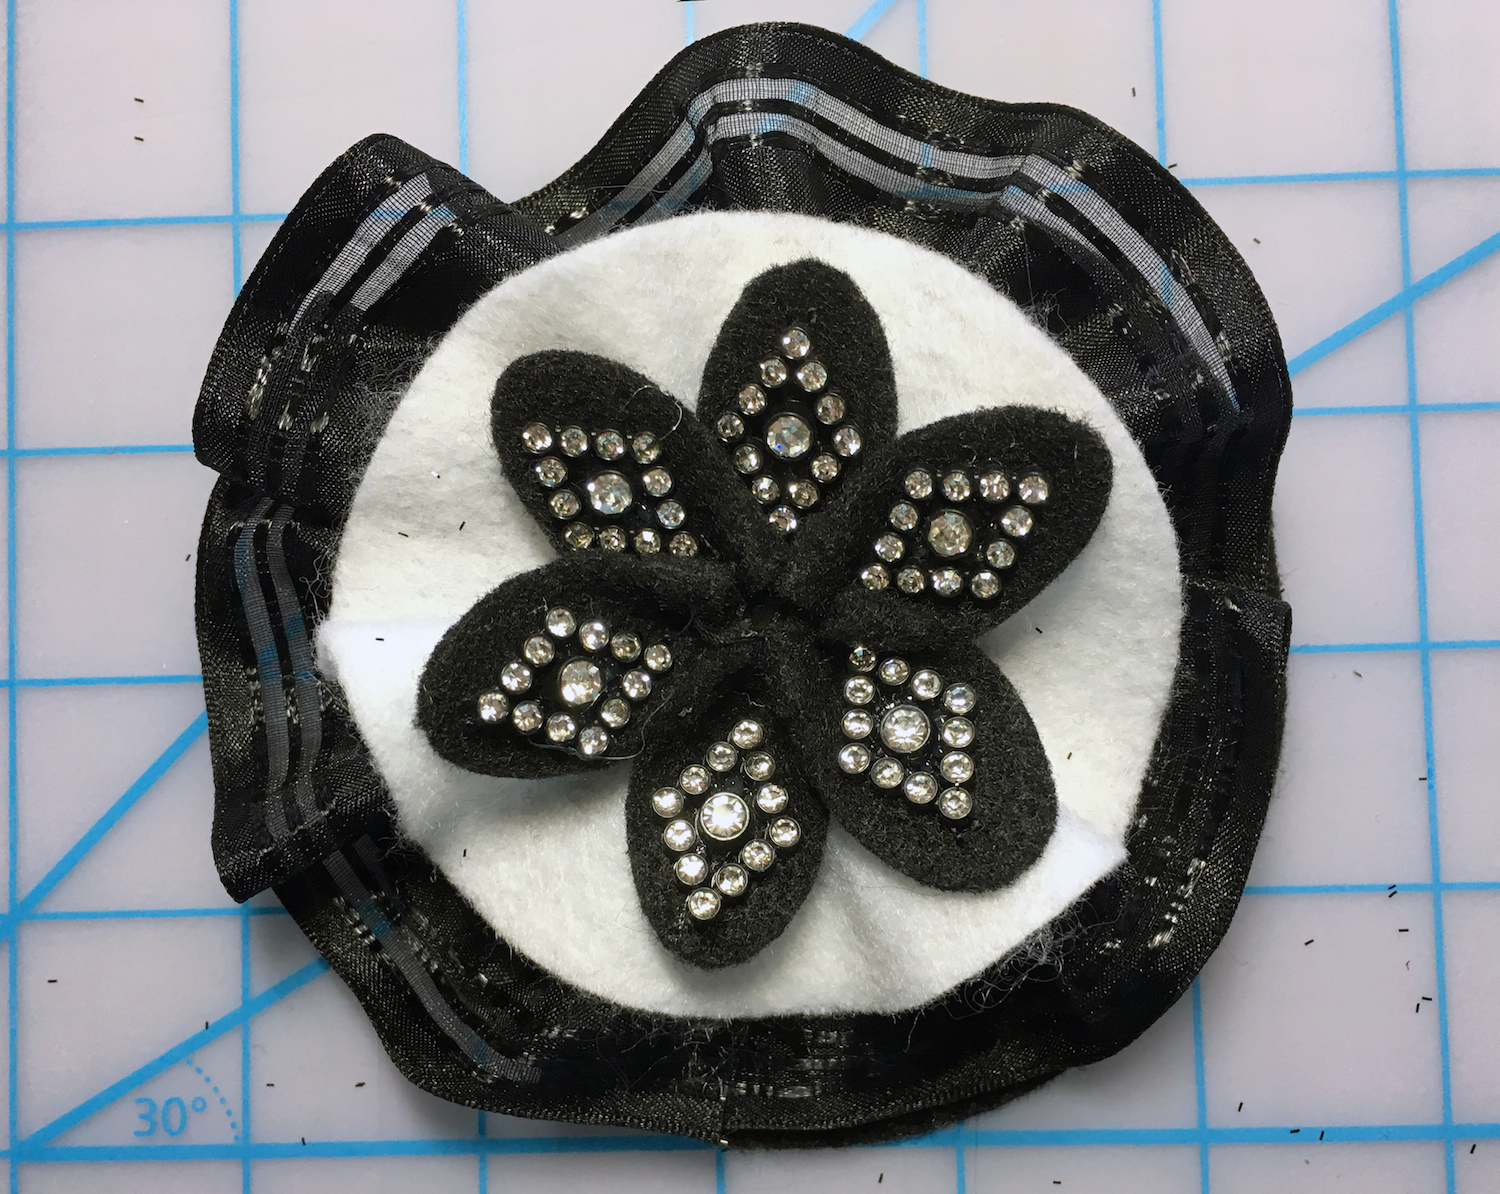
a. Fold the white circle in half, in half again (into quarters) then cut a small piece from the folded point to create a hole in the center about ½’ wide. Using the needle and thread, create small running stitches around the center opening, pull tightly to gather then over sew the end of the thread to secure. I used black thread on white for photography purposes.
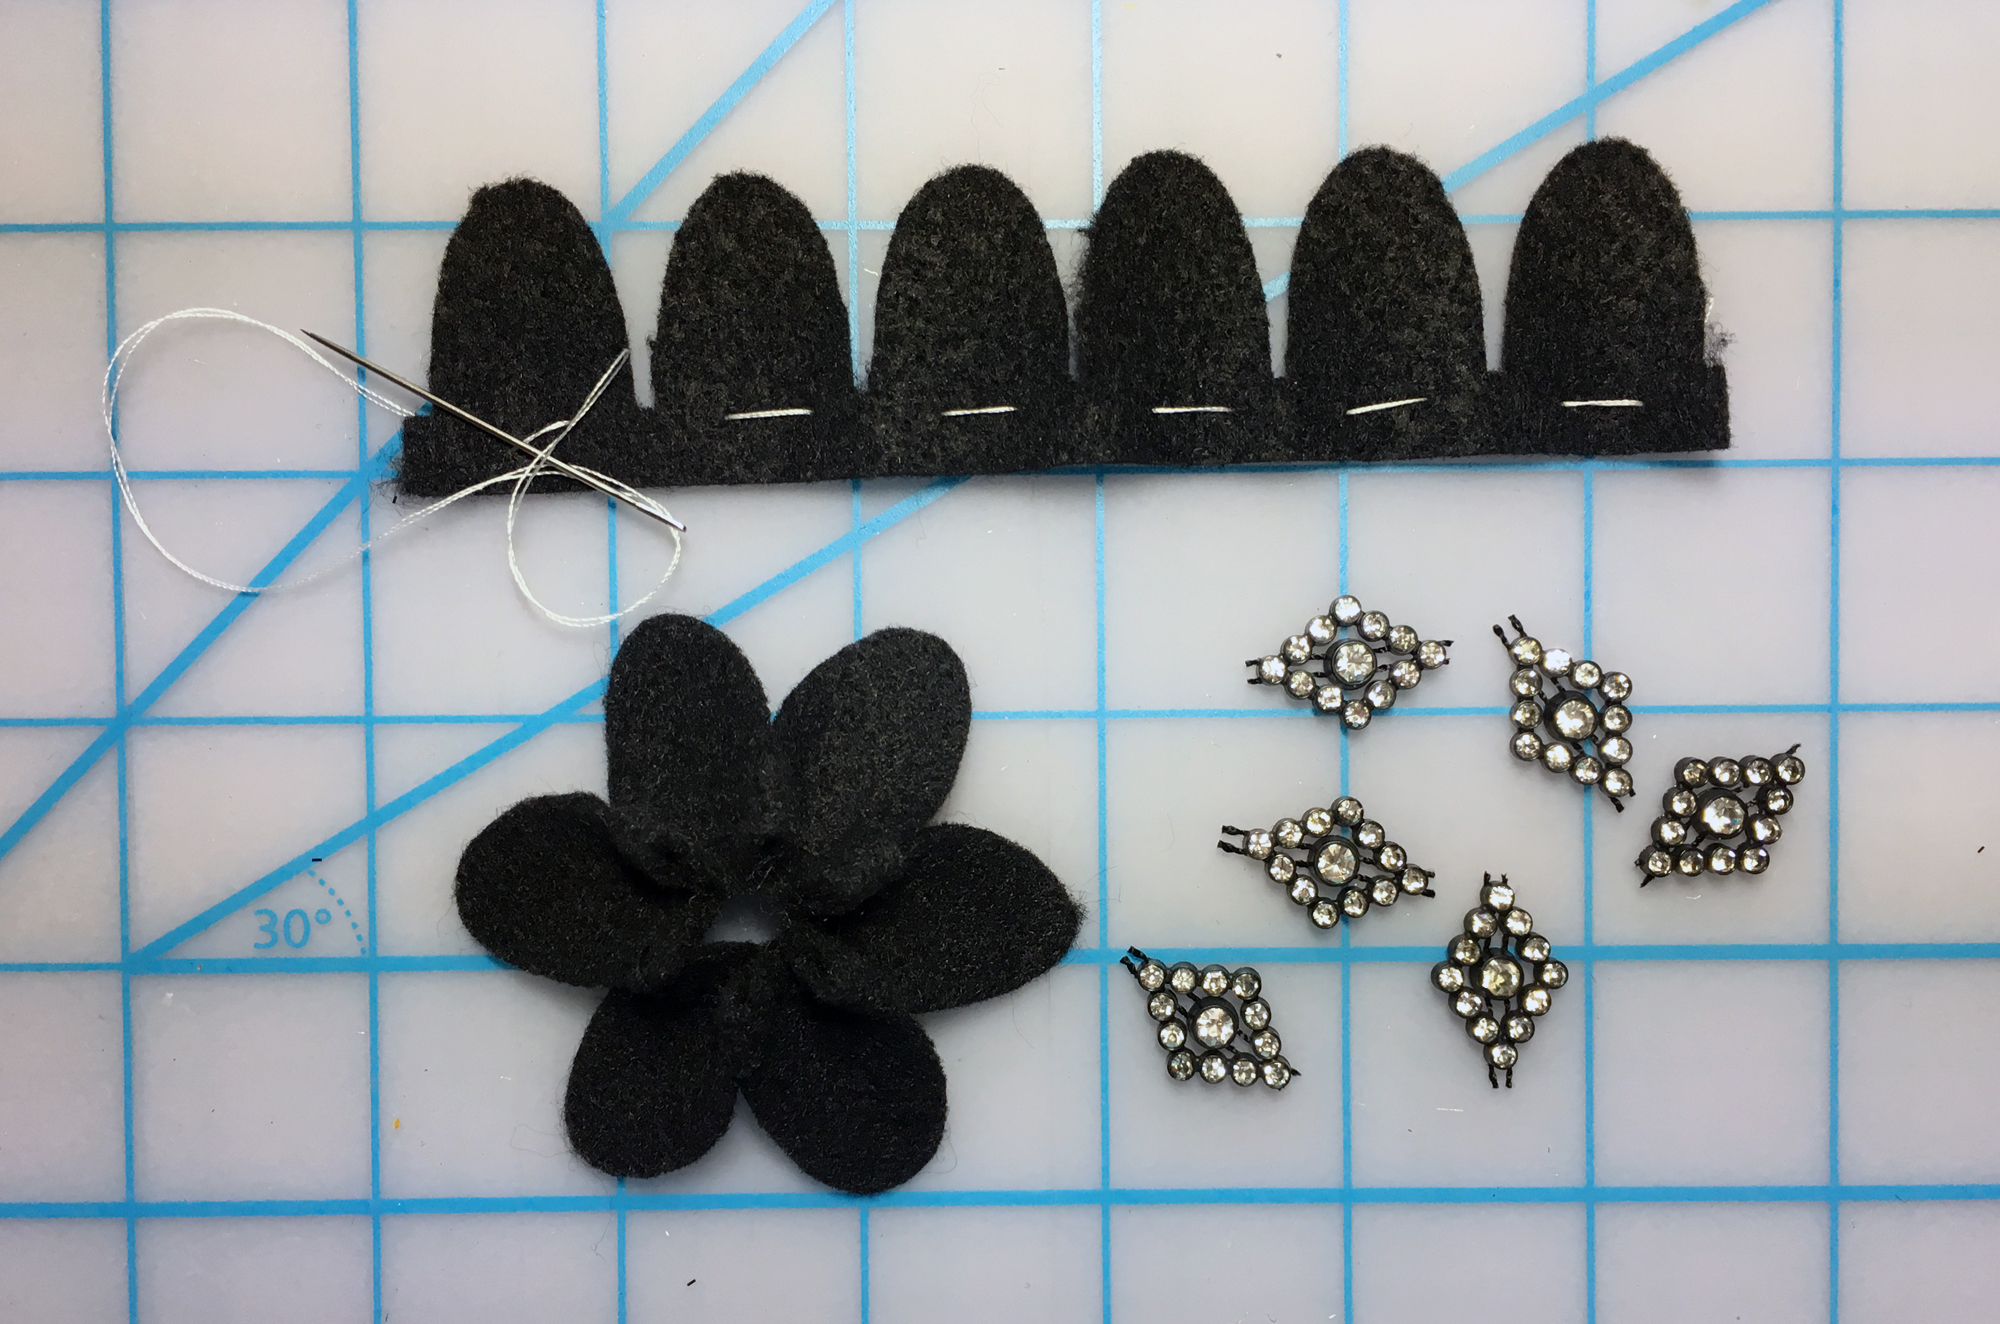
b. Place running stitches along the bottom of the petal strip as shown, then gather tightly. Over sew the end to secure then pull the ends together to create a circle of petals. Stitch, or glue the ends together. For added glamour, I cut apart the black rhinestone trim then glued each piece to a petal.
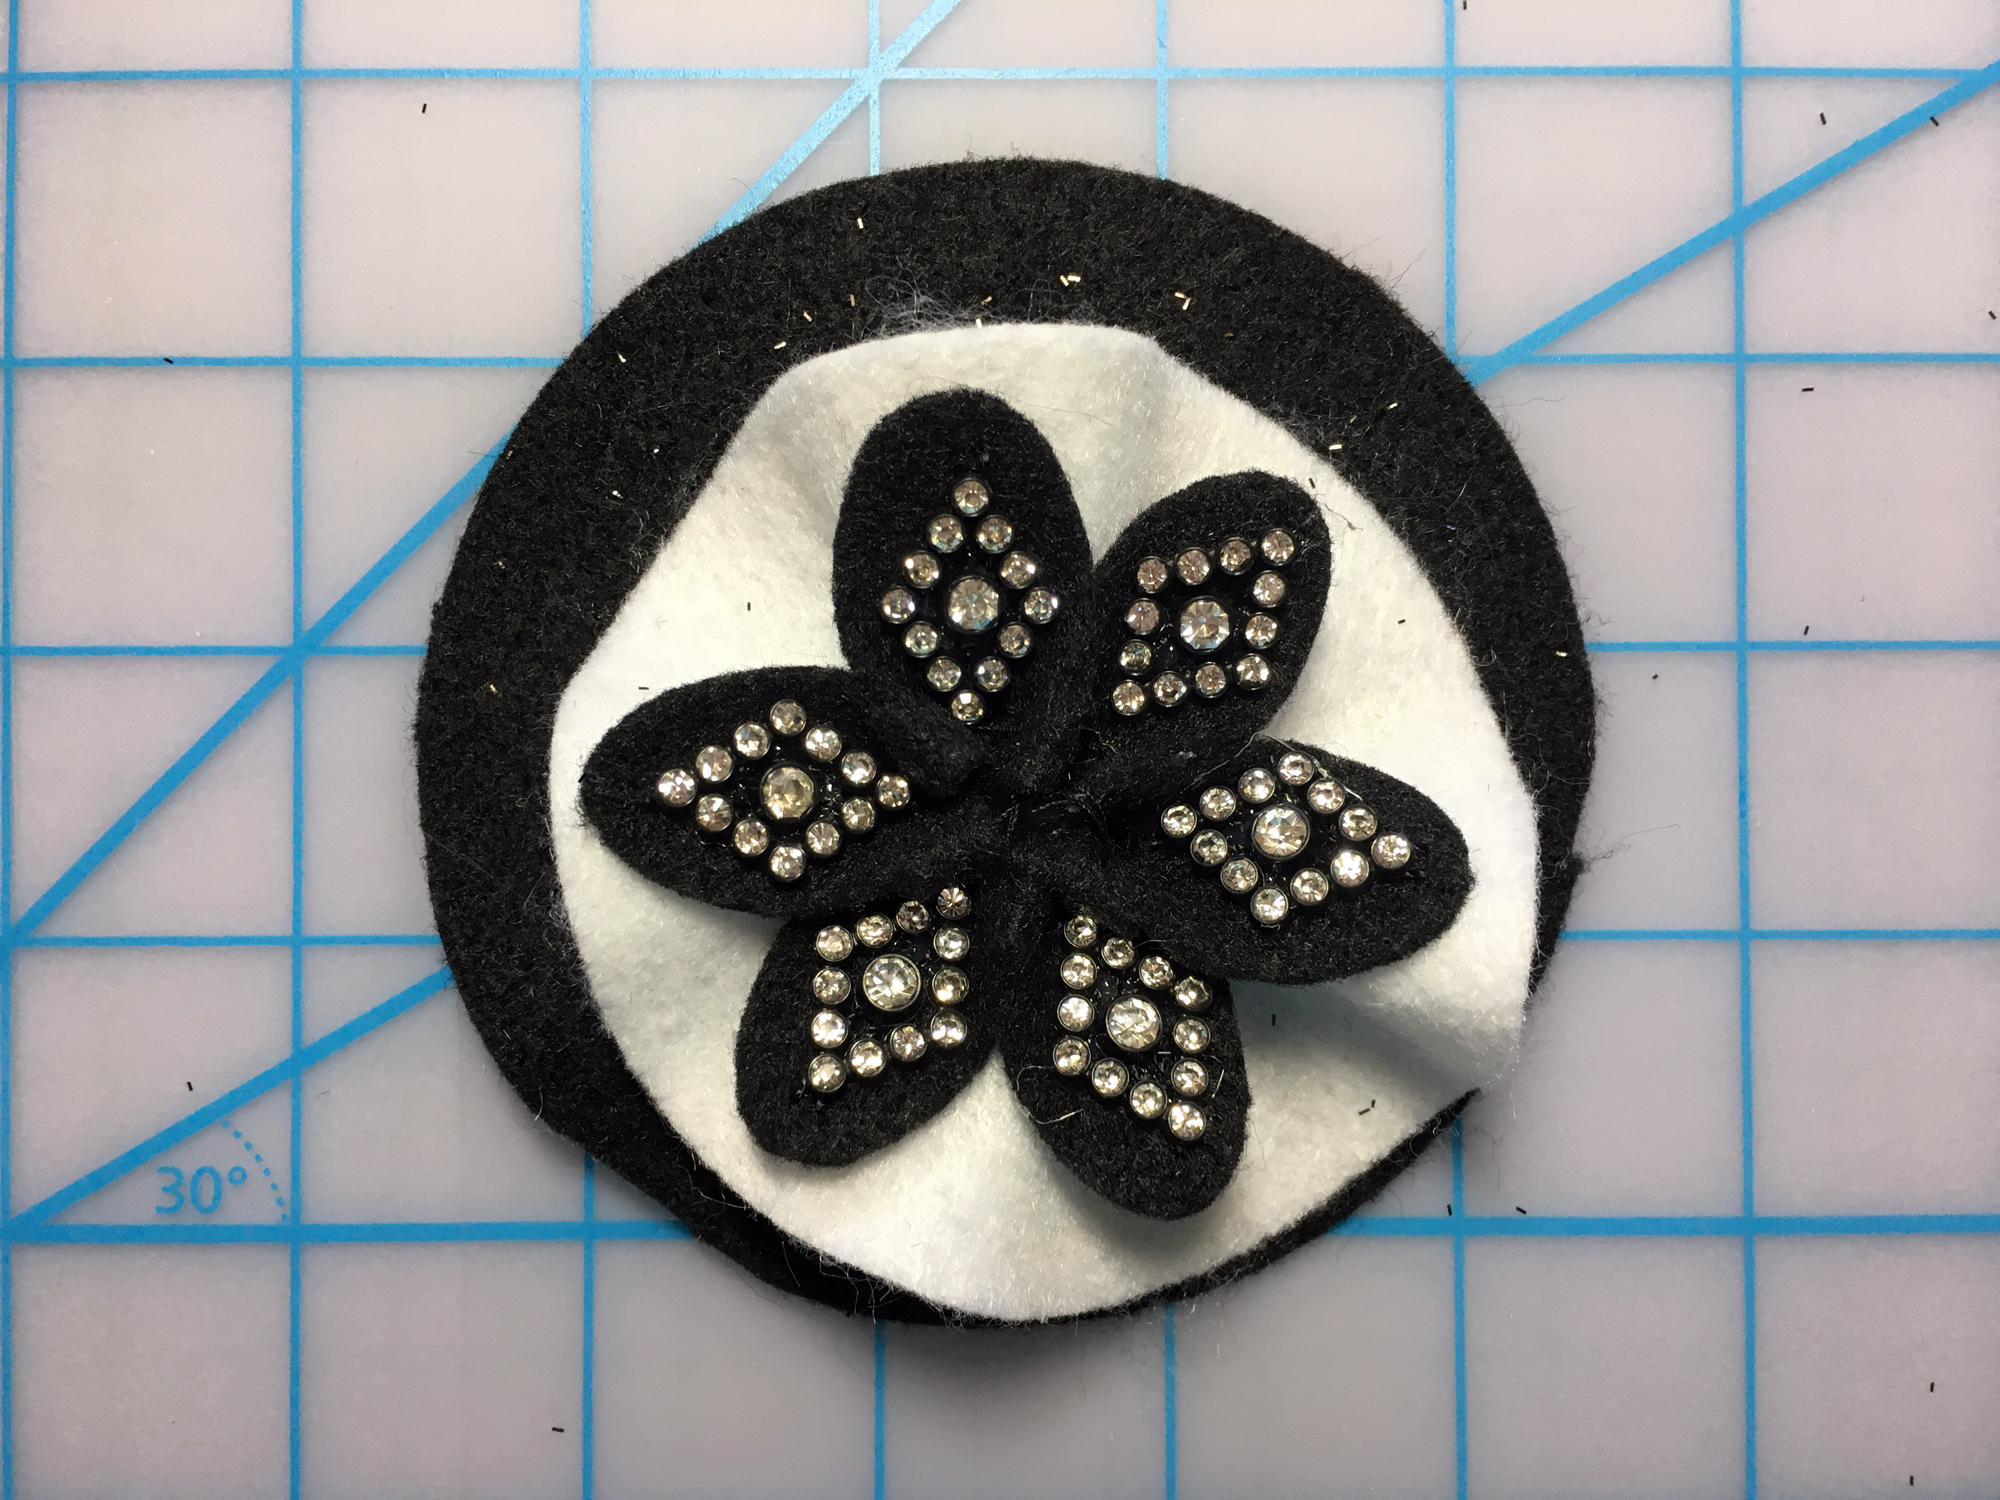
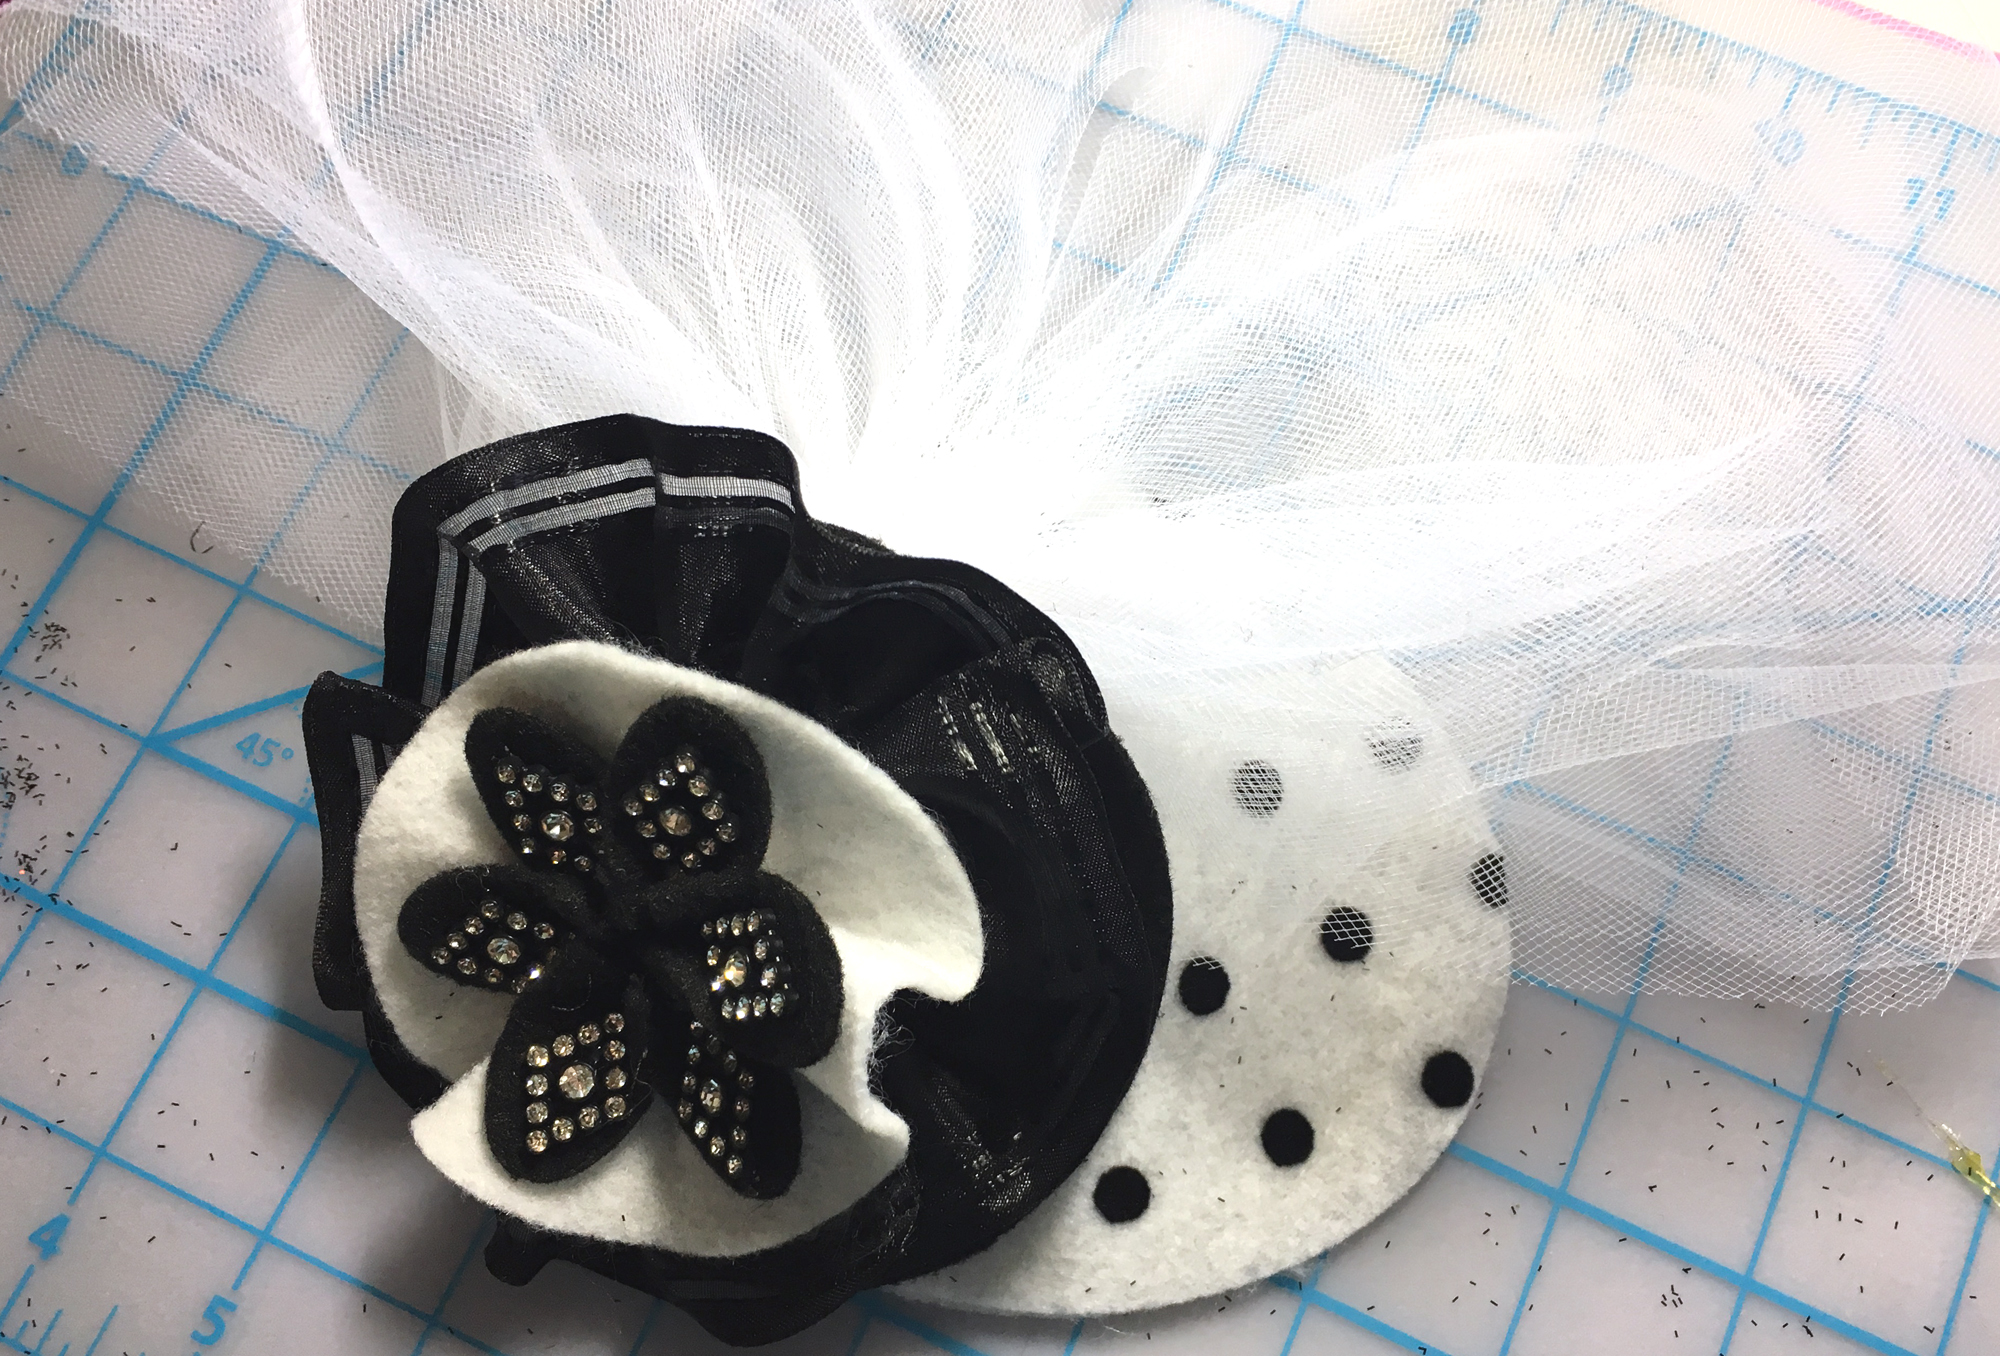
c. Glue the petals to the center of the white circle then both to the center of the black circle to create the flower embellishment.
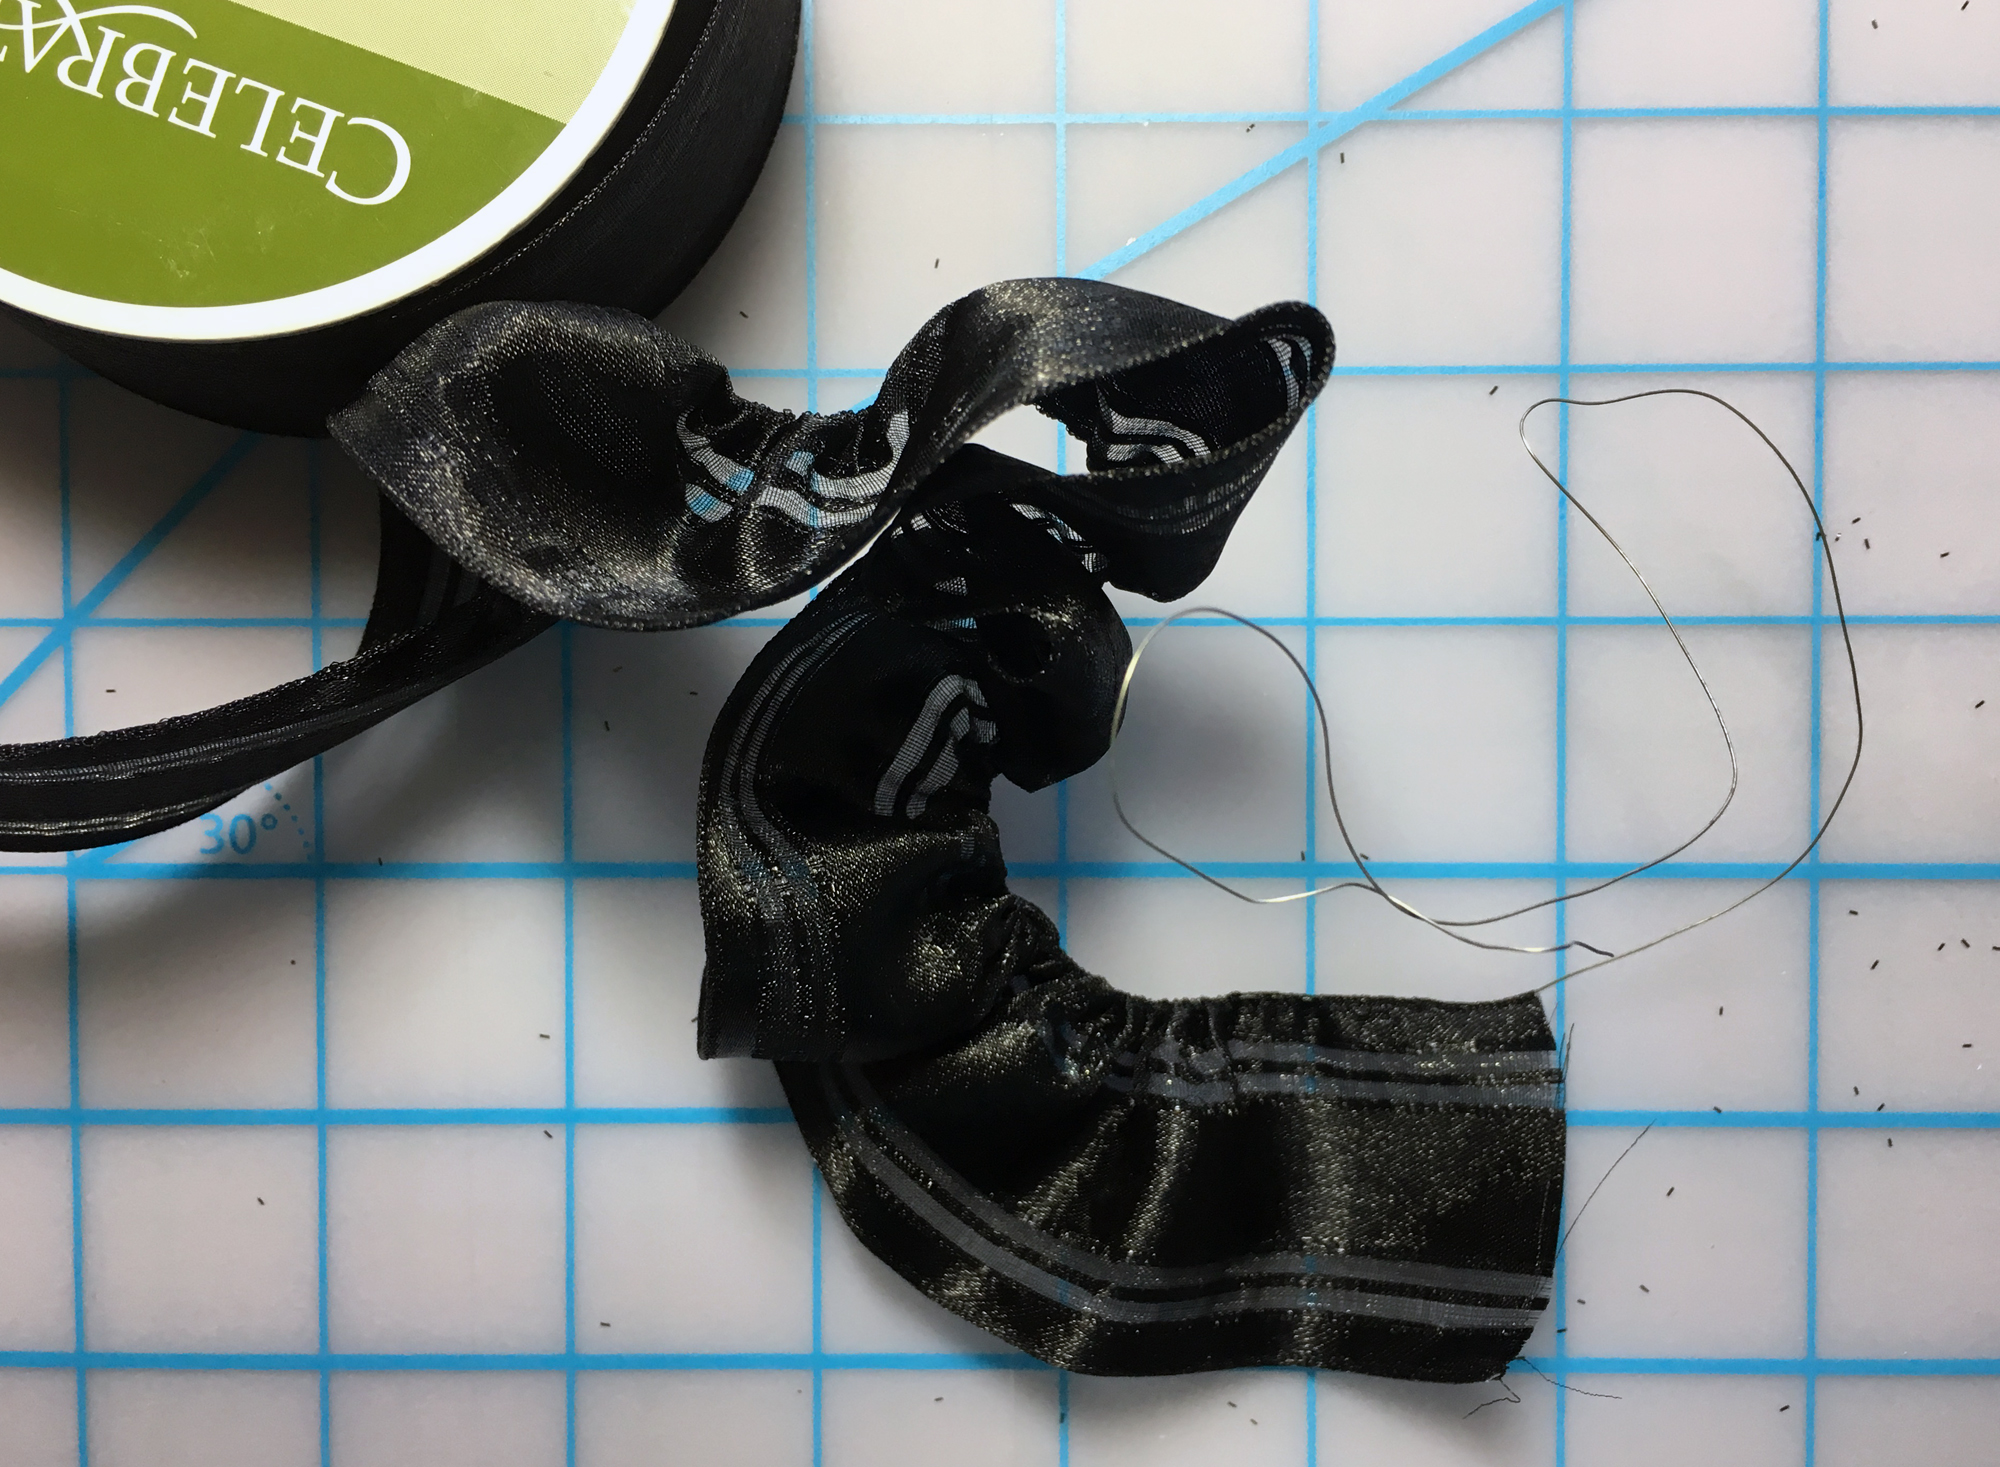
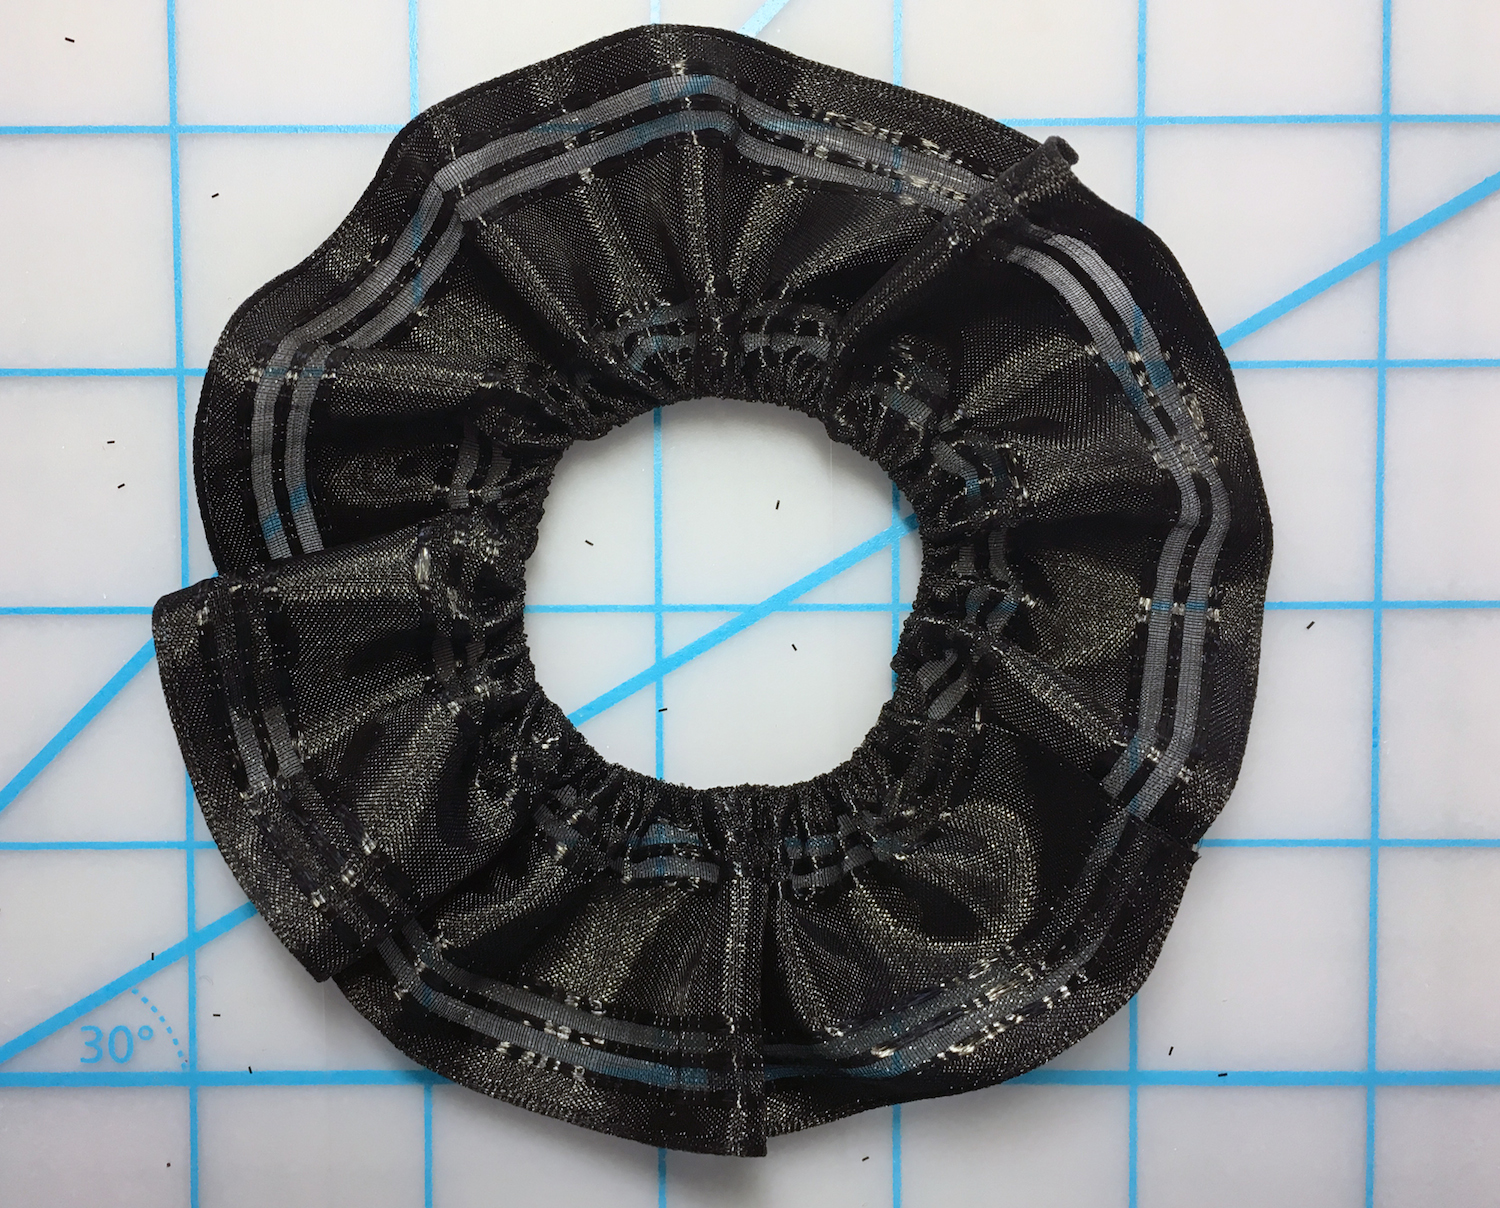
d. While the ribbon is still on the spool, pull the end of the wire gently from one edge to gather the ribbon. Push the ribbon along the wire until there is enough to make a circle the same diameter as the flower. Cut the ribbon from the spool then gently pull the wire from the other end. Sandwich the gathered ribbon between the white and black felt circles, pull the ends together, twist the wires to secure then cut the excess wire.
4. Glue the flower to one side of the base toward the back. You only need to glue the center of the flower to the base with enough glue to make it secure.
5. Fold the tulle back and forth about every 12” until you have created 3 loops at each end.
6. Pinch the tulle together at the center then wrap tightly with a twist tie (shown), thread or a piece of the wire cut from the ribbon.
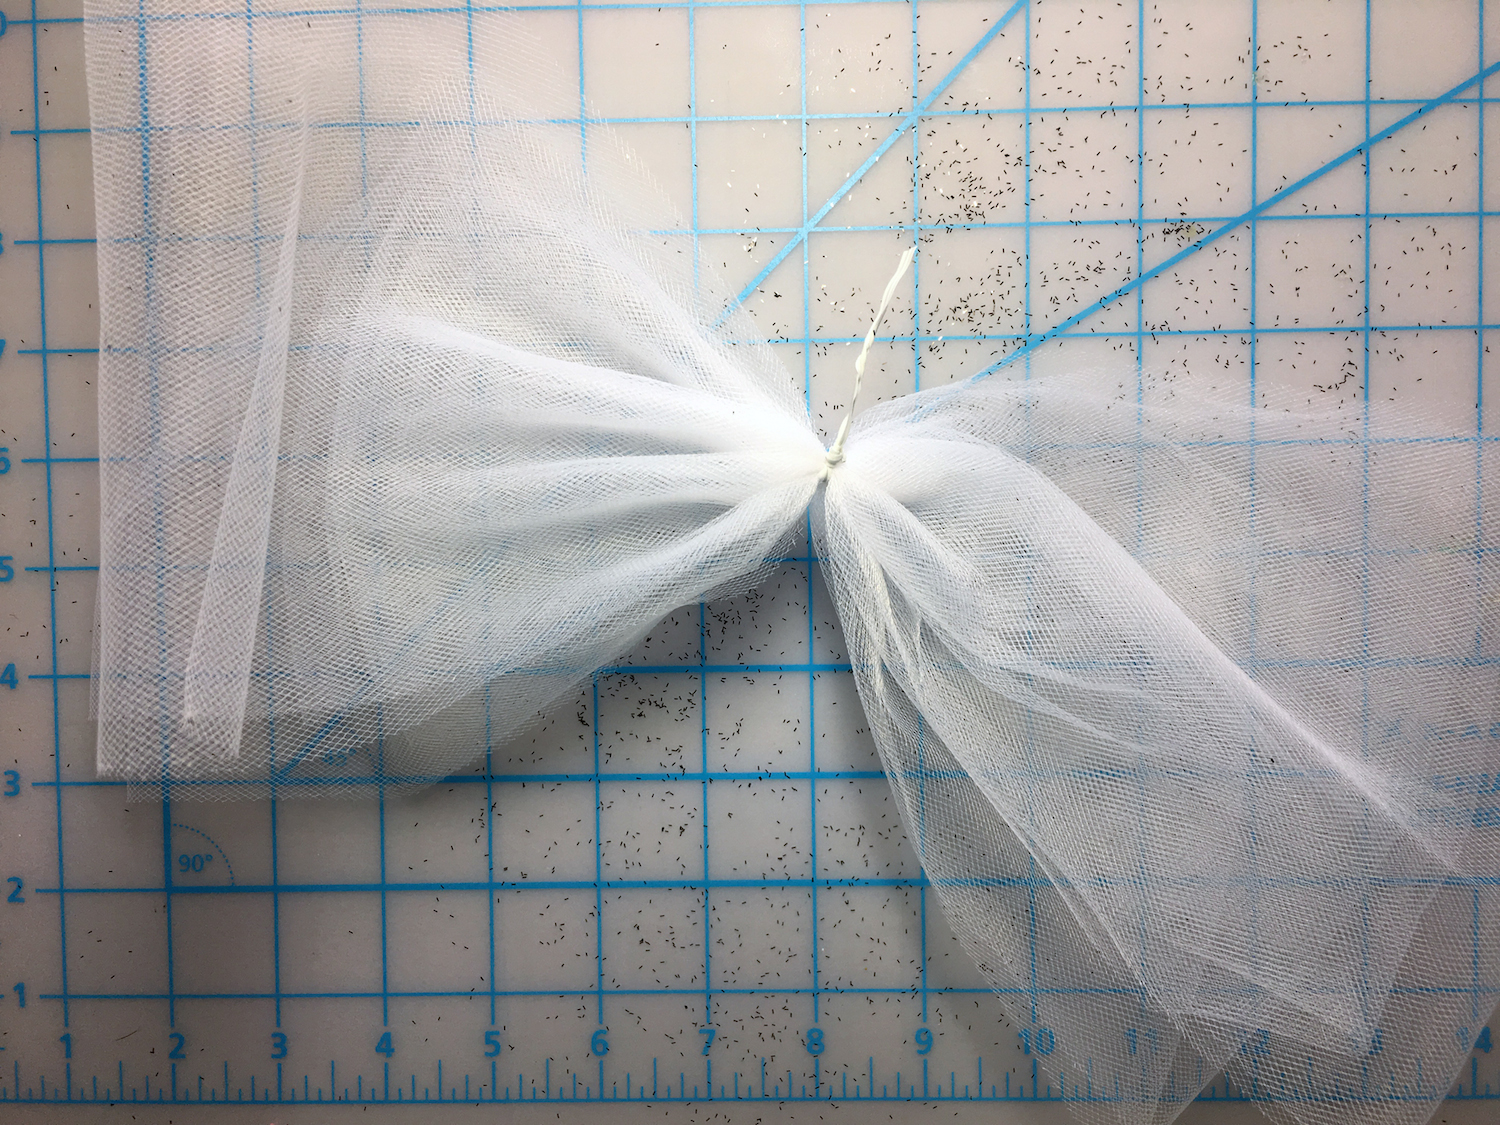
7. Pull the loops on each side together then glue the center of the tulle to the base underneath the flower. Fluff the loops apart.
8. There was a single rhinestone between each diamond shape on the rhinestone trim. For added sparkle, I glued these on top of a few of the dots at the front of the base.
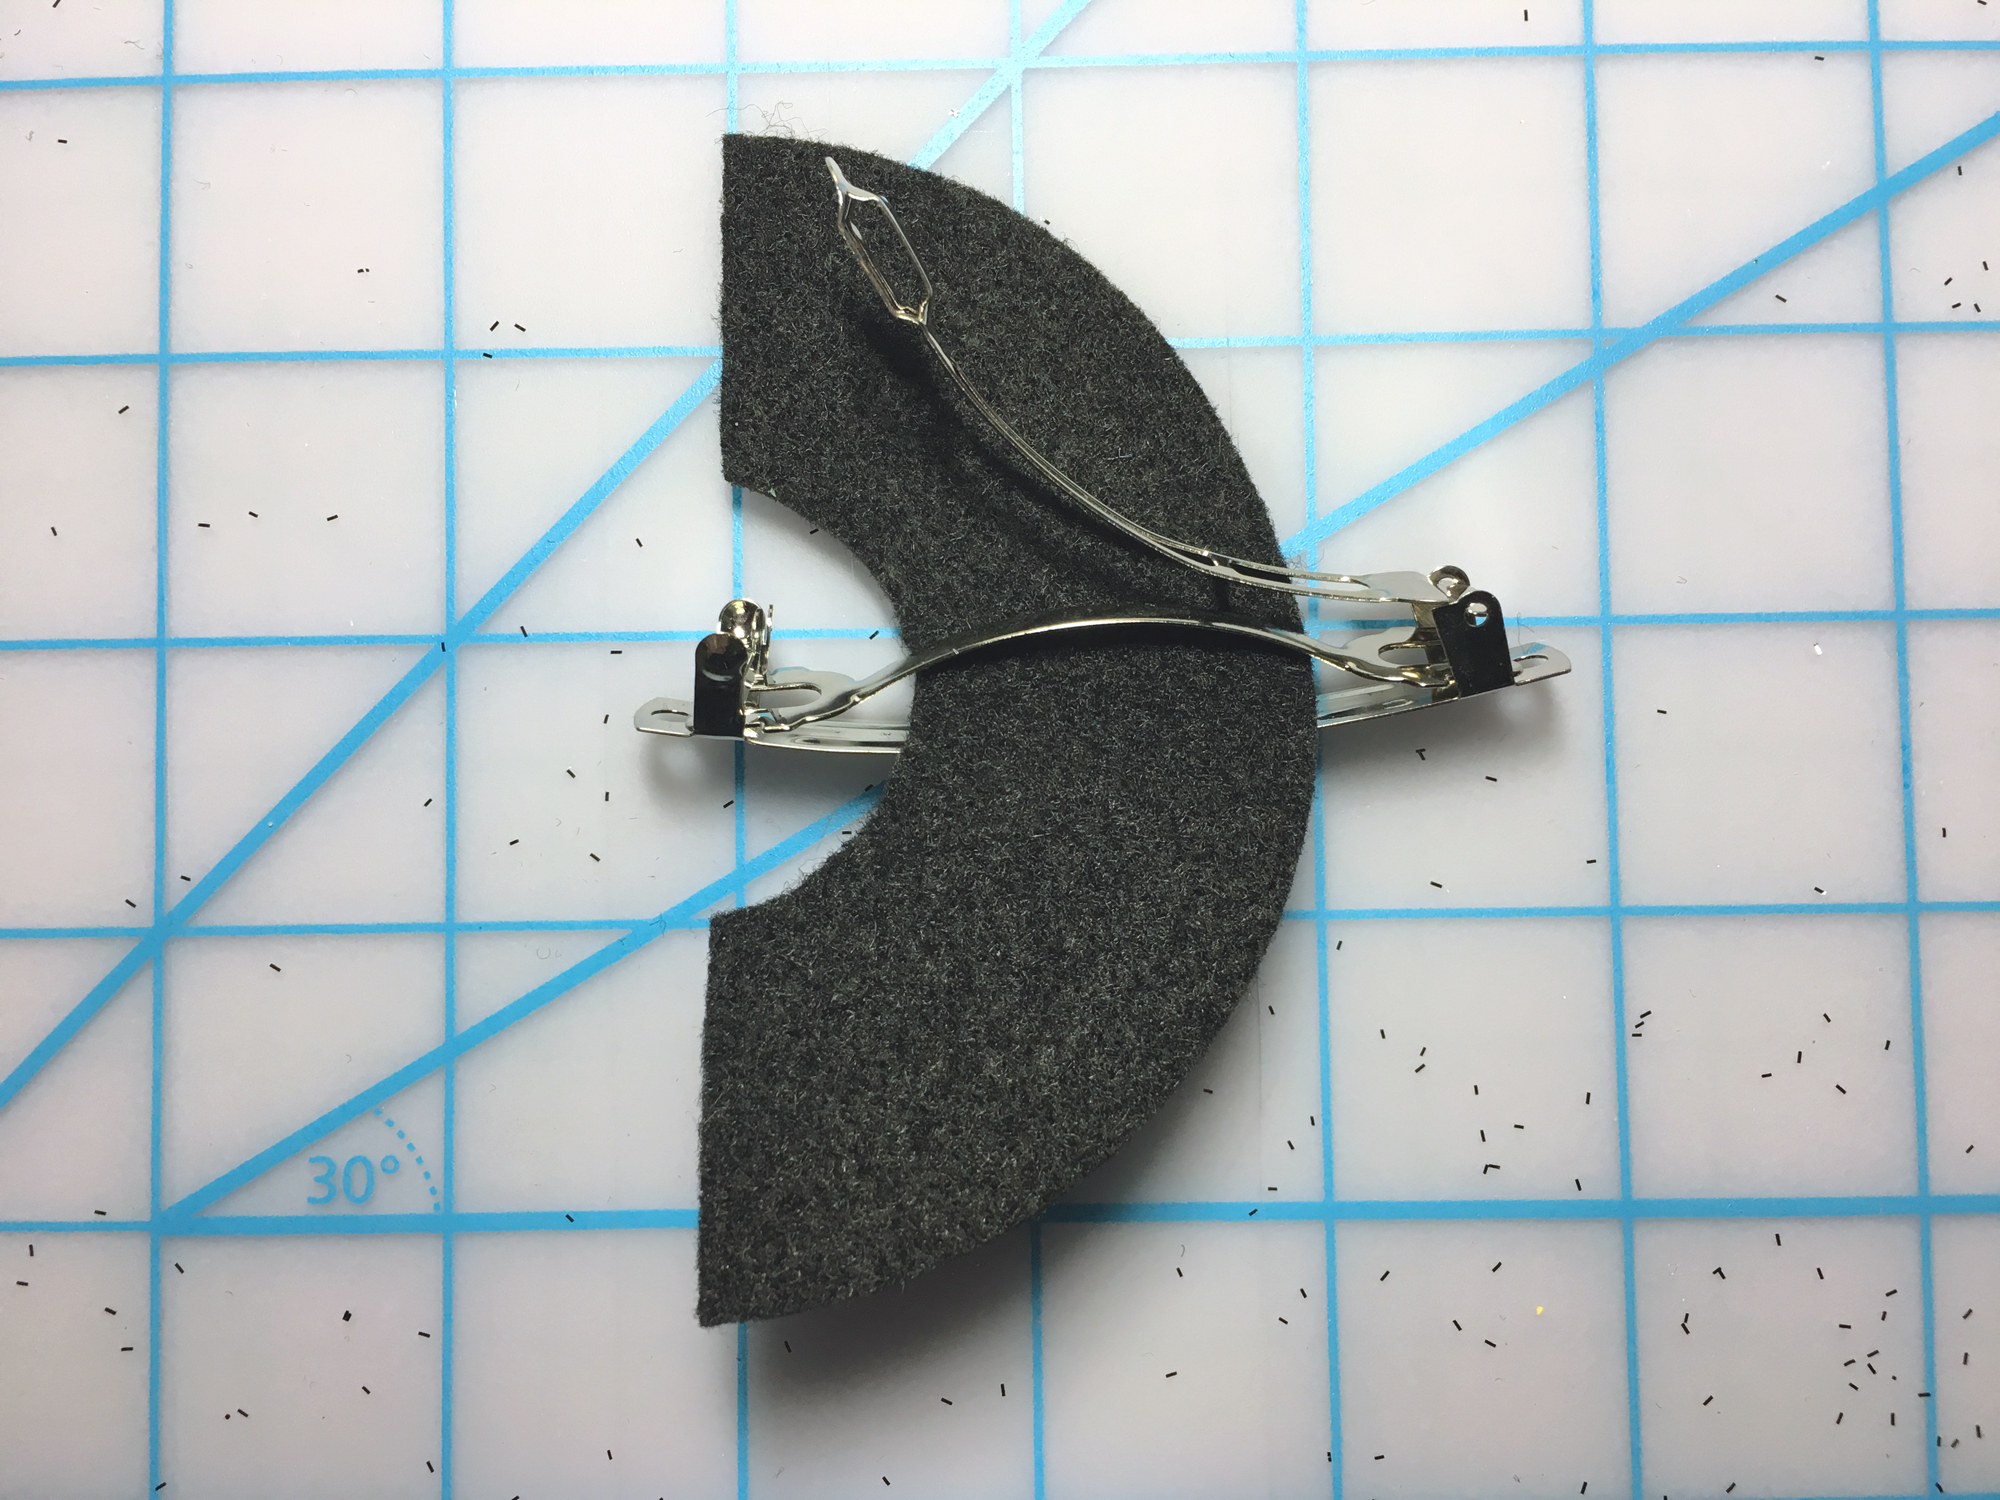
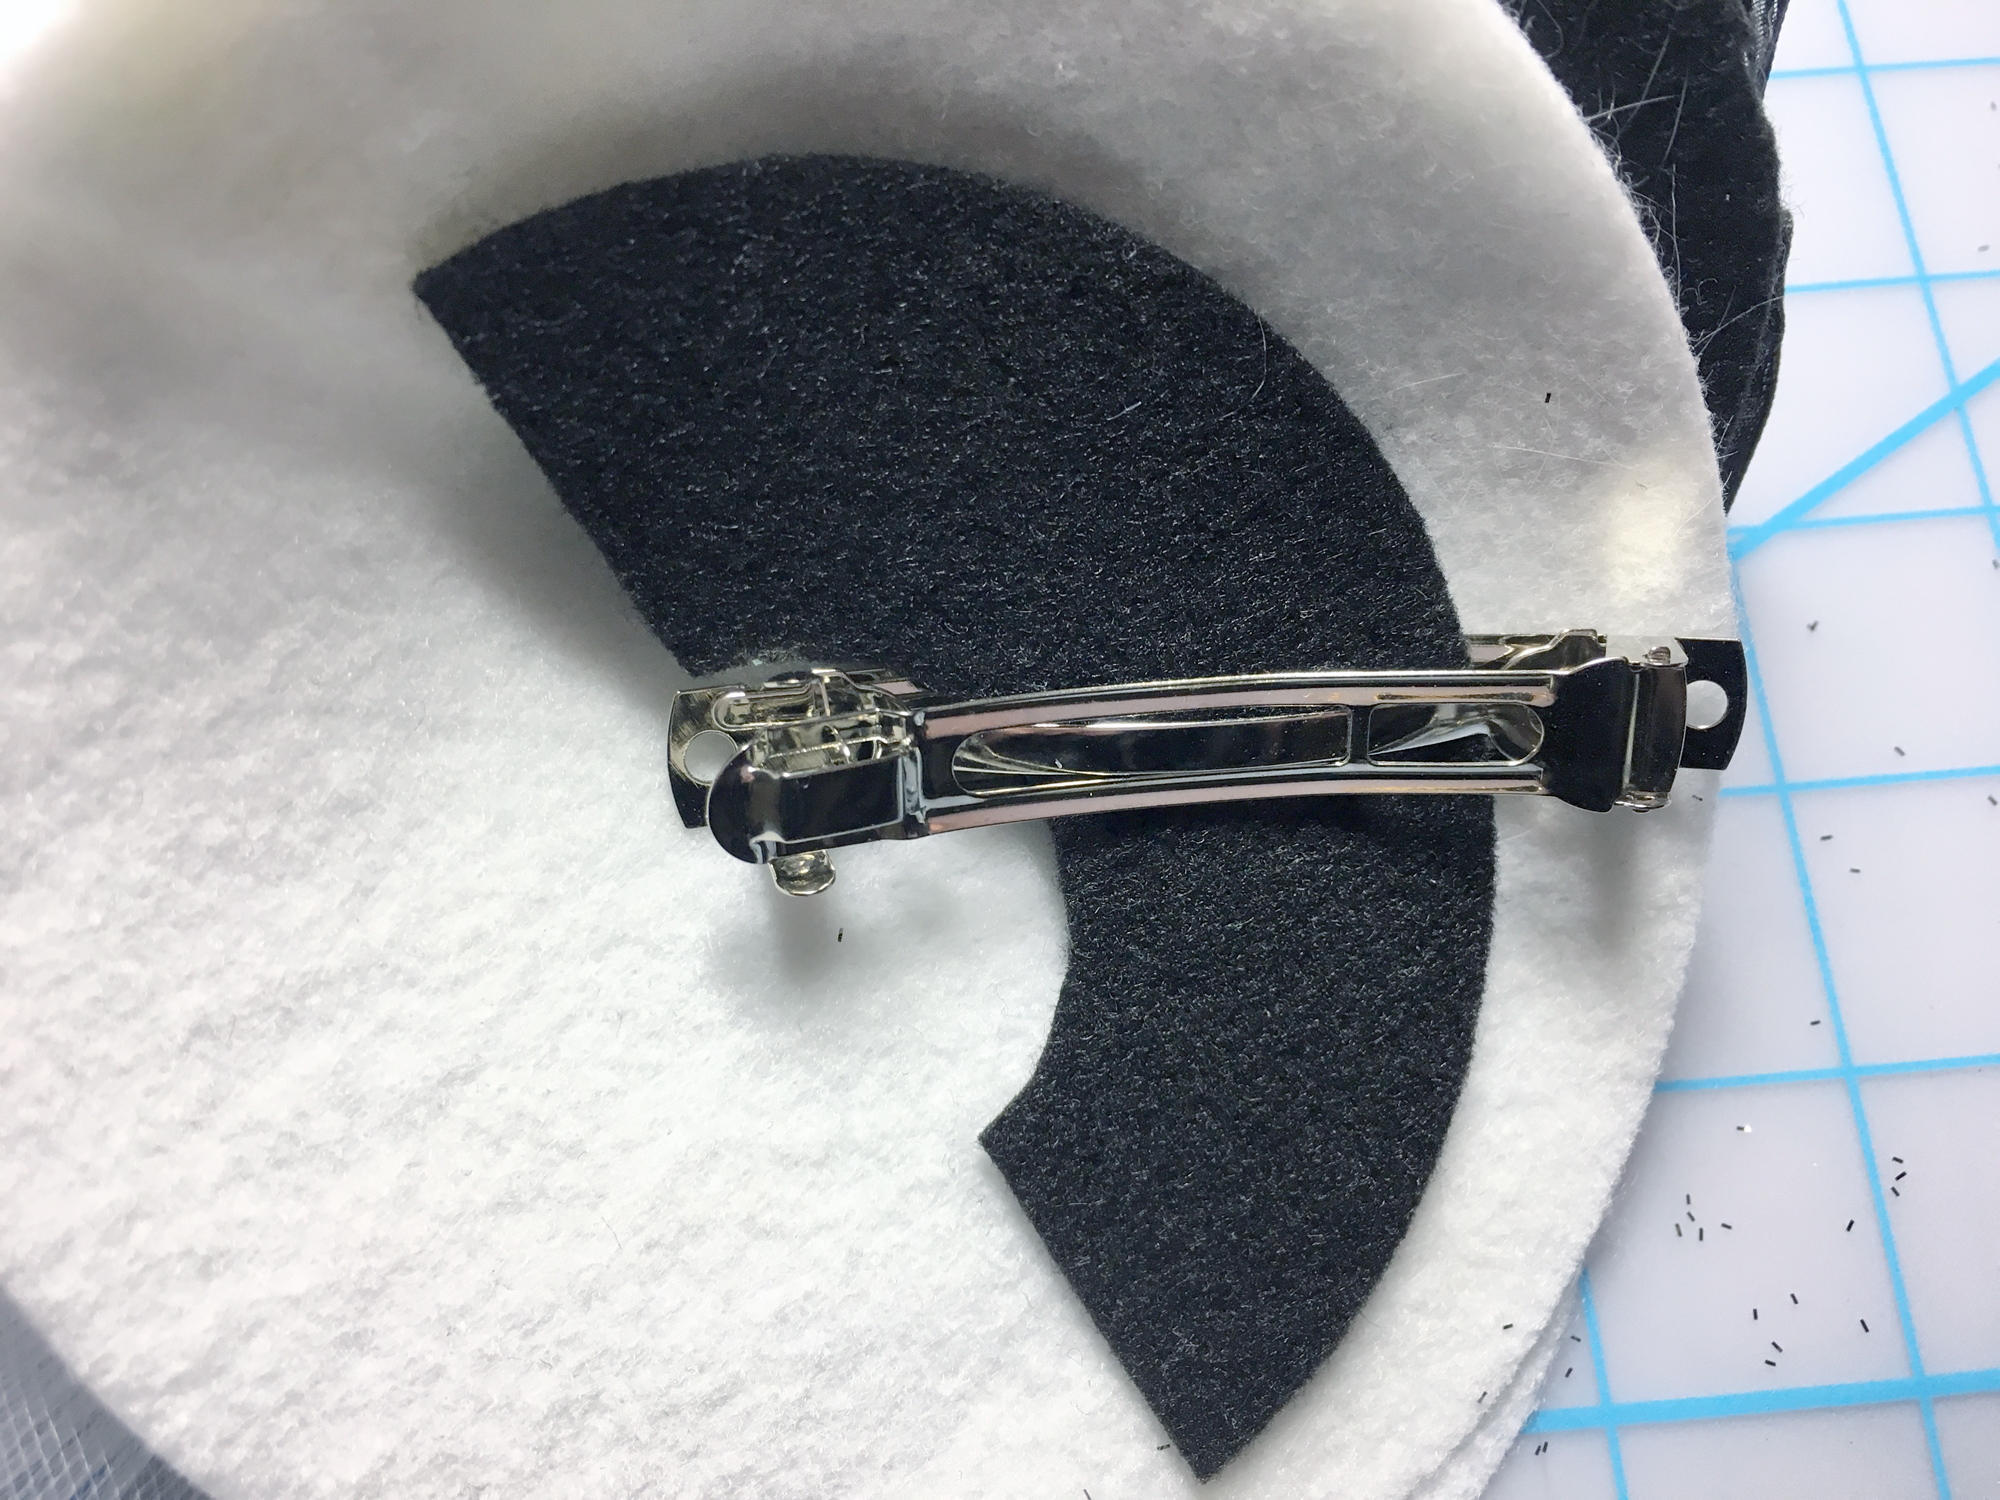
9. You can use an old-fashioned hat pin to hold your fascinator in place, or you can use a barrette. Cut a half circle of felt about 4” x 2”. Trim if needed, then thread through the upper part of the barrette. Glue to the underside of the base of the Fastenator. You will need to determine where/how you will want to wear your fascinator before securing the barrette to make sure it will be placed correctly to work with the way you style your hair.
10. A Fastenator isn’t truly complete until you add feathers. Squeeze glue into the center of the flower then insert the ends of 3 or more feathers and voilà, c’est fini… How adorbs is that!
You can find free patterns to create different types of flowers in Cricut Design Space, or simply search Pinterest for additional patterns and ideas. Whatever the occasion, you can make your fascinator look amazing with felt accents.
You can now find an expanded color line of Kunin® Classicfelt; Kunin® Premiumfelt and Corduroy non-wovens fabrics in cut by the yard at your local Walmart; please inquire as to what is available in your area.