
By Katie Berry
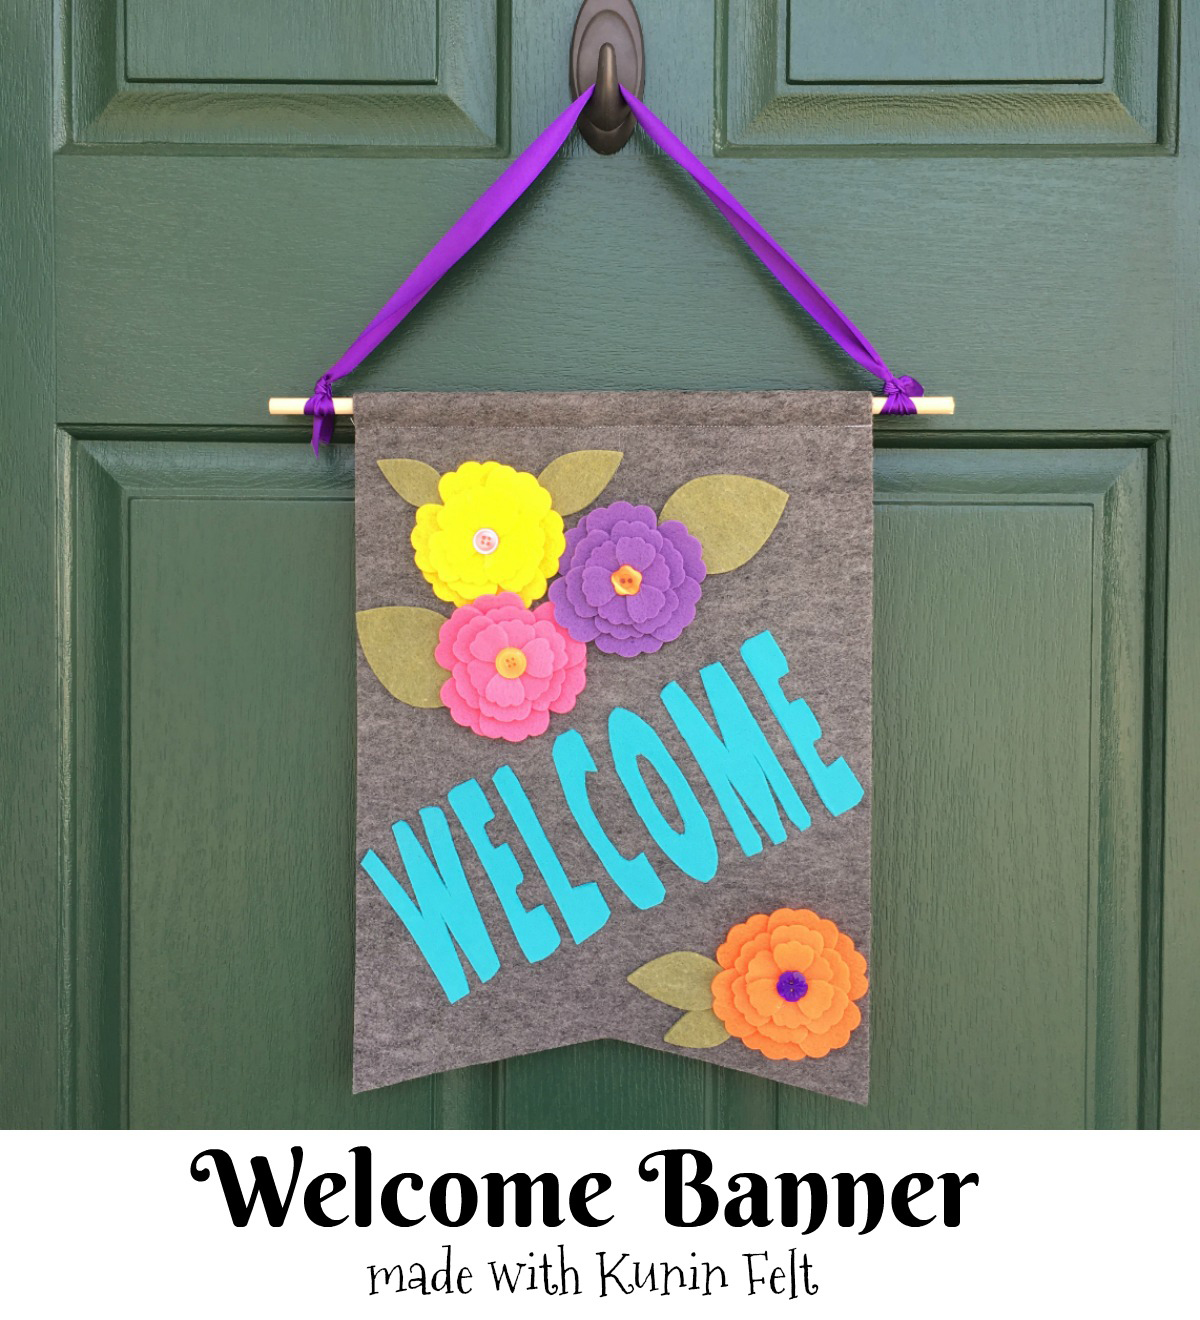
Spring is upon us and the flowers will soon bloom! It’s time to change out that winter door decoration! This felt Welcome Banner is perfect for brightening up your front door!
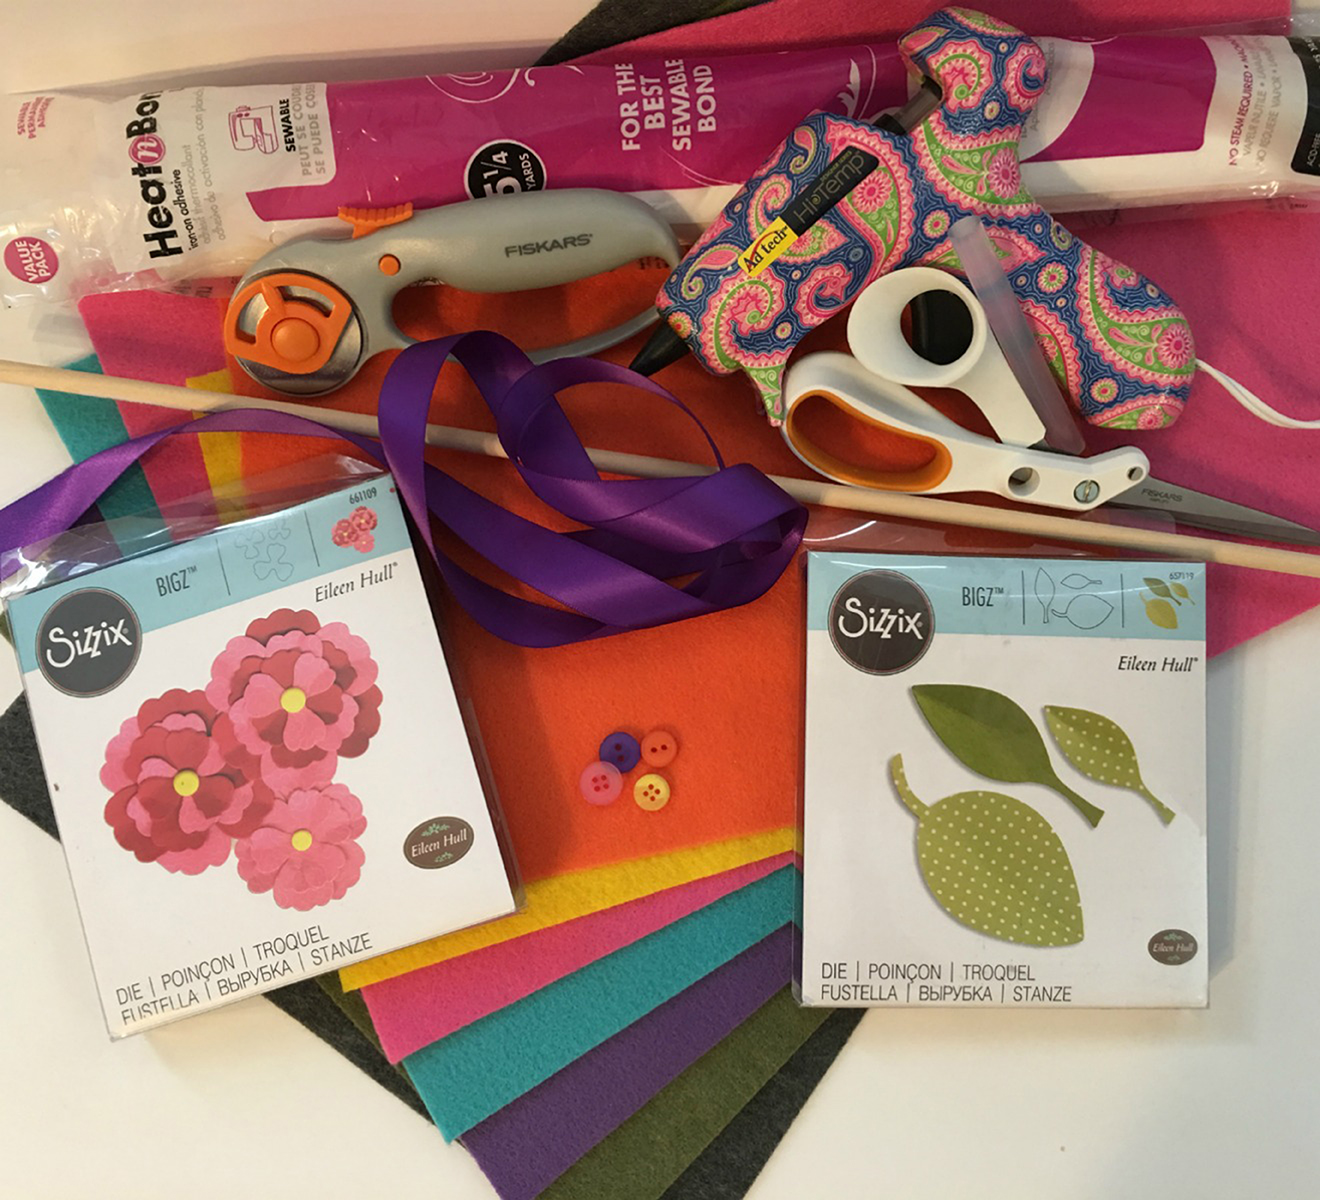
Materials Needed:
- 12” x 18” craft cut of Kunin Premiumfelt™ (1) Lagoon, (1) Violet Sky, (1) Smoke, (1) Olive, (1) Candy Pink
- 9” x 12” craft cut of Kunin Classicfelt™ (1) Yellow, (1) Orange
- Ribbon
- Wooden Dowel, cut to size
- Buttons
- Iron
- Hot Glue Gun and Glue
- Heat ‘n Bond
- Scissors
- Rotary Cutter with mat and ruler
- Ellison/Sizzix Die Cut Machine
- Flower and Leaf dies
How to make it:
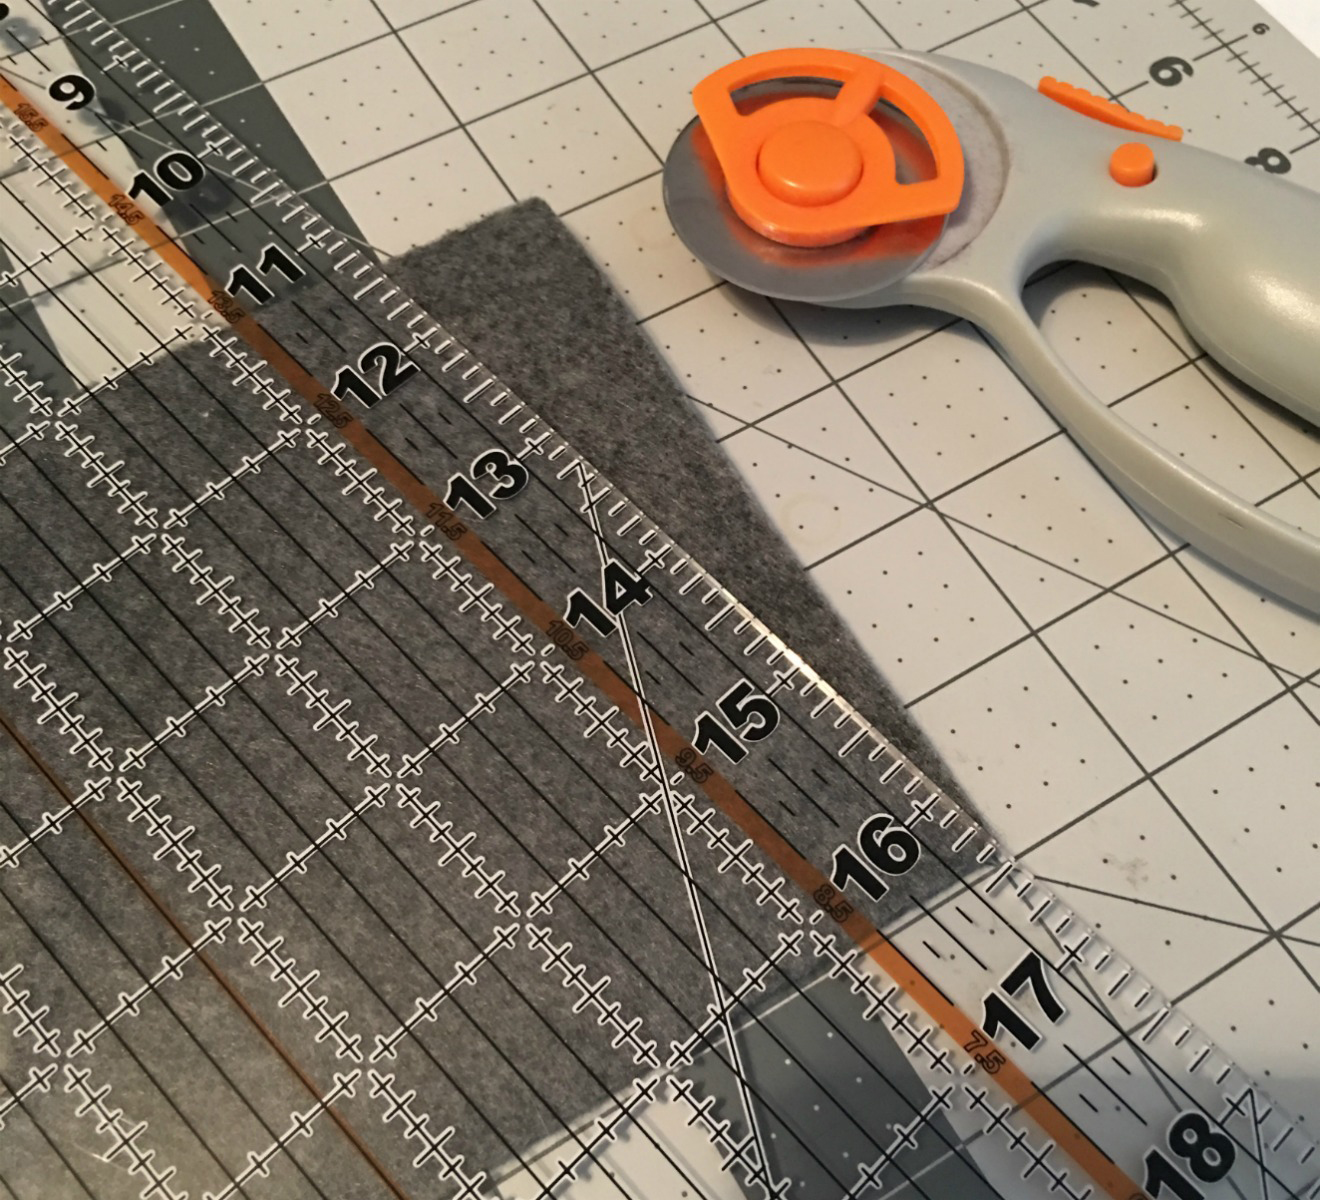
First I started by cutting the banner. I cut it 10”x14”. Then I folded the banner in half lengthwise. Using my rotary cutter, mat and ruler, I cut out a small right triangle with the highest point in the middle. I didn’t want it to be a high triangle so I didn’t go too far up the center.
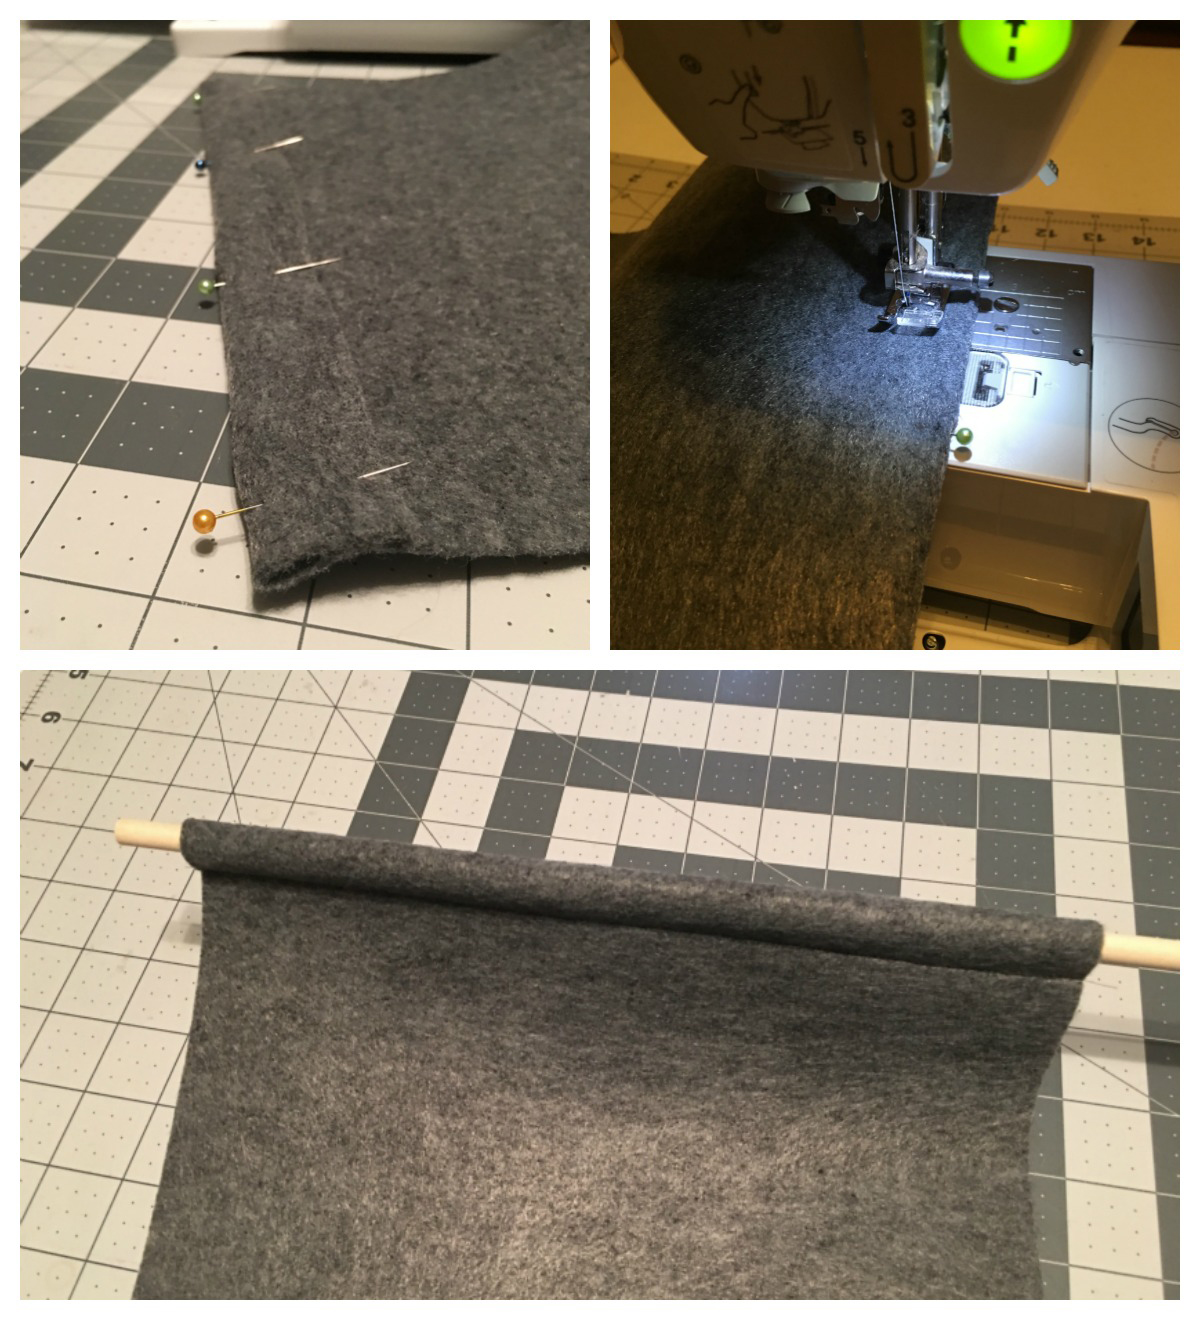
After I cut the triangle, I unfolded the banner and folded an inch down at the top, pinning it in place. Using the sewing machine, I sewed the flap down. Then I inserted my dowel.
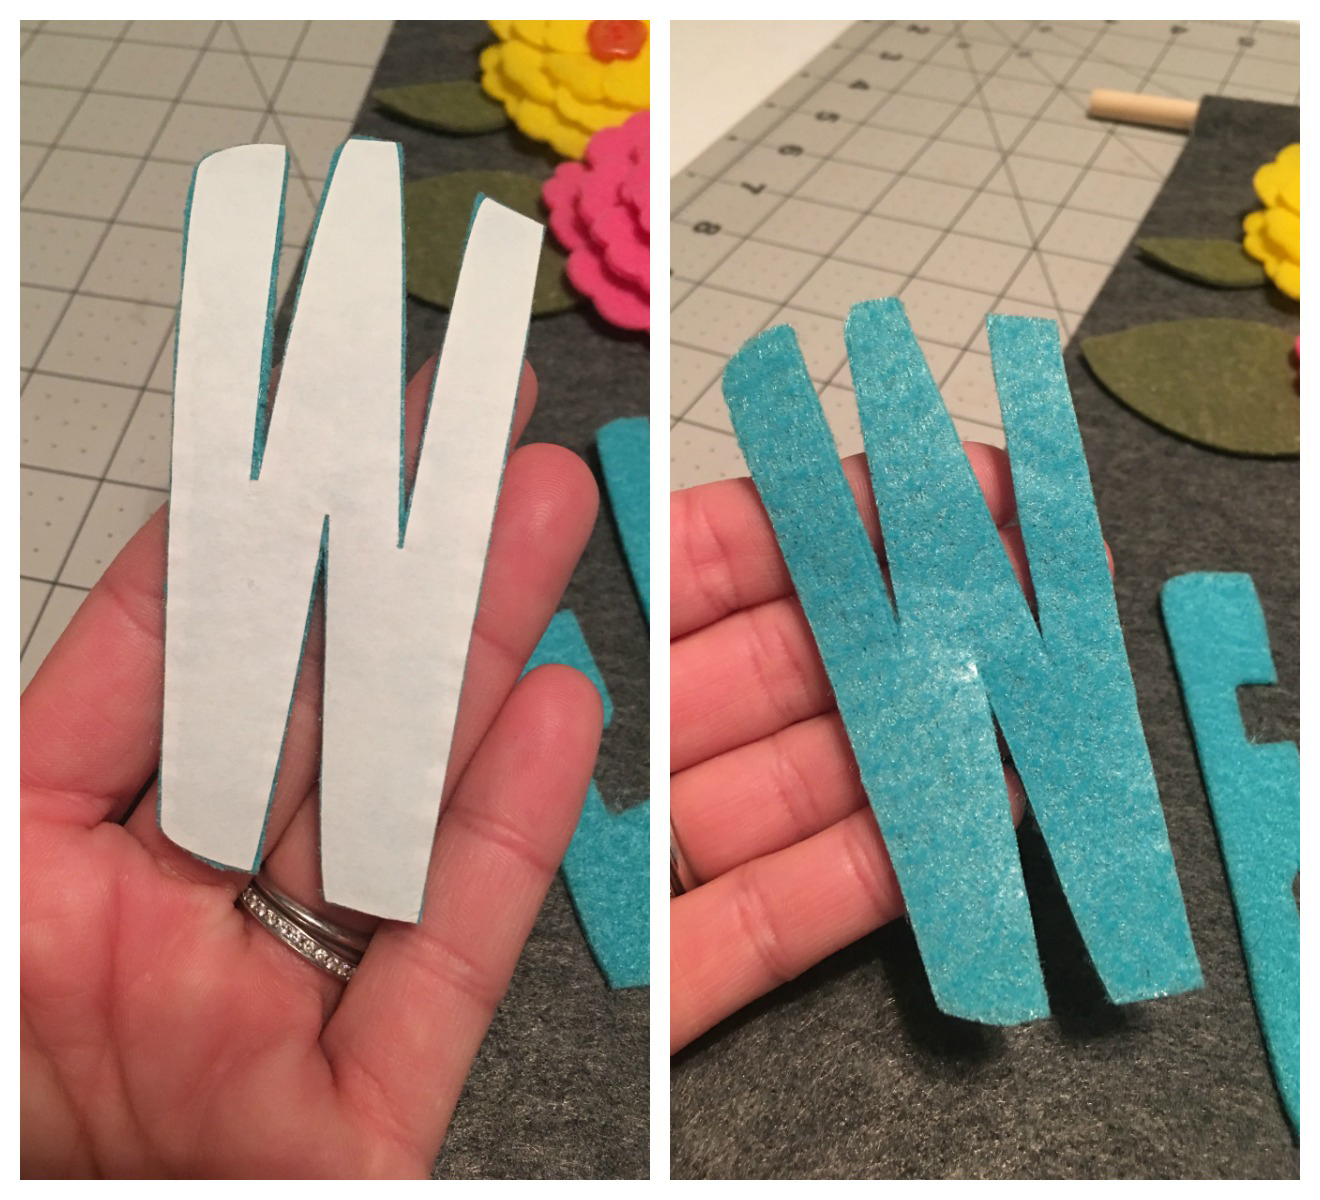
Then the banner was ready to be decorated. Using an electronic cutting machine, I cut the word WELCOME out of Heat ‘n Bond. Then I ironed the letters to my Lagoon colored felt.
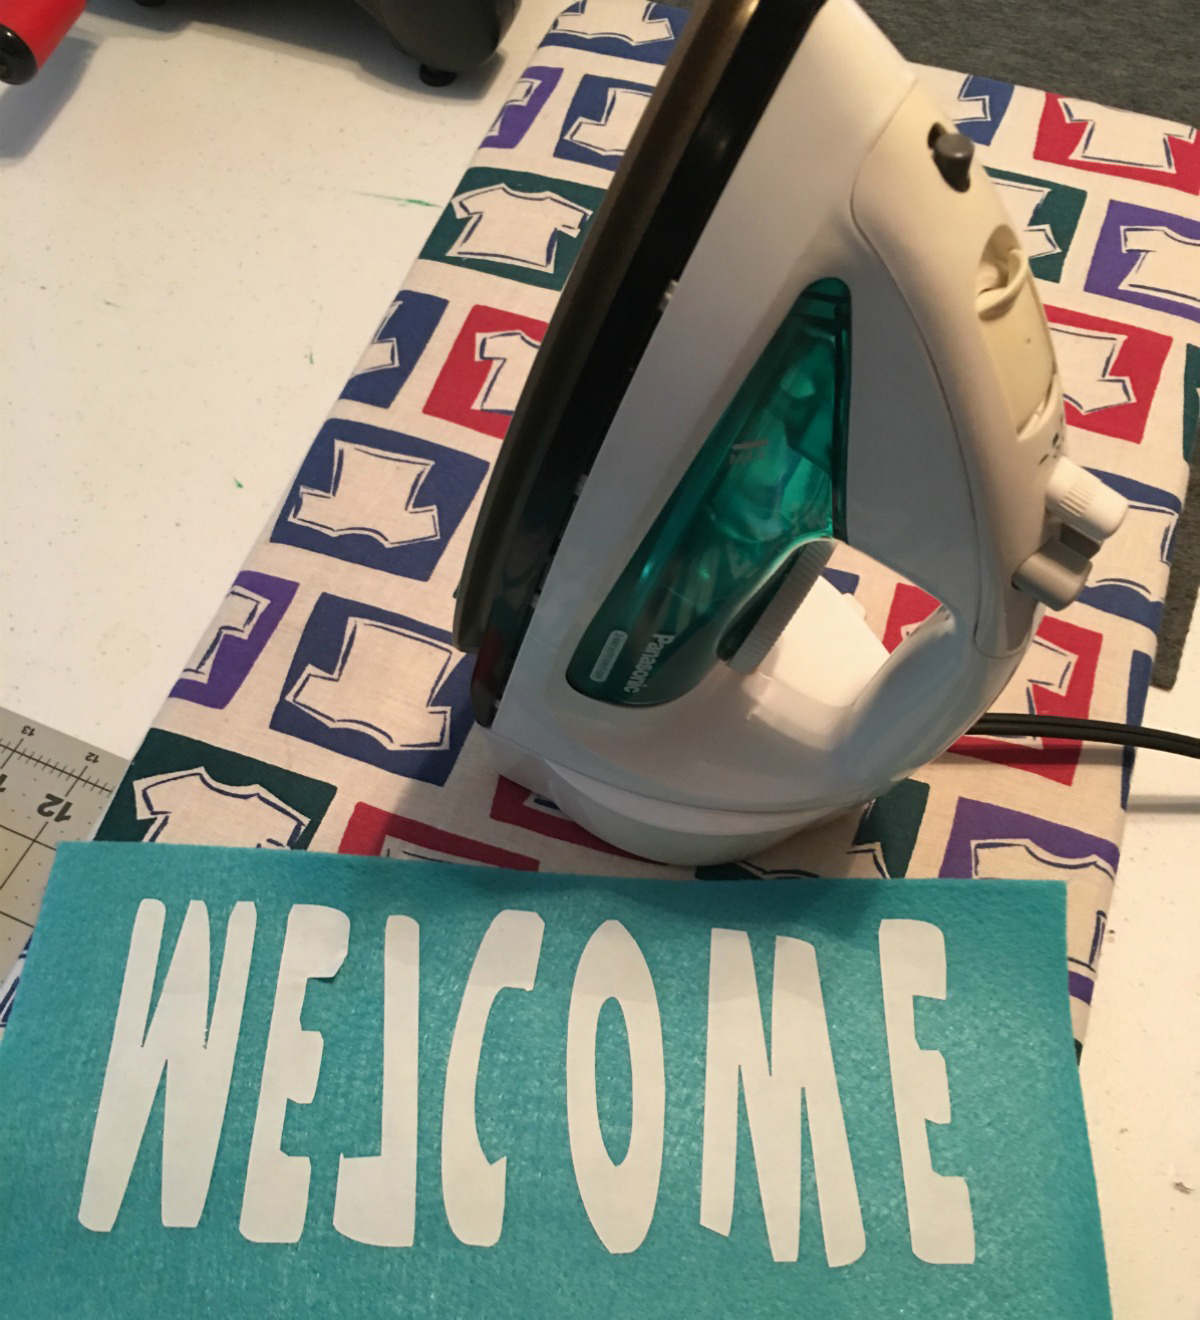
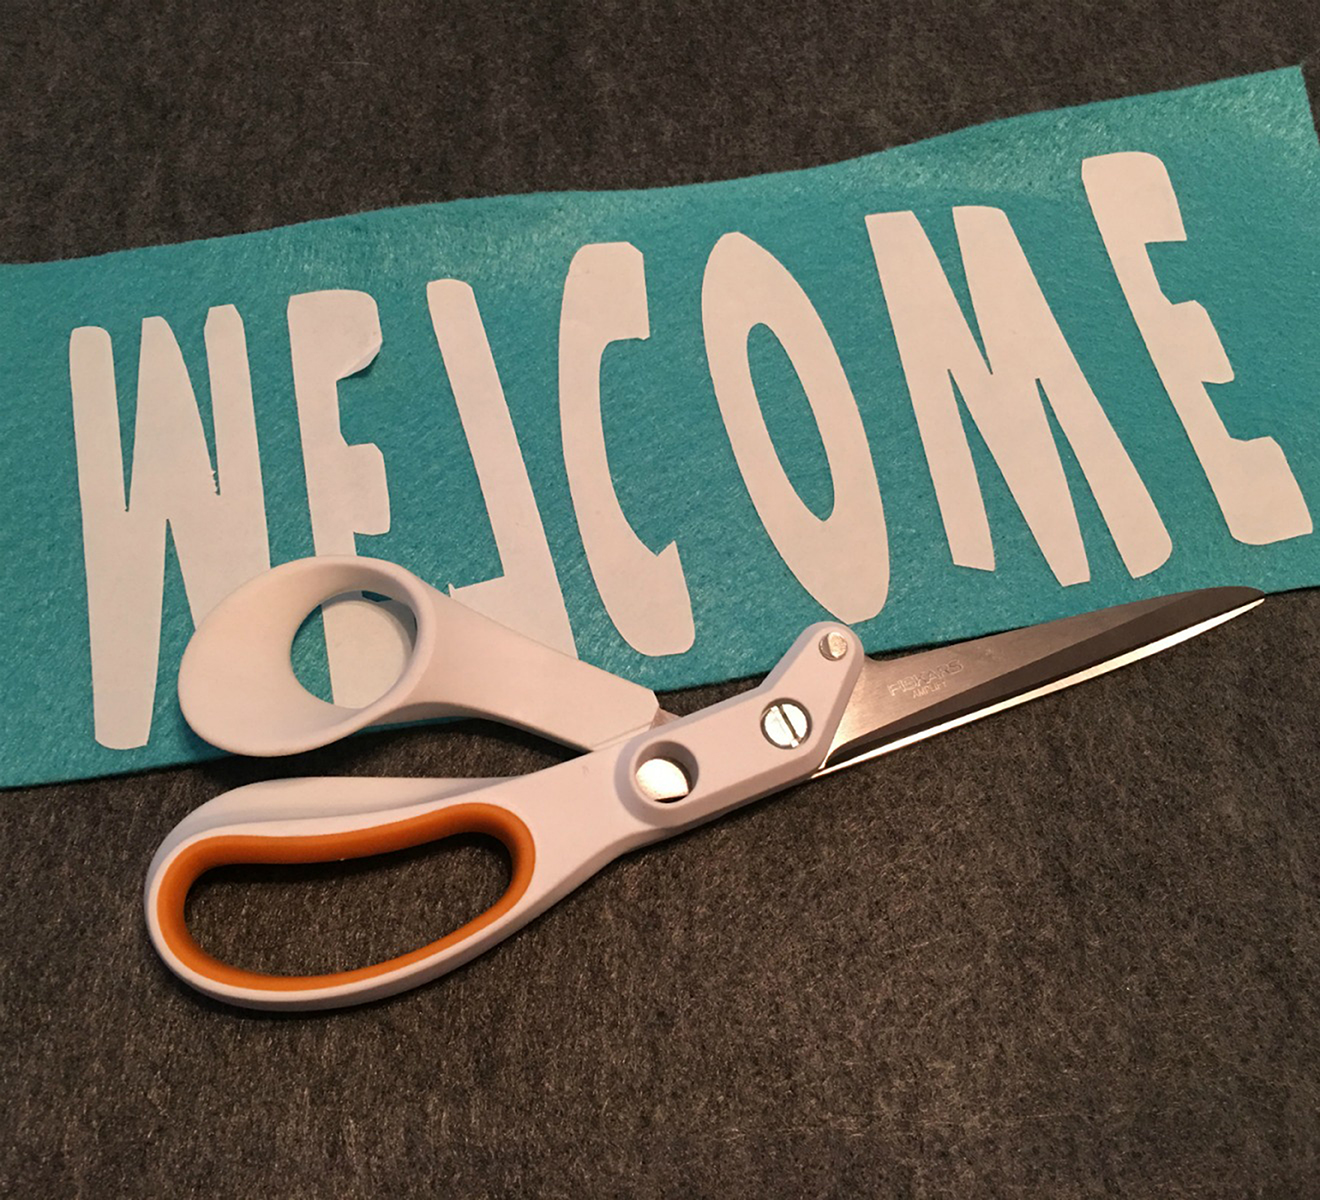
Then I cut my letters out. If you wanted to (or if you don’t have an electronic cutting machine), you could easily just cut the letters out by hand.
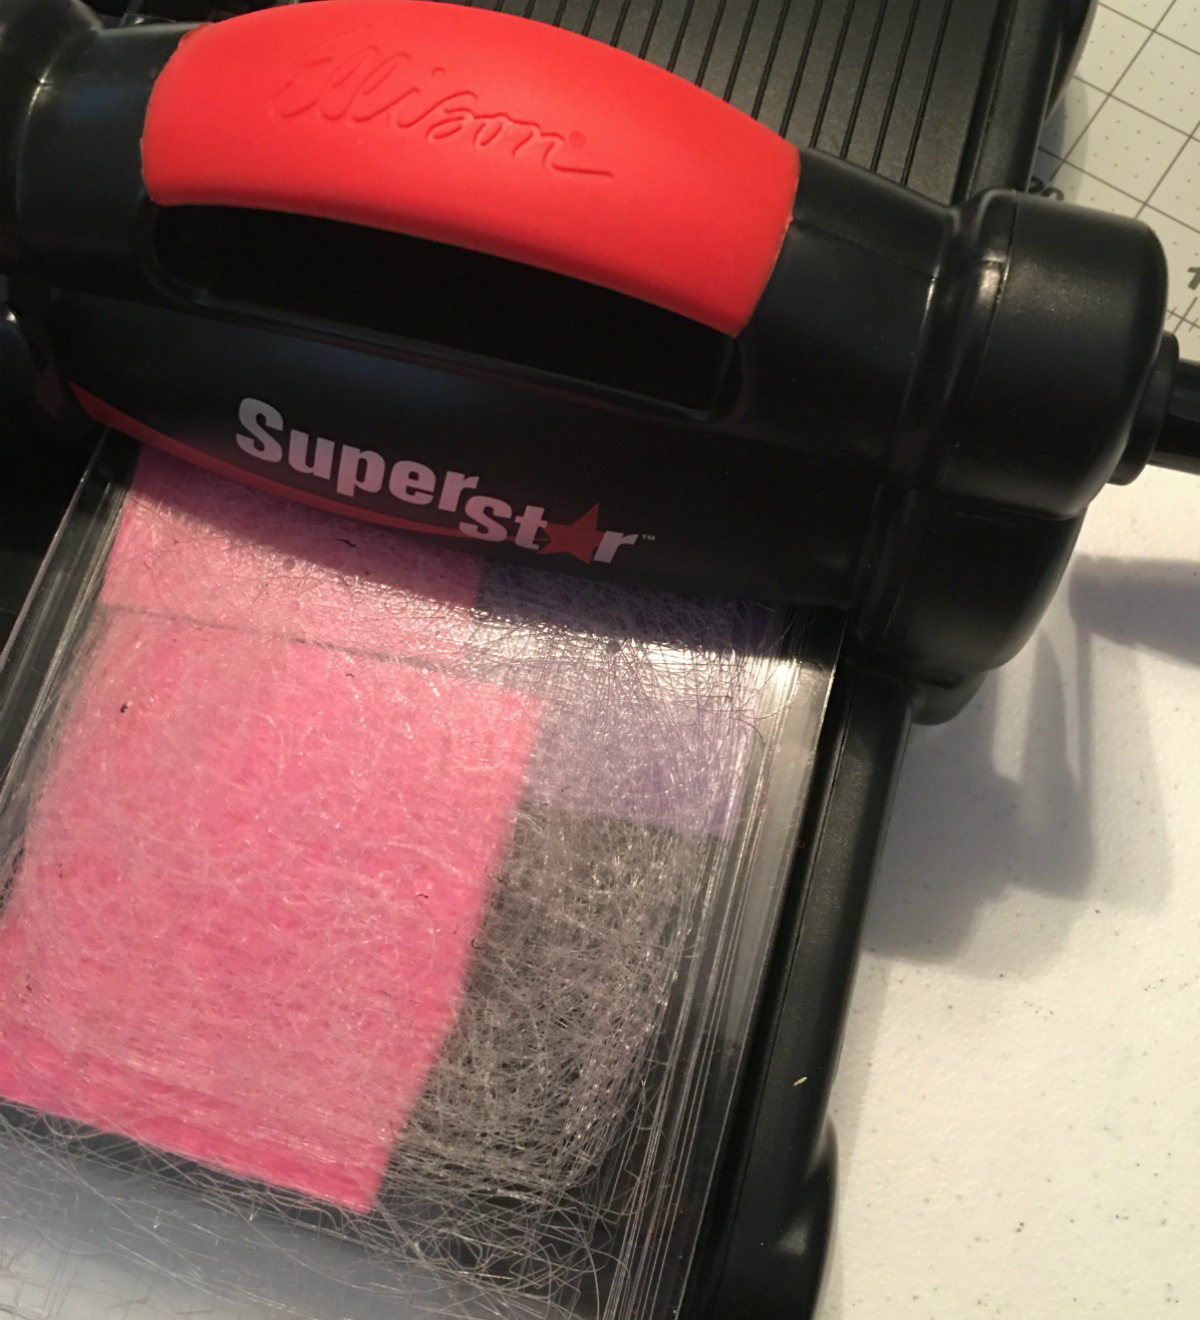
Next, I moved on to my flowers. I used Eileen Hull’s Pansy die and Leaves die from Sizzix and the Ellison SuperStar Die Machine to cut my flowers and leaves.
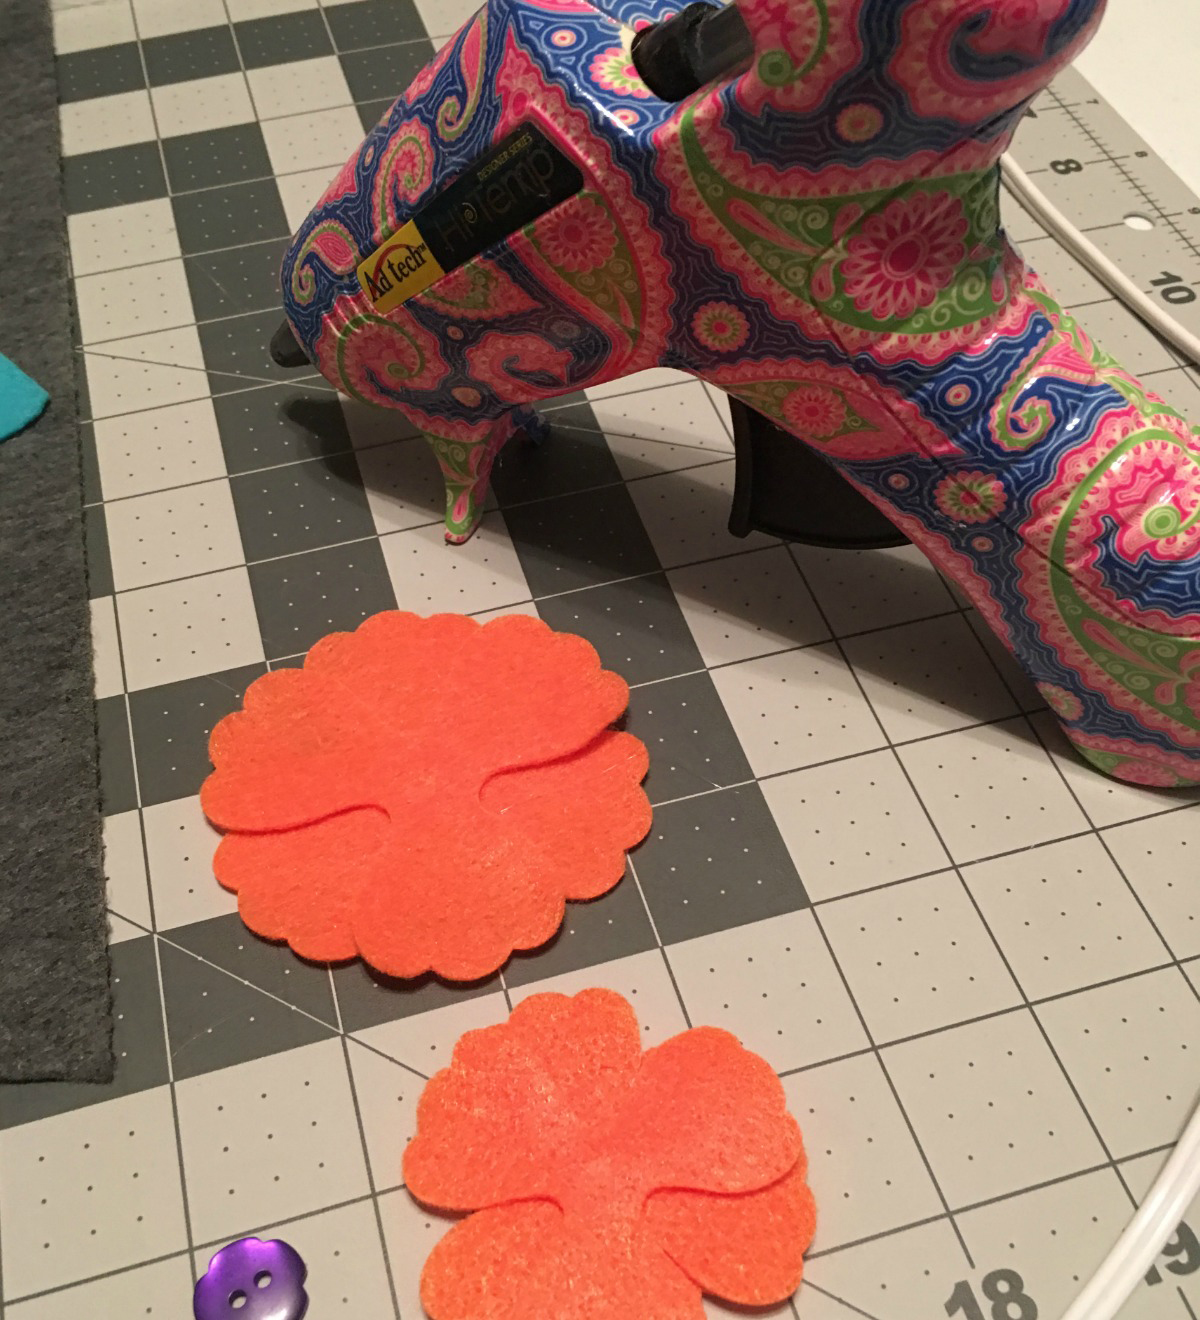
Using my hot glue gun, I glued the flowers together, laying pieces to make a full flower. Then I glued a button on the top of each.
Once my flowers were done, I moved onto the placement of the pieces. I made sure I knew where I wanted everything to go.

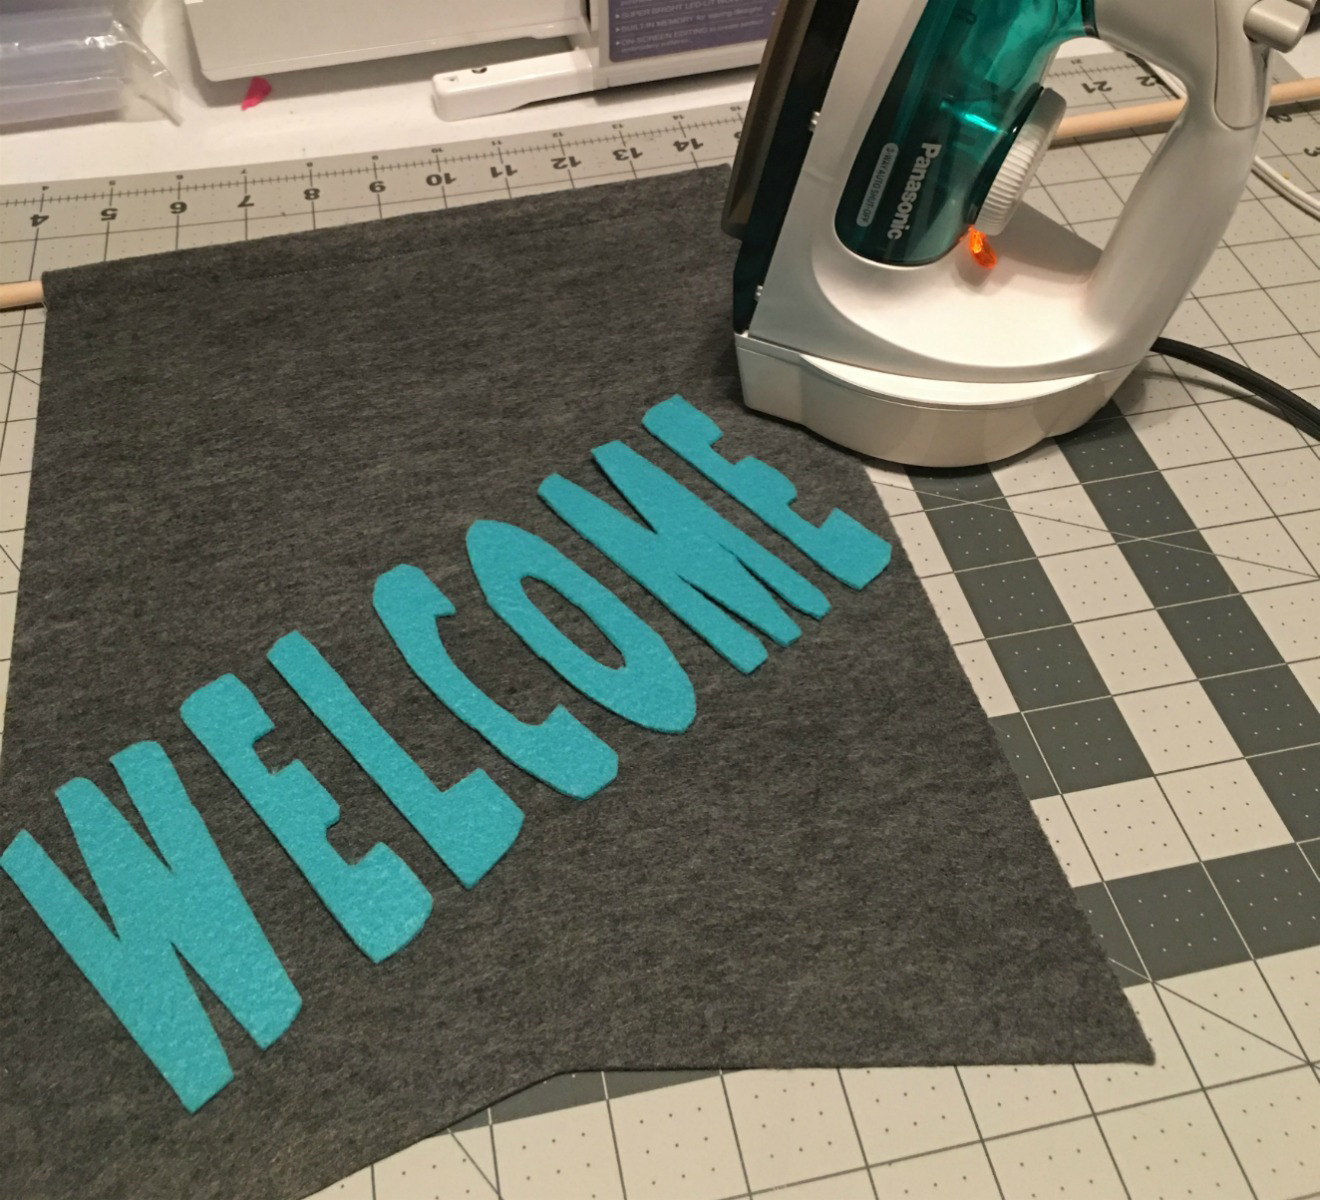
I removed to paper from the Heat ‘n Bond from the back of my letters and laid them in place.
Then it was time to iron the letters in place. Because the felt is a little thick, it took some pressing down to get the Heat ‘n Bond to stick.
Once the letters were ironed in place, I hot glued the flowers down in place, making sure to glue to leaves underneath the flowers.

Then it was time to tie the ribbon onto the dowel and then it was done.
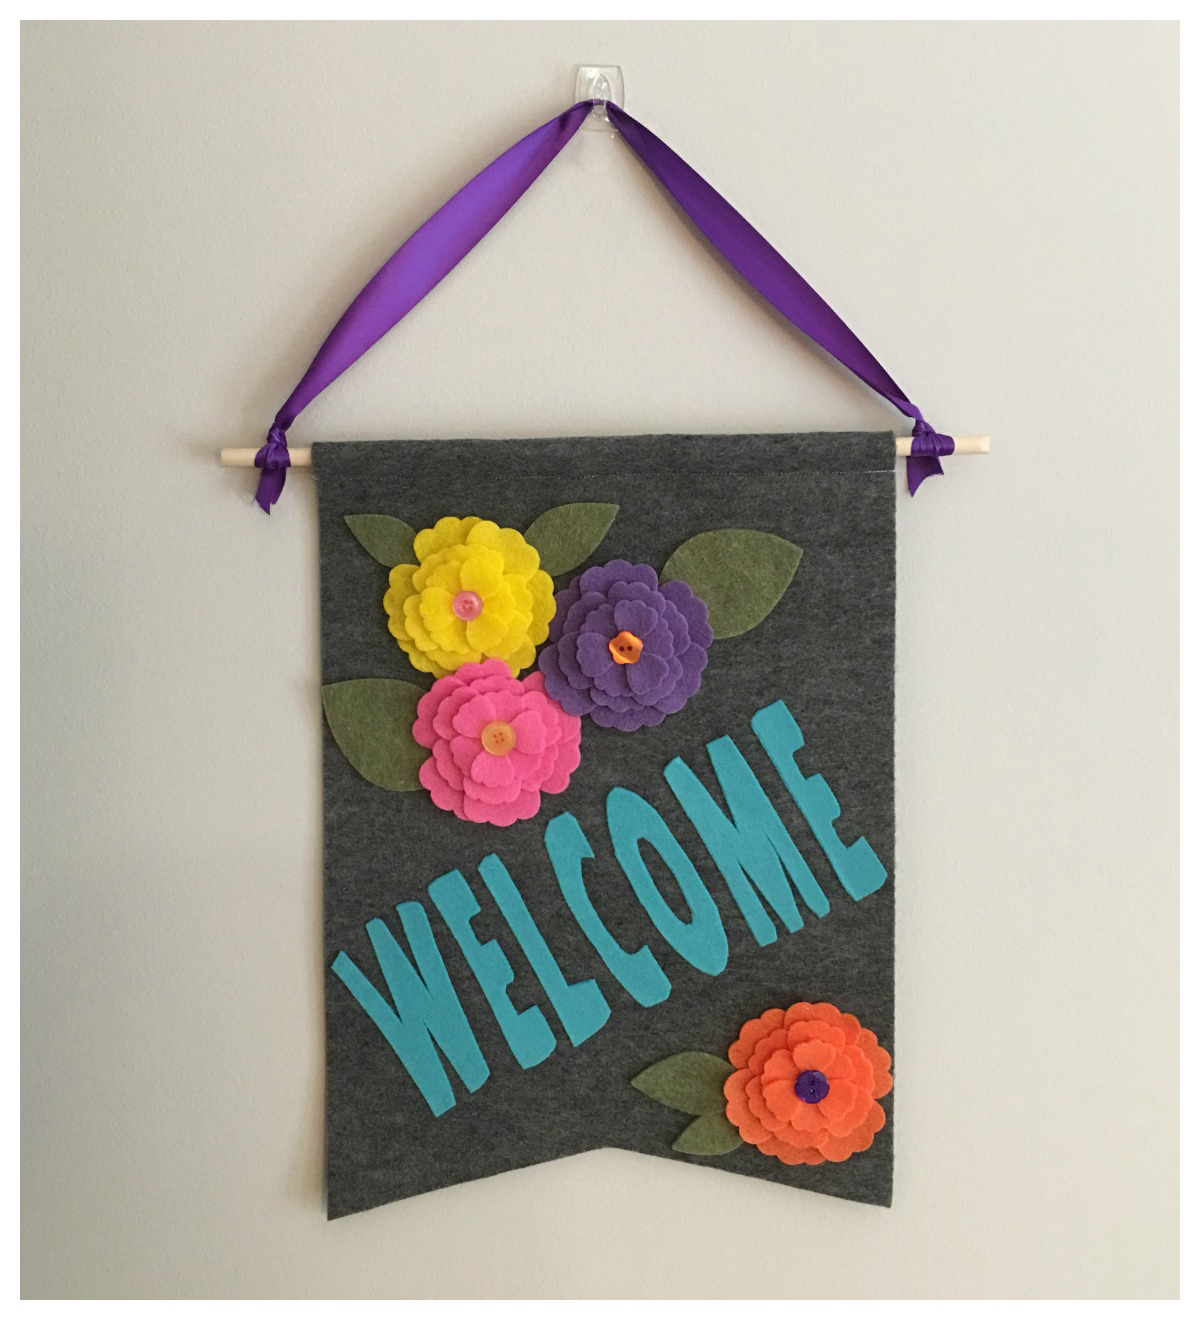
I love this banner and it looks really good on my front door, just in time for Spring! I hope you like it as much as I do! Think of all the possibilities you could come up with for a spring banner using Kunin felt!!!!!
You can now find an expanded color line of Kunin Eco-fi Classicfelt; Eco-fiPlus™ Premiumfelt and ShaggiChic non-wovens fabrics in cut by the yard at your local Walmart; please inquire as to what is available in your area.
Happy Crafting,
Katie Berry
A Sweet Berry Designs
www.asweetberrysblog.com
FB: A Sweet Berry Designs
IG: asweetberrydesigns
How fun to welcome Spring with this gorgeous banner! Great project Katie!