
I am so pleased to have the talented Christie Nieri Troxell of Ritzy Parties guest posting in the Kunin Classroom this week. These cuff bracelets are super stylish and simple to make. Enjoy! Debra
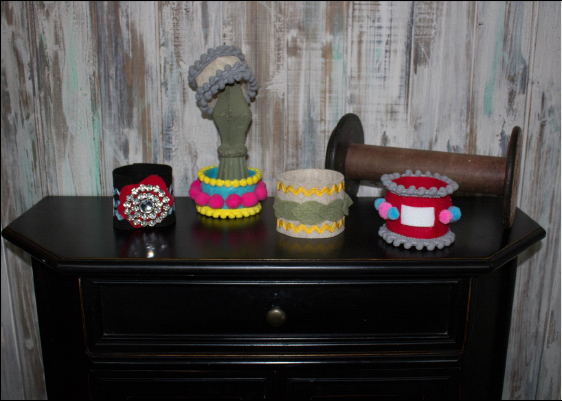
When the weather turns crisp and the leaves change color, it’s time for boots, scarves, and sweaters, and all things pumpkin spice. What better material for some fun fall accessories than thick, cozy felt? These charming and fashionable cuffs are soft and comfortable to wear, and add a touch of whimsy to your fall fashions. I’ve created five fun designs to inspire your autumn accessorizing aspirations, as well as two holiday designs that are perfect for gift giving. They’re designed for makers of all skill levels. You’ll want to create plenty; these darling felt jewelry bracelets make a welcome stocking stuffer or holiday gift enhancement, and the designs can be modified to suit any individual style, or color preference.
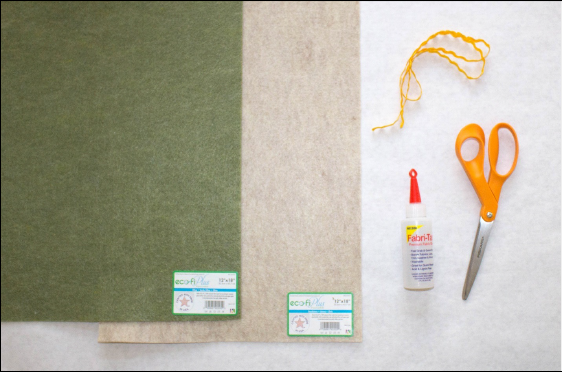
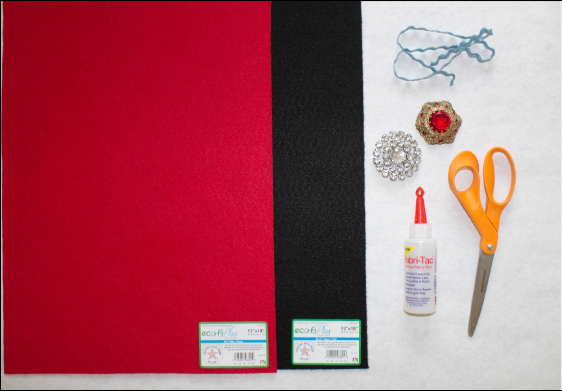
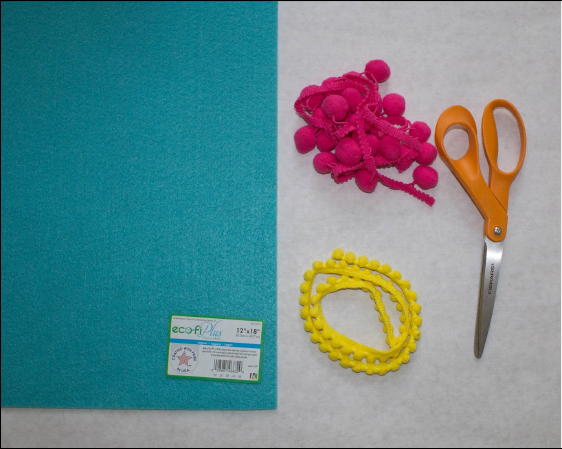
What You’ll Need:
- 9″ x 12″ craft Cuts Kunin Premiumfelt: 1 Sandstone, 1 Red, 1 White, 1 Black, 1 Olive
- Expo International Peapod Trims in Grey and Yellow
- Expo International Ric Rac Trims in Turquoise and Gold
- Expo International PomPom Trim in Hot Pink
- Thrifted costume jewelry findings, preferably with rhinestones or gemstones
- Beacon Adhesives Fabri-Tac Glue
- Scissors
- Ruler
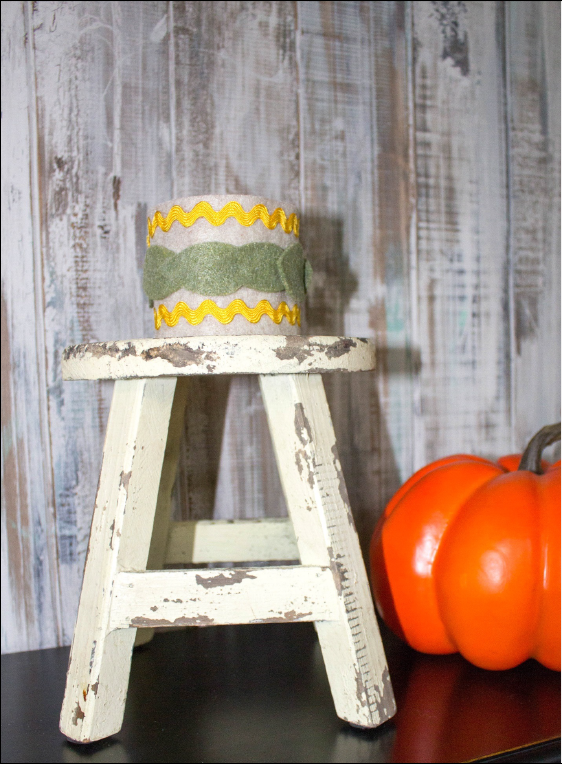
Design 1: Fall Leaves
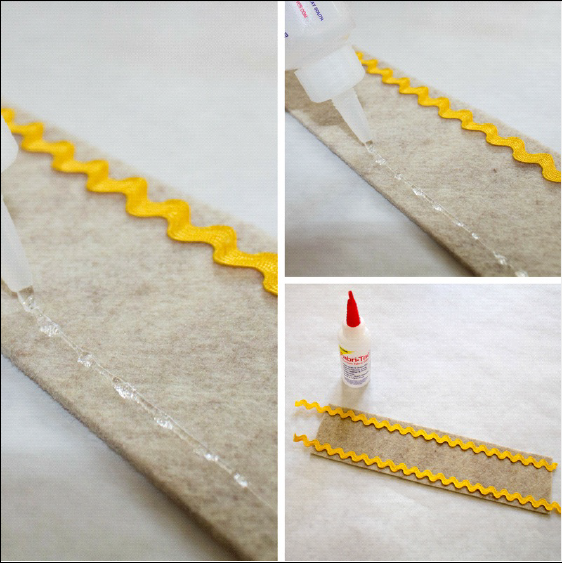
Step 1: Trim sandstone felt to cuff size, approximately 9” long by 3” wide.
Step 2: Add a line of gold ric rac trim, horizontally across the top and bottom of the cuff using Fabric-Tac.
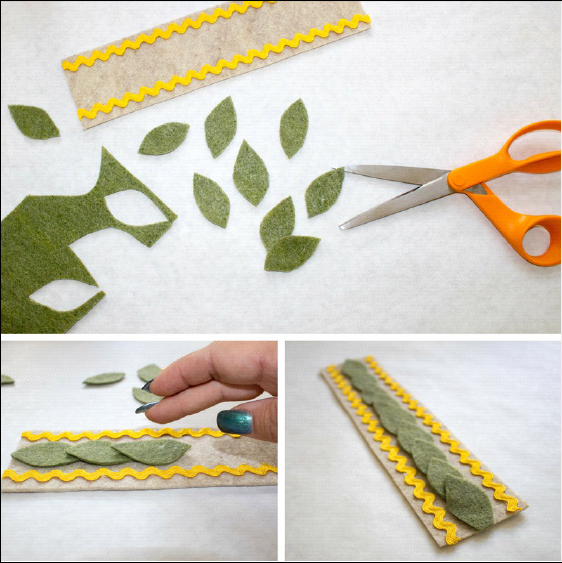
Step 2. Trim olive felt into leaf shapes using scissors. To achieve this shape, cut 2” circles, fold in half, and trim ends to a point.
Step 3: Lay the cuff flat on work surface, then glue down the first leaf horizontally on cuff using FabriTac.
Step 4: Place a second leaf onto the cuff, slightly overlapping the first, and glue.
Step 5. Continue overlapping and gluing down leaves until two inches of undecorated felt remain. Allow to dry.
Step 6. Curve the cuff into a circle, and glue the ends together, slightly overlapping by about an inch.
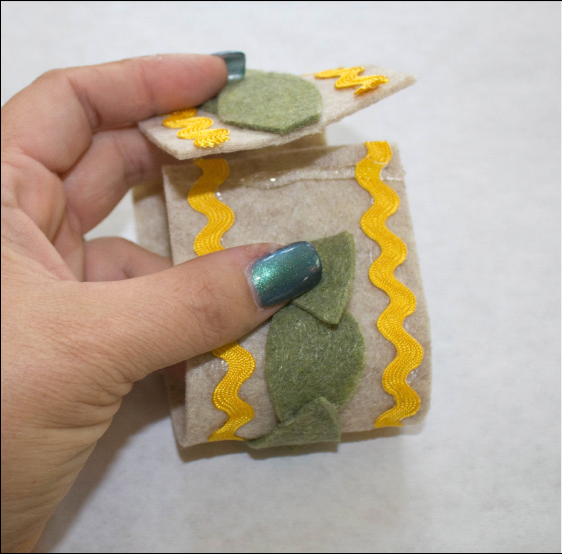
Step 7. Add any remaining leaves to conceal the seam. Allow to dry overnight.
Design 2: Natural Beauty
Step 1: Trim sandstone felt to cuff size, approximately 10” long by 3” wide.
Step 2: Curve the cuff into a circle, and glue the ends together, slightly overlapping by about an inch. Allow to dry.
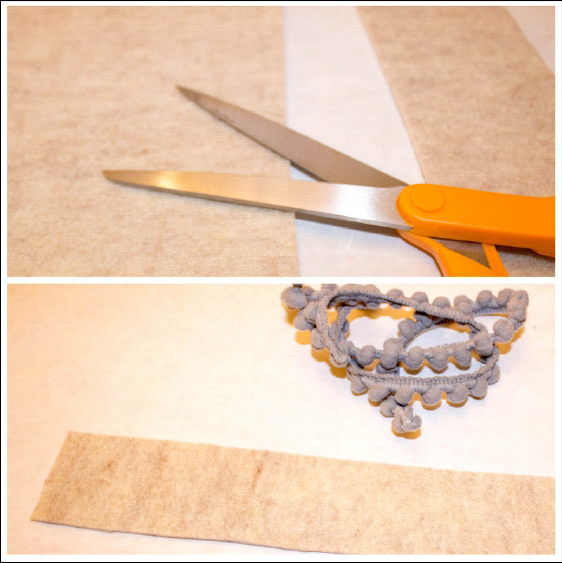
Step 3: Wrap the cuff with grey pompom trim to measure. Cut to fit, then glue with the straight edge of the trim facing the center of the bracelet. We layered two rows of this cute trim on each side.
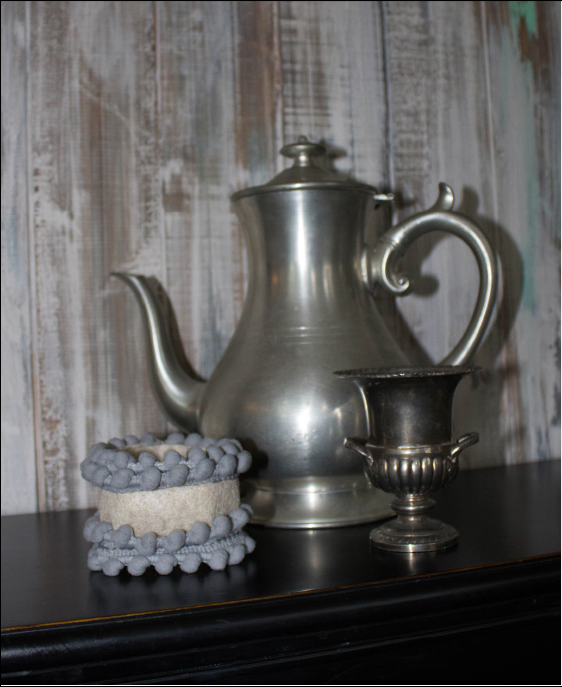
Step 4. Repeat with a second section of trim, and place it opposite the first. Glue with FabriTac.
Allow to dry overnight.
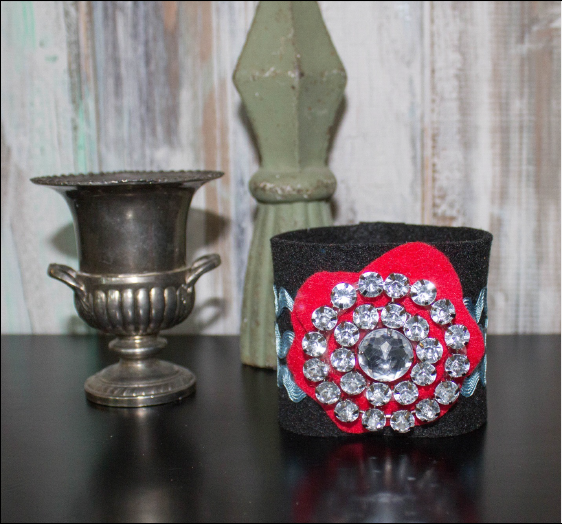
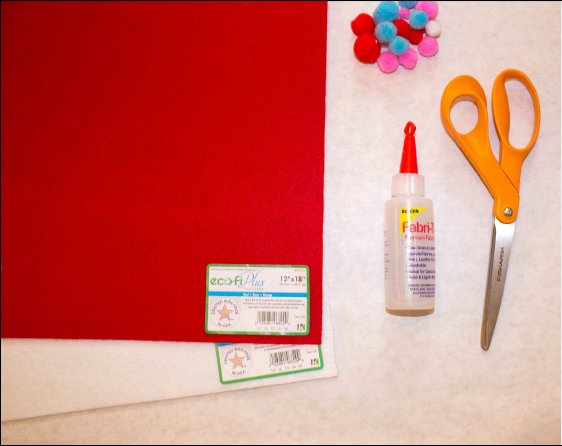
Design 3: Bejeweled Holiday
Step 1: Trim black felt to cuff size, approximately 9” long by 3” wide.
Step 2: Measure a 10” section of turquoise ric rac and adhere to center of cuff horizontally.
Step 3: Use scissors to cut circles from the red felt, imperfect shapes are great for this design. Cut one circle to approximately 3” diameter, and one to 2” diameter.
Step 4: Adhere the first circle to the center of the cuff, followed by the second, and if needed, the third, using Fabri-Tac.
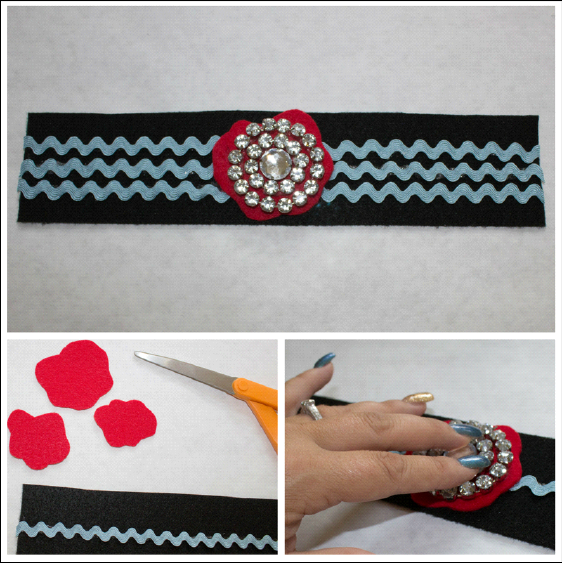
Step 5. Select a favorite jewelry finding to take center stage on your cuff. Round or oval pieces that can lay flat are best. My personal favorite is vintage rhinestones, so I used a piece from an old brooch that I found.
Step 6: Curve the cuff into a circle, and glue the ends together, slightly overlapping by about an inch.
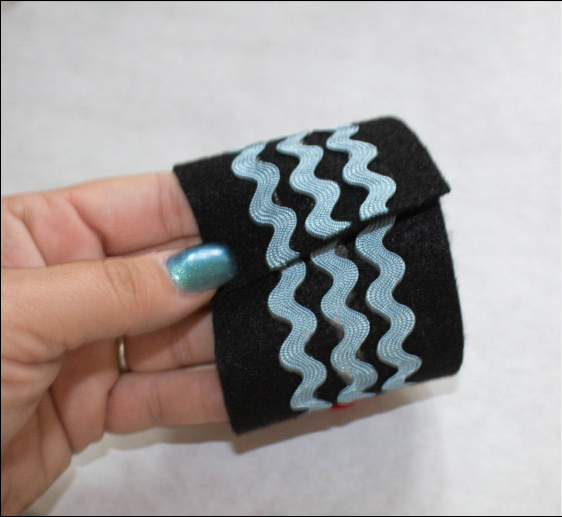
Allow to dry.
Design 4: Carnival of Color
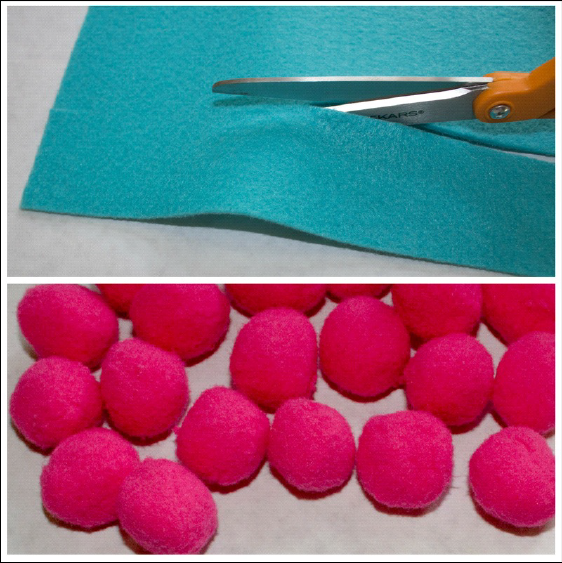
Step 1: Trim Turquoise felt to cuff size, approximately 10” long by 3” wide.
Step 2: Cut about a dozen Hot Pink Poms from trim so only the ball remains. Glue these using Fabri-Tac, horizontally down the center of the cuff, aligning tightly in a continuous, straight row. Leave approximately 2” of the cuff undecorated so that it can be glued into a circle
Step 3: Curve the cuff into a circle, and glue the ends together, slightly overlapping by about an inch. Complete any gap with additional hot pink poms.
Step 4: Trim two sections of Yellow Baby Pom Trim and glue with Fabri-Tac on either side of the center line of pom poms. Allow to dry overnight.
Design 5: Santa Baby
Step 1: Trim red felt to cuff size, approximately 10” long by 3” wide.
Step 2: Fold the cuff in half horizontally and snip vertical slits as shown.
Step 3. Cut a 10”x 1” section of white felt so that it can be woven in and out of the slits.
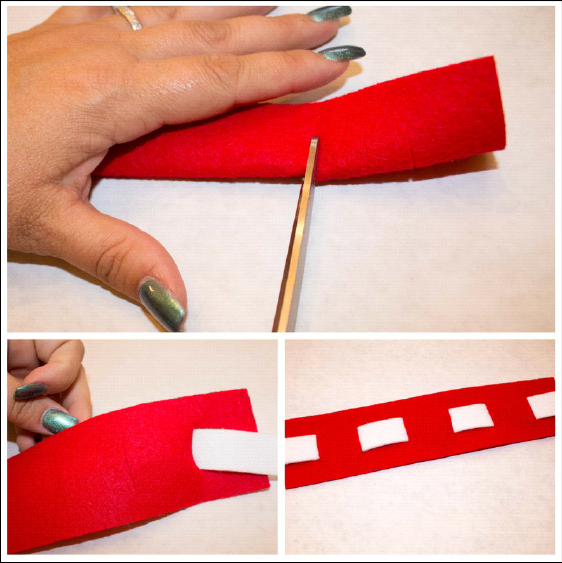
Step 4: Glue clusters of blue and pink pom poms to the red sections of the bracelet using Fabri-Tac. Leave approximately 2” of the cuff undecorated so that it can be glued into a circle.
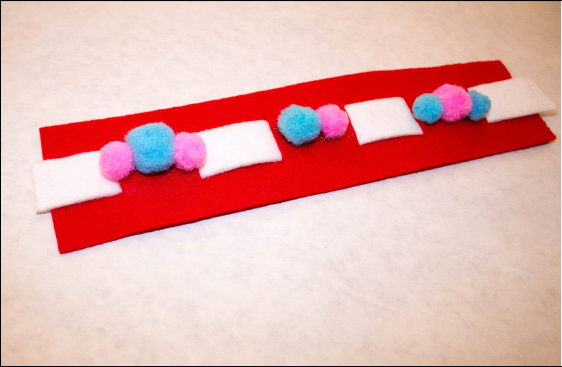
Step 5: Curve the cuff into a circle, and glue the ends together, slightly overlapping by about an inch. Trim with gray Peapod Trim.
With these cozy felt cuff bracelets, you’re ready to brave the cooler weather, and give gifts with serious style! These designs can be customized however you like using the vast array of felt color options from Kunin Felt.
You can now find an expanded color line of Kunin Eco-fi Classicfelt; Eco-fiPlus™ Premiumfelt and ShaggiChic non-wovens fabrics in cut by the yard at your local Walmart; please inquire as to what is available in your area.
These are very stylish and creative, thanks Christie for sharing!
How cute are those! I would have never thought of that!! My girls would love to make those and give them to their friends as gifts!!
Thanks for the step by step instructions!
I love Kunin felt and these cuffs are a fabulous idea! Who would have thought! So cute!
These cuffs are so cute. What a fabulous idea and fun too!
Ooh, I love them all so much!! I think the Christmas one is my fav though!
I love Kunin felt because it is such great quality and this blog proves it more than ever, utilising the strenth…. what fantastic cuffs, beautiful designs, I love the Pom pom additions. So many choices. Thanks for great DIY steps!!!
Oh my stars!! These ideas are fantastic! I love them all!! Looks like I need to get me some felt! Great Job Christie!
Loves ❤️️ Madge
These are fabulous. I always love seeing what Christie does, makes for happy creating. Now I need to make some.
Lisa
What a cute idea. Great for the holidays coming up!!!
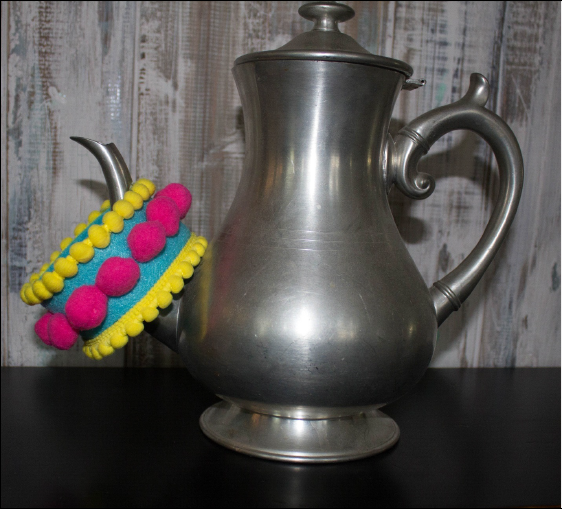
These are very pretty. I love the one displayed on my Grandmother’s teapot best!