
By Laura Bray

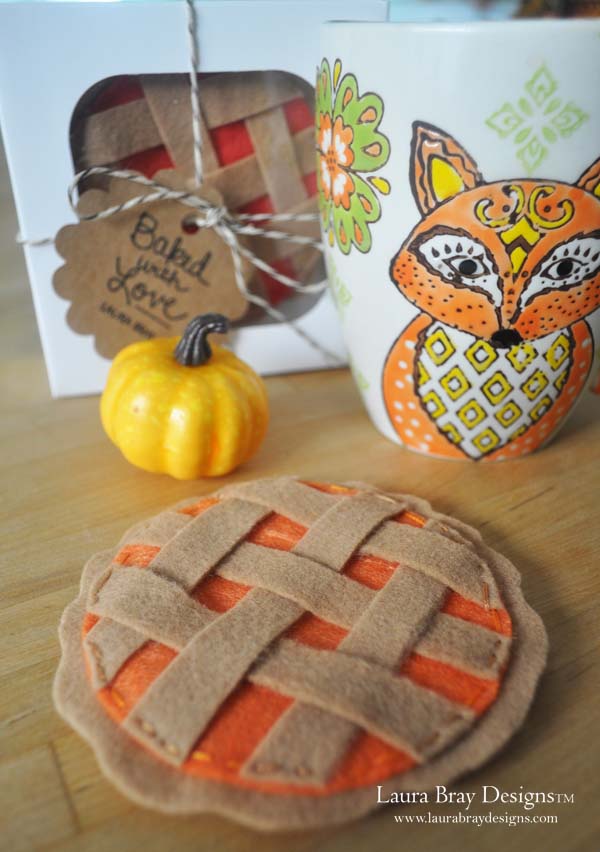
Cooking Thanksgiving is hard work so, if you are lucky enough to get to be a guest instead of a host, don’t forget to bring a lovely hostess gift. These cute pie coasters fit the bill perfectly and pay homage to a Thanksgiving favorite-pumpkin pie! Present them when you arrive for dinner and you just might get invited back next year.
Supplies:
- Kunin Eco-fi Classic Felt in Brown, Orange, Yellow, Blue, and Red
- Pie Pattern by Laura Bray Designs (Pattern Attached)
- Embroidery thread
Instructions (to make one pie coaster):
- Cut one round pattern piece in brown for the pie crust and one for the filling color of your choice.
2. Cut one scalloped pattern piece in brown for the pie crust.
3. Cut 6 strips of brown felt measuring ½” x 5”.
4. To create the lattice pie top:
a. Lay three strips over the pie filling piece evenly spaced.
b. Weave the other three strips (going in the opposite direction). 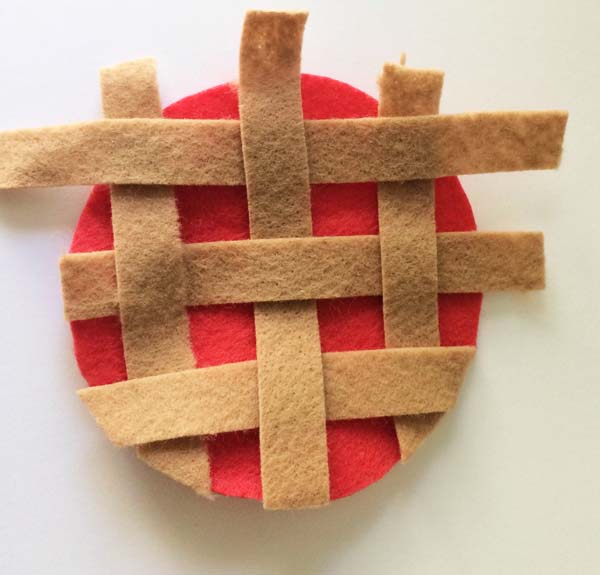
c. Trim the extra edges off, using the colored pie filling as a guide.
d. Hand stitch the lattice into place using embroidery thread.
5. Lay brown round crust piece down on your work surface. Place the scalloped piece over it, centering the bottom round piece.
6. Lay the pie filling piece (with the lattice crust) in the center of the scalloped pie crust piece.
7. Stitch everything together with embroidery floss and running stitch around the outside edge of the filling.
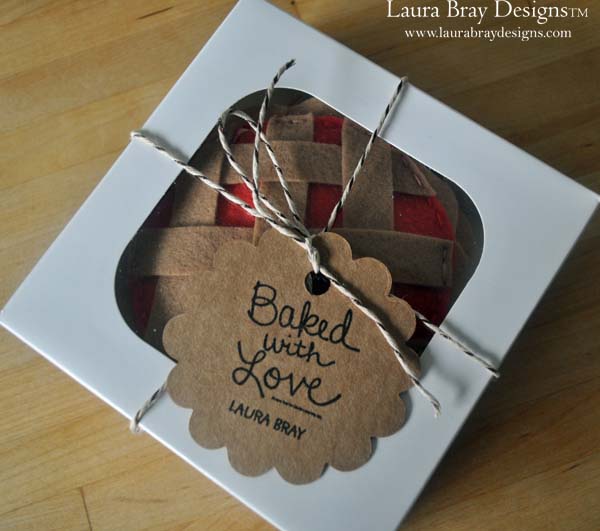
Packaging tip: Buy individual cookie boxes to create mini-bakery boxes. Stack the pie coasters in the box and tie with bakery string. A “Baked with Love” stamp makes the perfect final touch.
You can now find an expanded color line of Kunin Eco-fi Classicfelt; Eco-fiPlus™ Premiumfelt and ShaggiChic non-wovens fabrics in cut by the yard at your local Walmart; please inquire as to what is available in your area.
What a sweet gift idea! Thank you. For sharing Laura!